|
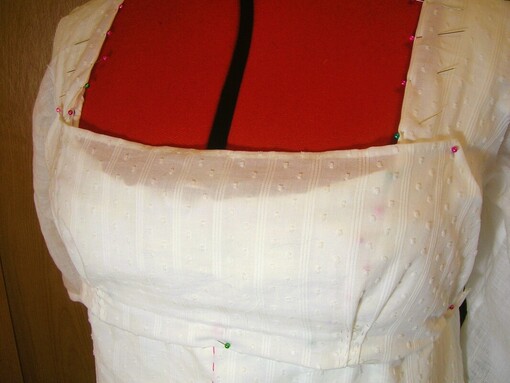
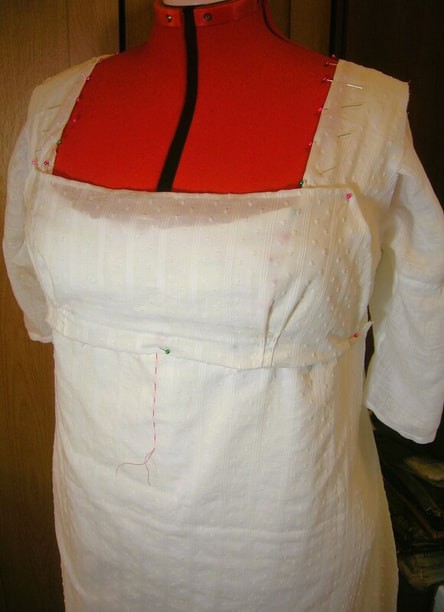
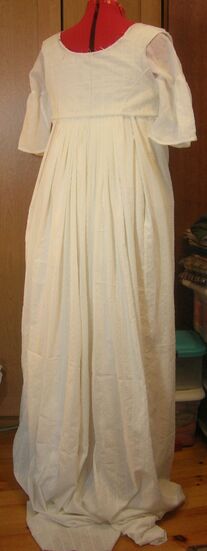
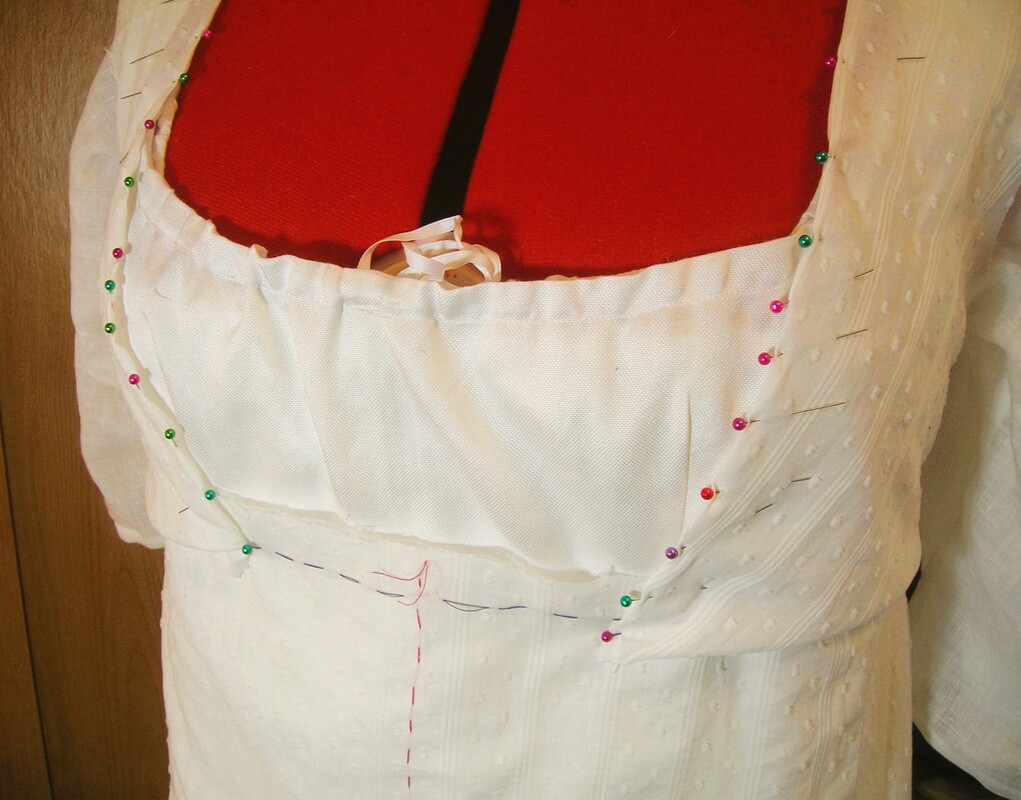
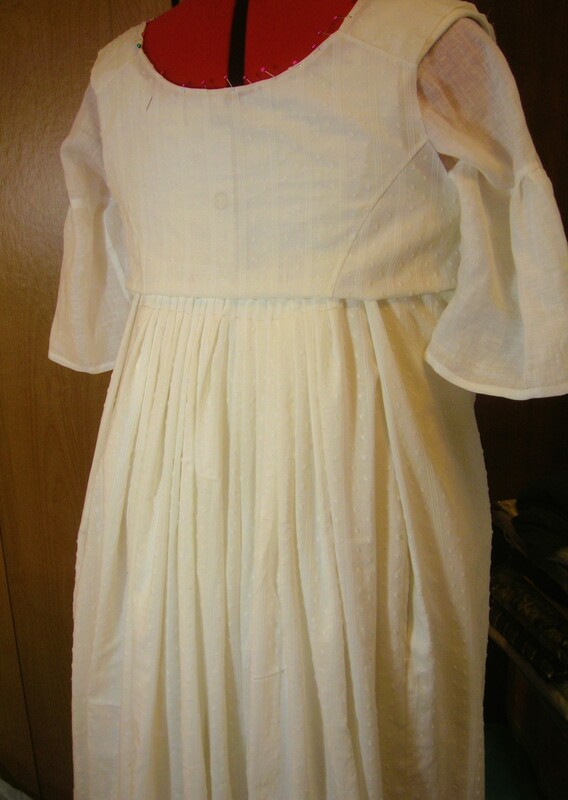
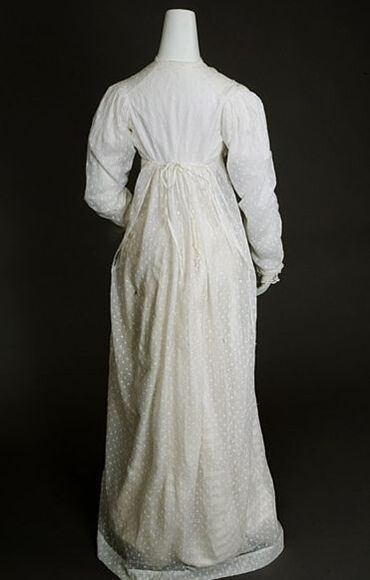
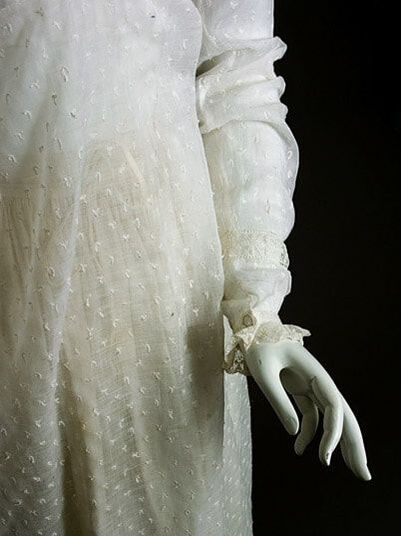
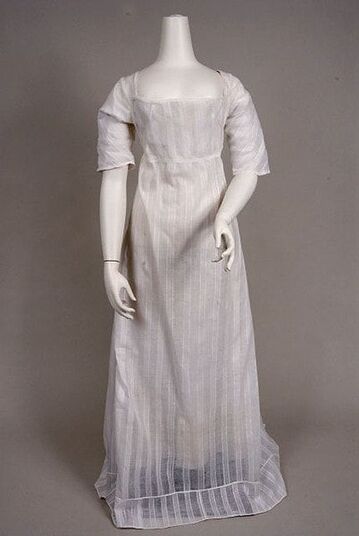
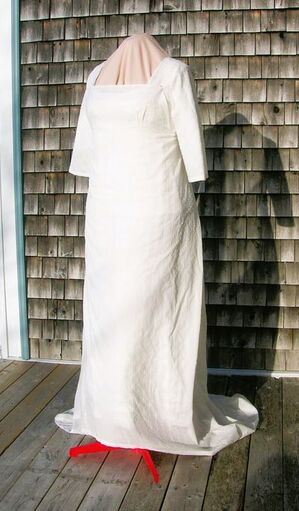
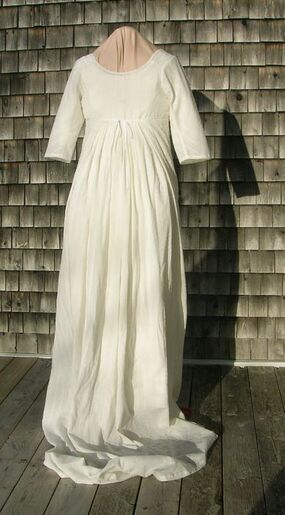
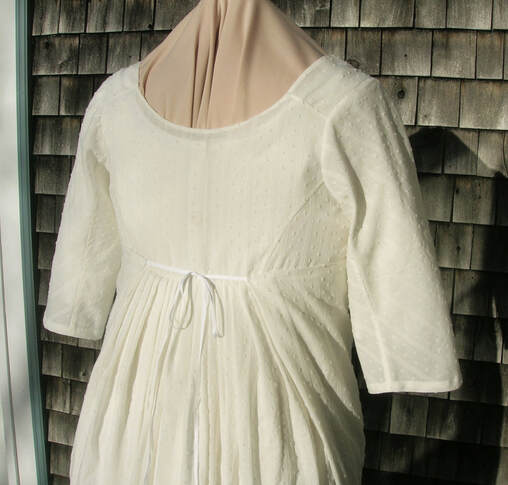
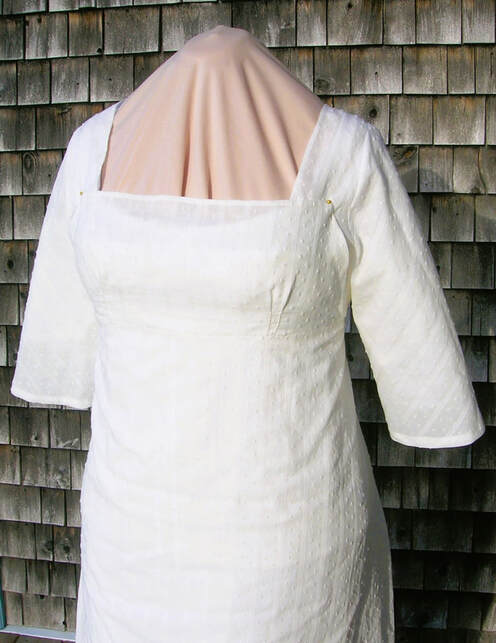
It seems that everyone is creating Regency fashions these days, although I must admit it wasn't Bridgerton that influenced me (I really didn't like the series much at all, and found the costumes very poorly done). No, this idea sprang up in my head a few years ago (BCE = Before Covid Era) to attend a garden party at a venue where fashions of the 1800 to 1815 era would be ideally appropriate. First, as usual, I had to complete all the underthings, working from inside to outside (something I would always recommend to any historical sewist). However, this time it was for an era that was somewhat unfamiliar to me, which involved some serious research and note-making, as well as leaning a bit on the work of an expert Regency pattern designer. The shift was first of course. Making a new shift for the Regency era was a relatively simple task that I completed with a few hours of machine sewing (I like to save wear and tear on my hands by using hand-stitching where it really matters and will be seen). I made my shift of a beautifully diaphanous and lightweight 100% linen in order to minimize bulk under my Regency layers -- the shift is a joy to wear! Even though I normally draft everything myself, this time I leaned on a design from a fellow historical pattern-maker for the very uniquely constructed and historically accurate Regency corset (I say "unique" because it neither resembles the earlier stays nor the later Victorian corsets). My blog on creating the corset can be found here: Next came a full-length, sleeveless underdress. Here again, as my time was very limited (or at least so I thought), and I wanted to spend the majority of it on the outer gown, I decided to use another pattern design from Laughing Moon. This did indeed save me a lot of fussy time with cutting and fitting, and I had the garment completed in short order (unfortunately I don't currently have photos of the underdress itself, but I'll add some soon). The underdress was made of a flowing, very lightweight silk/cotton blend, making it washable when necessary. It provided the necessary visual opacity to prevent any unpleasant "see-throughs", especially on a sunny day outdoors! There was a long hiatus between shift and corset/underdress, due to a number of causes, which resulted in my putting the whole project aside for nearly 10 months. Ultimately I ended up wearing a Georgian ensemble to the event, which was just as well received I think as had I been in synchronous attire. In November, 2023 I was finally able to turn back to this project to try and get it completed -- for the next year. Thank goodness for repeating annual festivities! The Gown: It's odd how sometimes a near-forgotten material will eventually find its best use! The semi-sheer cotton dimity (self-coloured spotted and striped weave) which I bought on a whim at least 15 or 16 years ago and which sat in a box unloved all that time, suddenly became the perfect -- and most obviously appropriate -- textile for this gown. Not only that, but I actually had enough of it to create a trained Regency dress (how many times am I just a tad short of the necessary yardage, but not this time). The fabric is pretty, and gracefully translucent, yet not too sheer and unseemly for a woman of my vintage, as you can see from the photo below (showing the work-in-progress, with the bodice temporarily pinned in place): The gown is self-drafted, and although I cheated with the skirt seams and used my sewing machine to create the narrowest French seams I could manage, I decided to completely hand-stitch the bodice. All the pins you see in the photos are holding the tiny hem edges in place until I get them sewn down. I usually work so much in silks and linens that I'd forgotten how different it is to hand-sew cotton, with its limp yet forgiving hand and malleability. In any case, with the very small bodice pieces involved, it's actually easier to control the seams by hand than by machine, and certainly far easier to achieve an invisible finish on the outside. I designed this gown after an extant ca.1805 garment that was sold privately some years ago (from which I had saved photos). It was at times a bit difficult to discern construction details, but between the pictures and my general understanding of Regency design, I've managed to puzzle it out. How absolutely different the whole construction concept of these gowns was, compared to dresses of just 25 years earlier! Here is the back of the gown (still in progress, without sleeves and unhemmed (and admittedly not a very good photograph), but it does show the lovely Regency silhouette of these dresses). Elements of a Regency Gown: To briefly explain the construction, the skirt back is very finely and densely knife-pleated at for about 9cm each side of centre back, in such as way as to place the gown's "side" seams in fact well into the back. The front skirt panel is cut in one and wraps around the body smoothly but with enough ease to fall freely, seamed to the skirt back on each side back position, with an opening about 35cm long to allow the skirt front to be lapped over the back when fastened. This is a variation of the "apron front" design, so the small front bodice will be attached to the skirt front as far as possible at the raised waistline, with a narrow fastening tie sewn to the top finished (open) edge of the skirt front. The bodice back is cut with curved seams sewn to side sections which then wrap up over the shoulders as straps, and down over the sides of the bust, with fastening ties sewn to each bottom forward edge. The bodice centre back area is sewn permanently onto the pleated skirt edge, as far as the side-back seams, leaving the lower front portions of the bodice back free to allow them to be wrapped around the chest and tied at front. The gown is put on by first arranging the back and shoulder/side bodice areas on the body, fastening the ties under the bust at front. The "apron" (that is, the small front bodice and joined front skirt) is pulled up over the front of the bust, pinned (or buttoned) at the shoulders, and the upper skirt edges are fastened with ties at centre back.
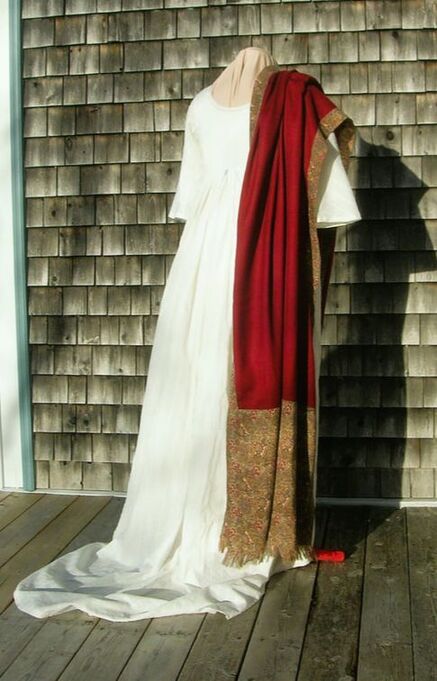
As the description and photos above make clear, another point of realization for me was that despite the apparent simplicity of these gowns, the concept can actually be fairly complicated and relies on a precision I hadn't expected, a bit like origami. Although the components aren't rigidly formed or structured, they must fit perfectly and must drape on the body beautifully in order to properly reflect the neo-classical aesthetic. I found this was the biggest challenge, and I hope I succeeded. Although I'm relatively tall, I'm not the willowy slip of a young thing that (frankly) looks best in these fashions, but I think it's possible to look graceful at any age with the right style and fabric. For this reason, for a mature woman, I'd say that a semi-sheer or semi-translucent fabric is better than the almost transparent muslins we tend to associate with historical fashion of this era. A full Regency corset, including some boning, is a very good idea for the mature person, both for support and for smoothing the form underneath those floating layers. If you're fortunate enough to be both young and slender however, you can get away with a Regency short corset with very little structural boning and enjoy wearing a scandalously sheer fine muslin gown! My only real conundrum is choosing the sleeve design. I originally wanted to make elbow-length sleeves (which I feel are more graceful on a woman "d'un certain âge" than the little puffed sleeves seen on many Regency gowns suitable for young women). But I also love the overly-full-length sleeves seen on some Regency dresses, usually cut on the bias, which "pool" a bit around the wrists. I have just enough fabric left to do one type, but not enough to re-cut if I change my mind and want the other. So -- which should I choose? Long and flowing, perhaps more formal-looking, or elbow-length and restrained, but permitting the wearing of opera-length gloves? Definitely more pondering required... An interesting aside is that the Regency silhouette was revived exactly 100 years later, from about 1902 to 1907 (referred to in French fashion at the time as "style Empire"). I'll be writing about this historical fashion phenomenon in much more detail soon in the "Research and Essays" section of this website. Oh yes, a postscript! During the process of designing my Regency ensemble and wondering how on earth I was going to create an appropriate Regency shawl, I remembered another "orphan" fabric -- a beautiful length of fine, lightweight wool challis in a stunning claret colour. I loved this fabric when I bought it years ago, but never really knew what to do with it. Hence it got stuffed into a box in an undisturbed corner for years. It has now triumphantly re-emerged from its long exile to become an elegant Regency shawl. Update:
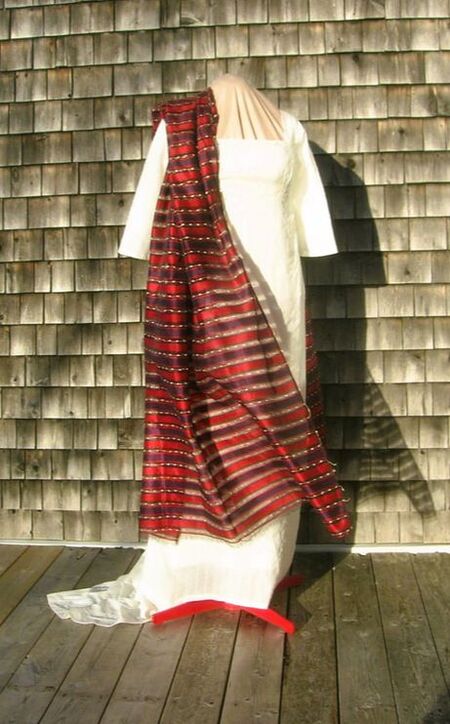
In the end, I opted for mid-length sleeves, which will allow me to wear formal-looking elbow length gloves with my gown. The gown and two shawls are now complete; my only remaining task is to design and create an appropriately formal looking turban-style headdress, which should be a fun and creative project! A few photos follow, of the finished gown with the two shawls -- one is the beautiful claret coloured fine wool challis which I fashioned into a sort of "faux Kashmiri" shawl, and the other is actually an interesting semi-sheer synthetic striped fabric (imitating silk) in rich berry tones that I never knew what to do with -- until now!
2 Comments
Jillian
6/12/2023 04:14:17 pm
Perhaps you’ve already decided, but I suggest going with the elbow length sleeves and creating the opportunity to wear some lovely long gloves. I think the accessories really bring the relatively simple lines of the regency fashions to life.
Reply
6/12/2023 04:26:54 pm
Hello Jillian! So good to hear from you! Yes, this was exactly my thought, opera-length gloves to provide a formal look. In the end, I think I'll construct the full-length sleeves (since I have enough fabric for them), and decide whether to cut them down to elbow length. It's hard to resist wearing those long gloves!
Reply
Your comment will be posted after it is approved.
Leave a Reply. |
AuthorPatricia Preston ('The Fashion Archaeologist'), Linguist, historian, translator, pattern-maker, former museum professional, and lover of all things costume history. Categories
All
Timeline
March 2024
|




 RSS Feed