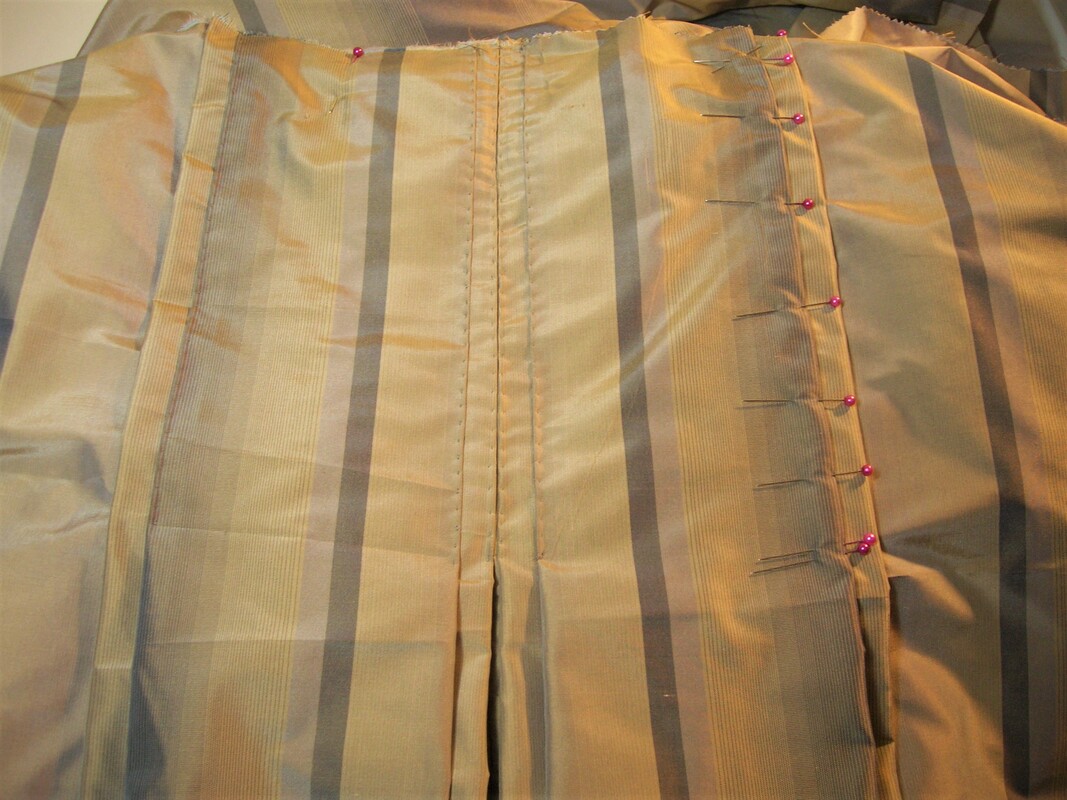
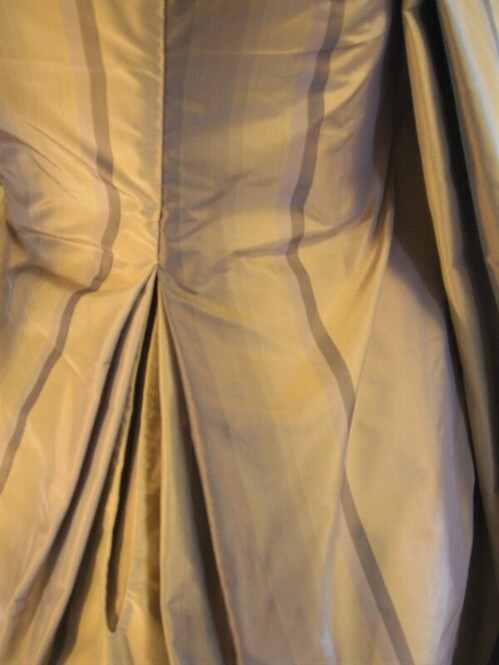
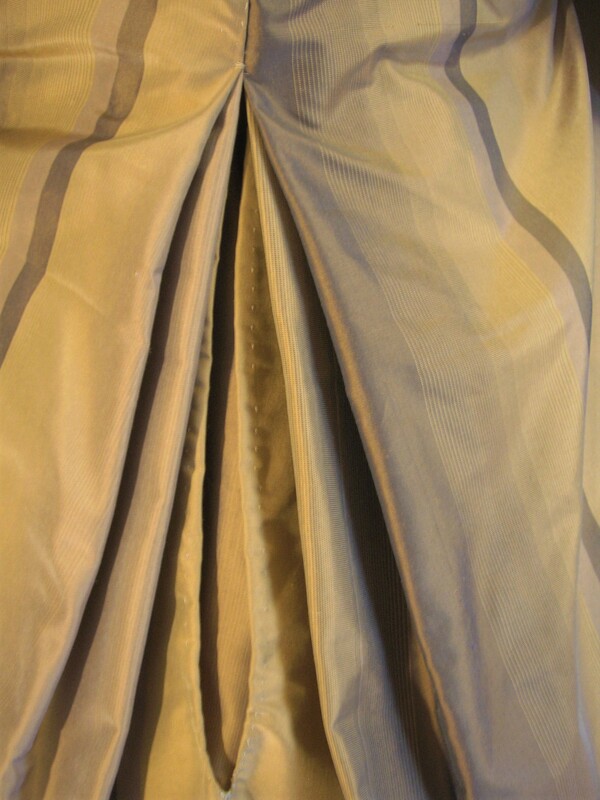
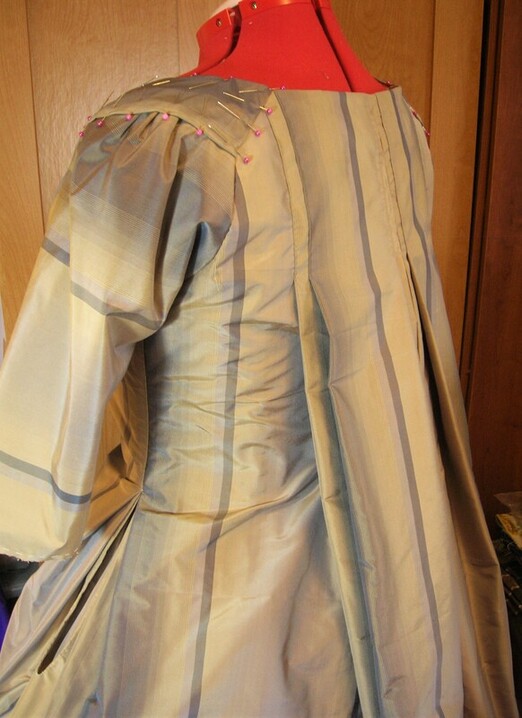
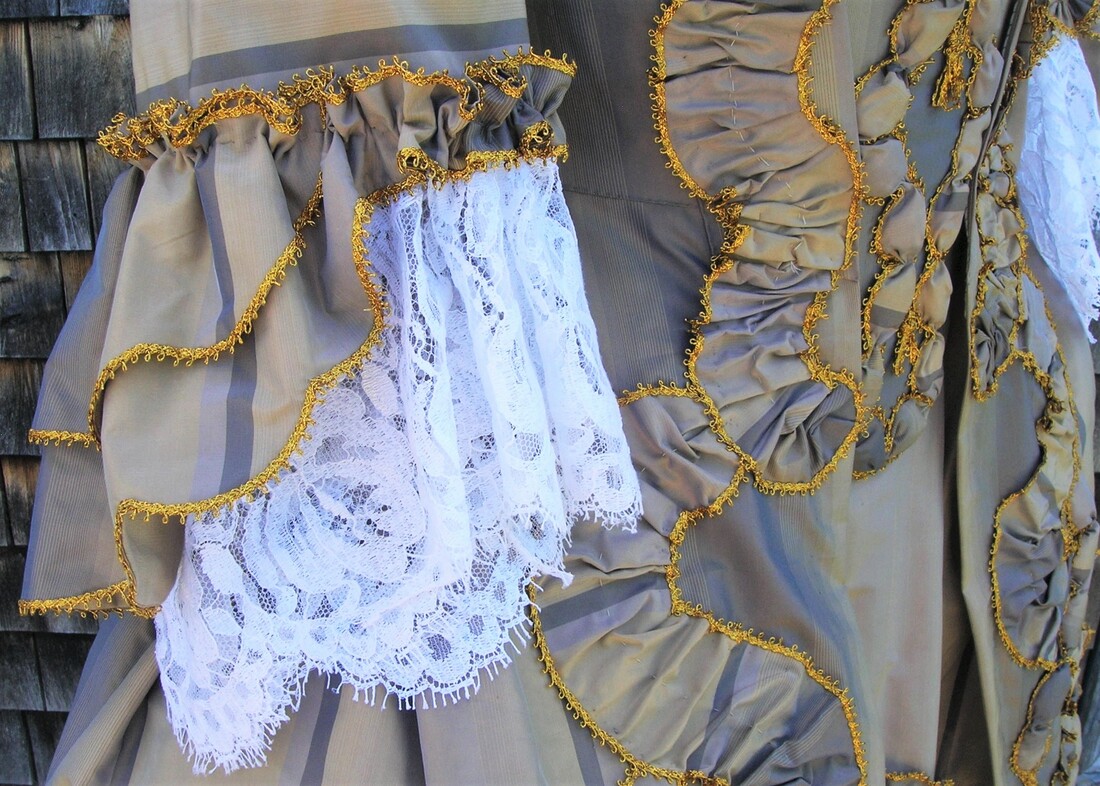
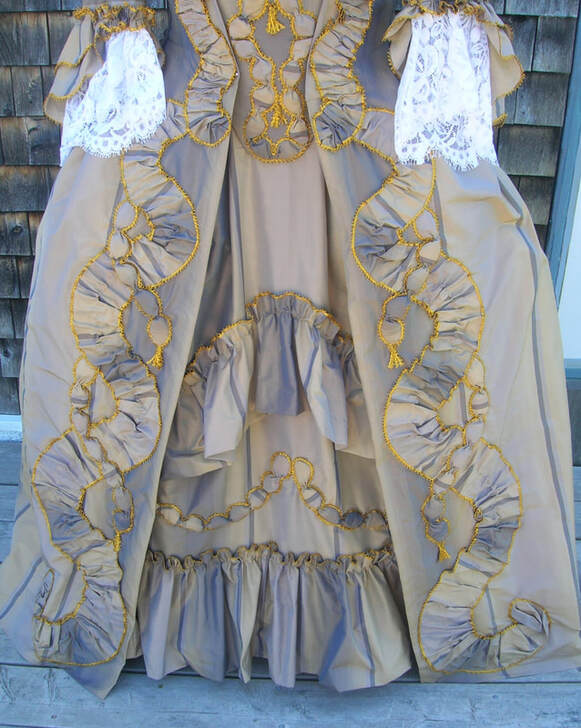
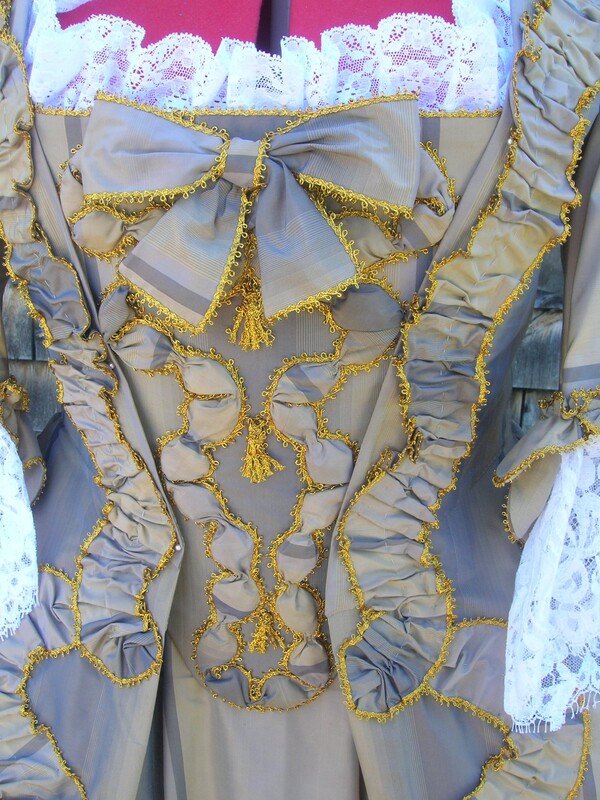
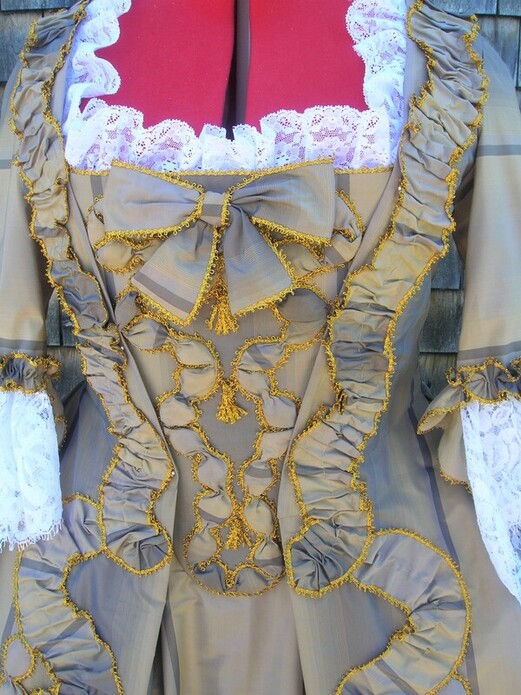
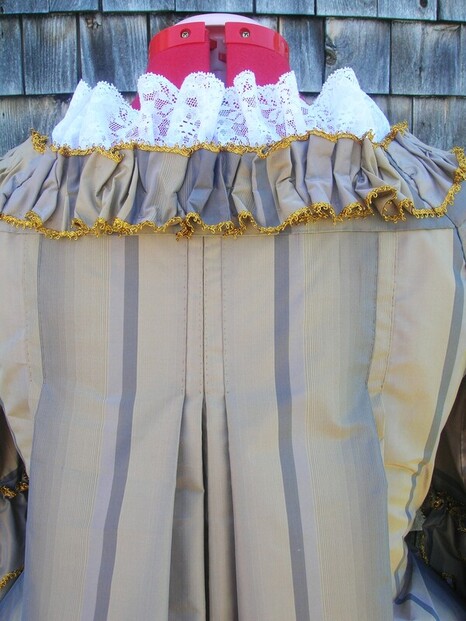
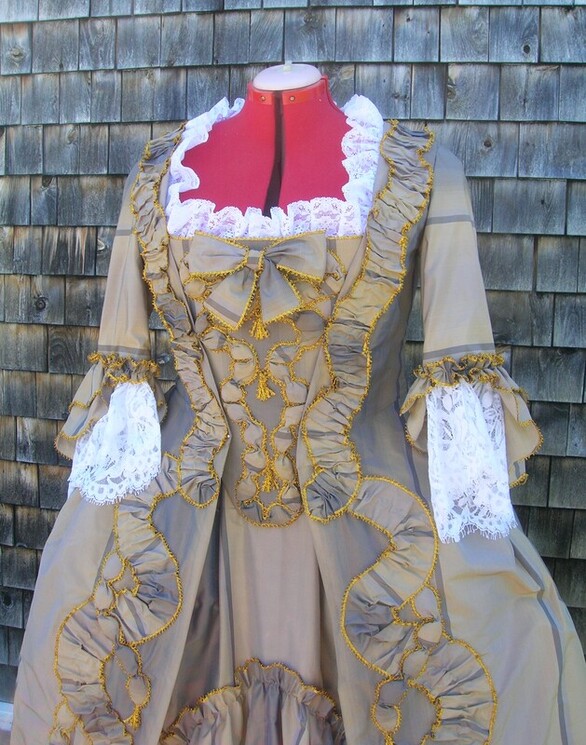
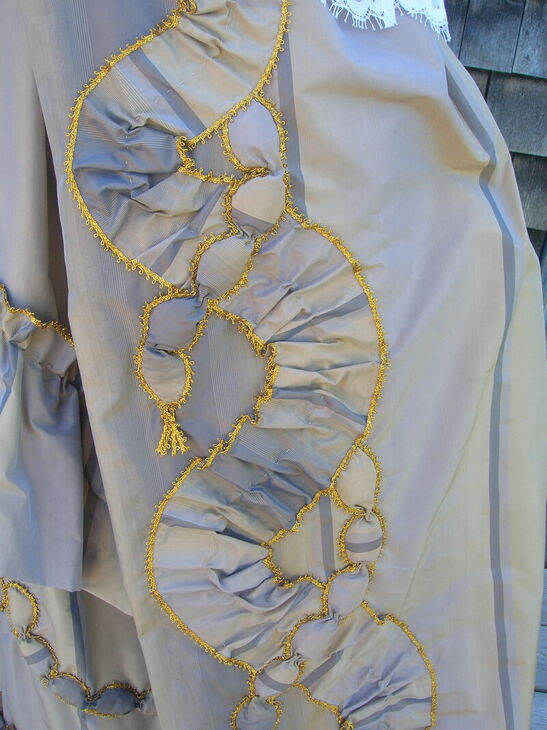
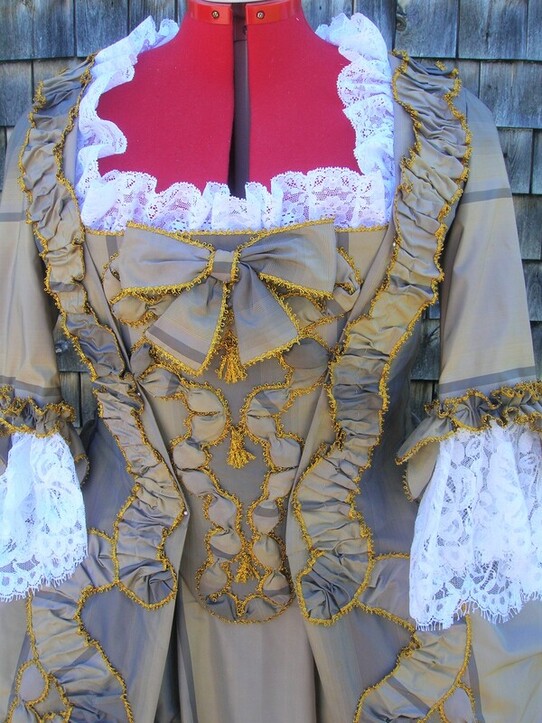
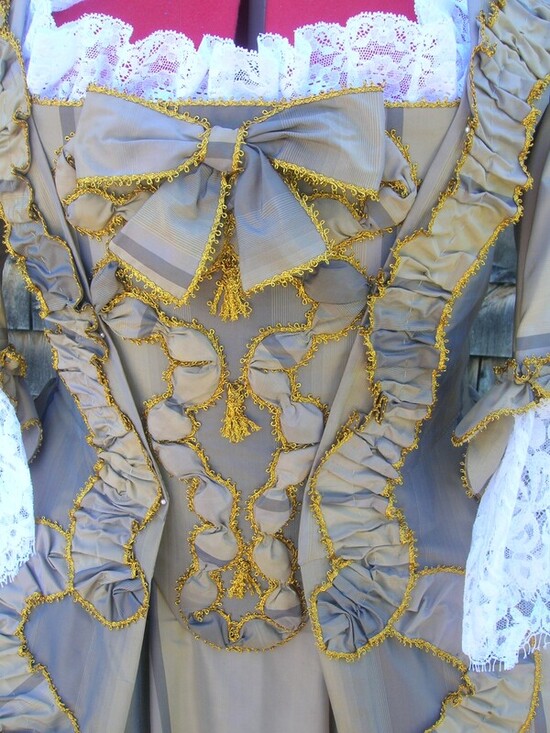
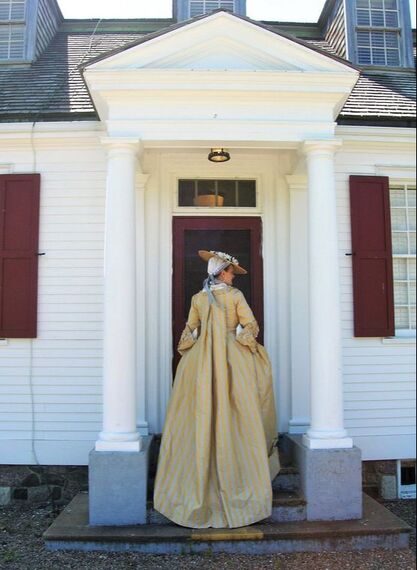
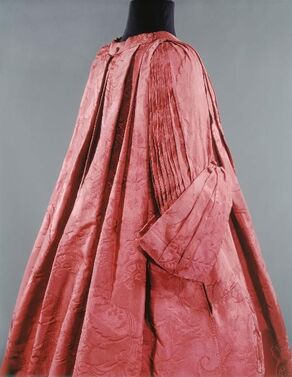
Sometimes you just want to go over the top! This sacque gown (robe à la française) is without doubt the most opulent gown of its type I've made yet, inspired by a small number of extant gowns of the 1750-70 period made of beautiful brocade textiles with applied silver trim and lace. My challenge was to create a gown that represented the luxury of the era in upper class dress, while still maintaining the balance, grace, and elegance of mid-18th century dress.
As often happens, this project was sparked by a fortuitous discovery of a luxurious silk blend brocade at a price that, while expensive, wasn't shockingly high. This lovely fabric, with soft metallic gold motifs woven throughout, on a golden tan ground, and little sprinkled motifs in rose-red, was rich looking without being garish -- a perfect background for metallic silver laces and trim. Please read on to follow my journey of creating this unique gown!
Inspirations
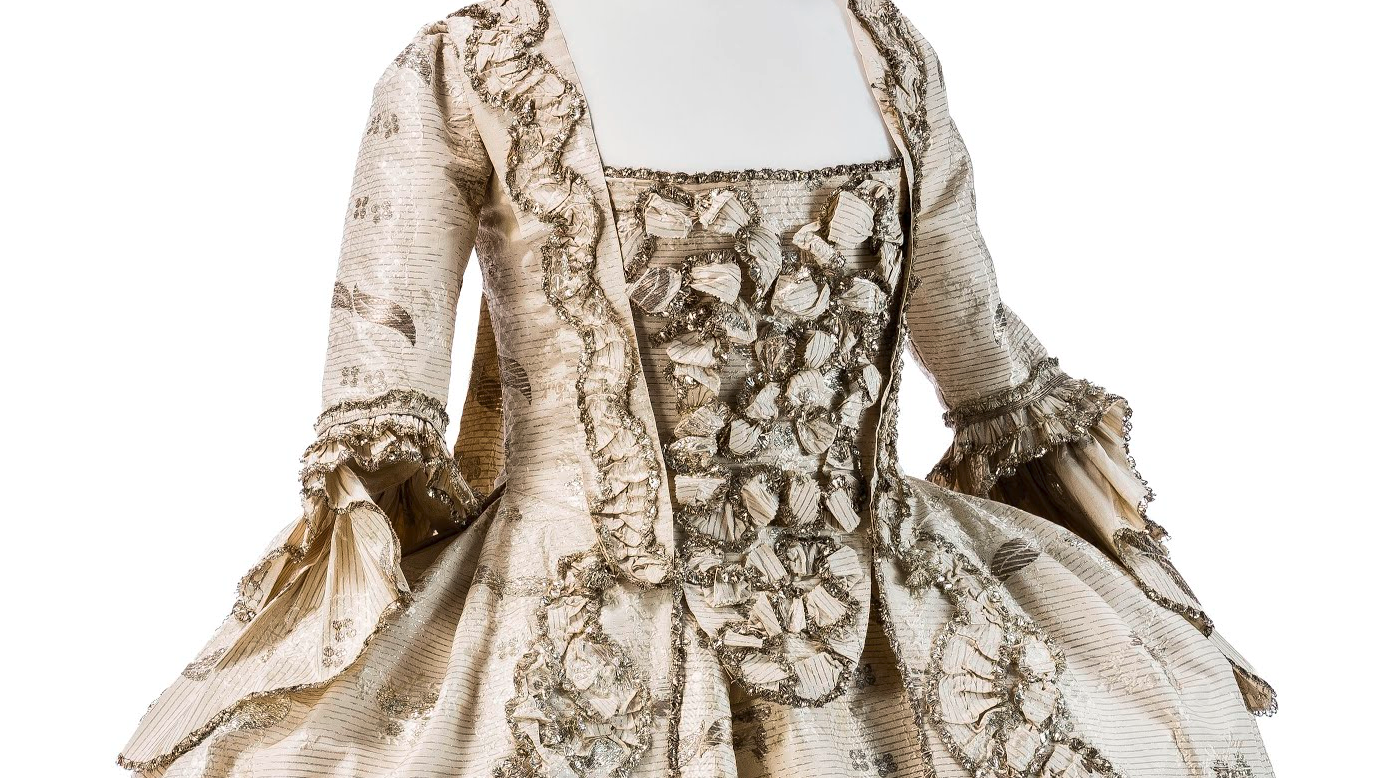
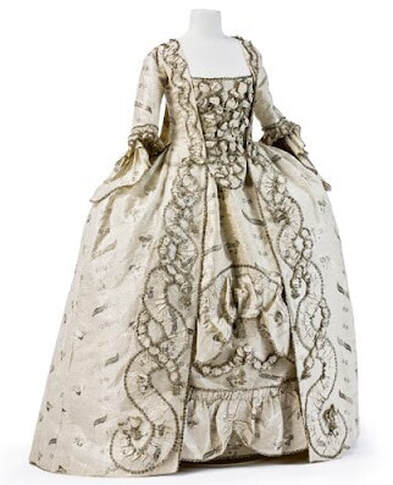
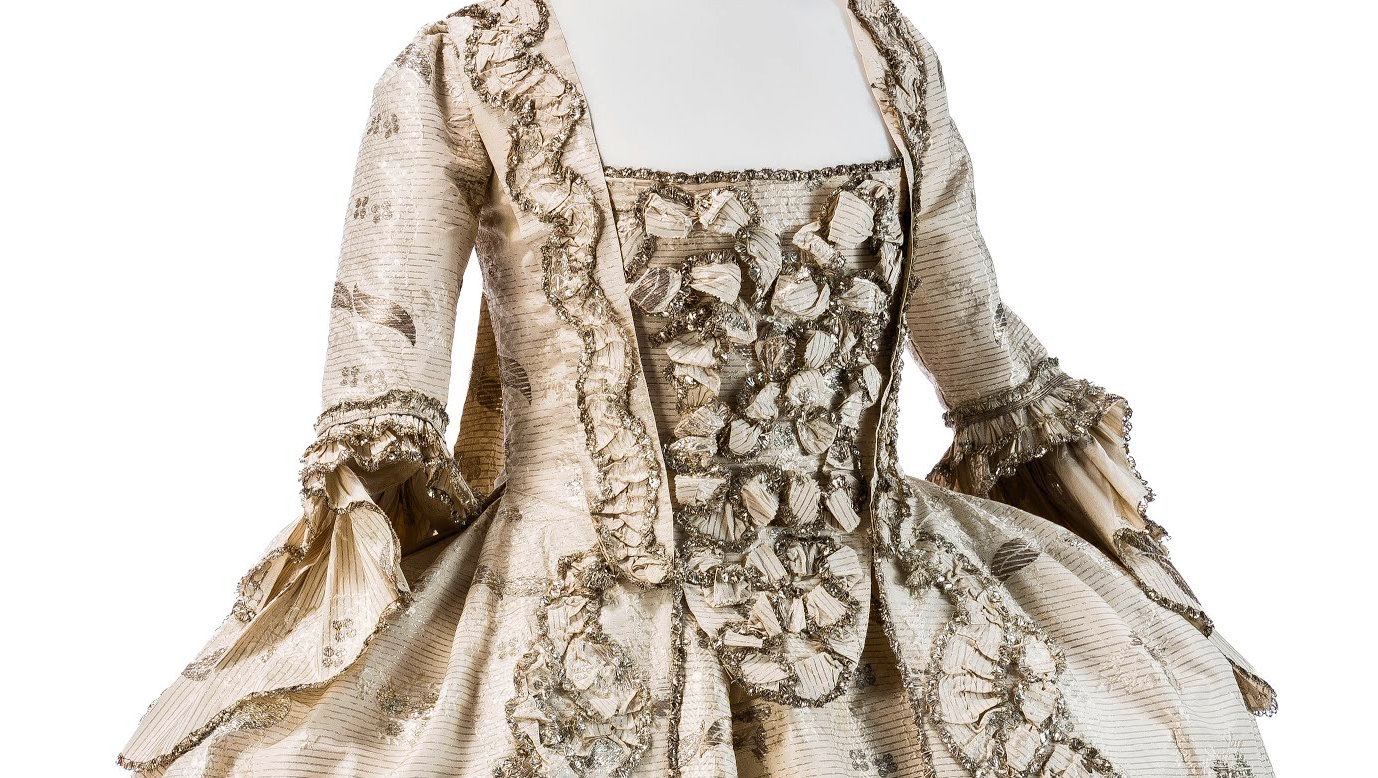
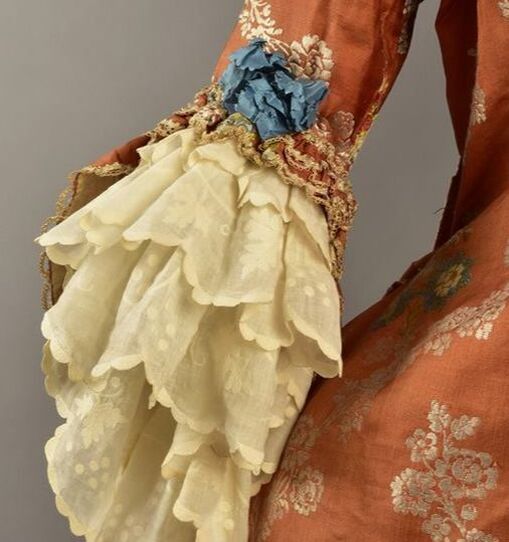
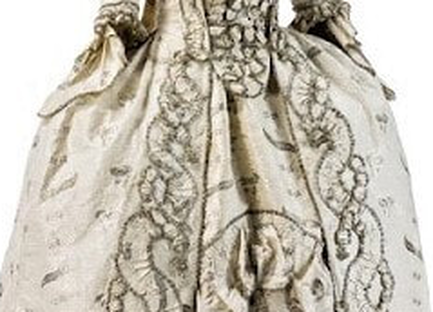
I had a small assemblage of sources depicting extant gowns with silver trim and/or silver lace embellishment, including the well known example in the collection of the Royal Ontario Museum (see photos below). What I had specifically been looking for was a brocade sacque with silver trimming, but few such gowns survive.
However, amongst those that I was aware of there was enough detail to be able to create an ensemble that represented a sort of amalgam of those examples, in essence using elements of extant gowns to create an entirely unique garment. Still, the pattern of application of silver trim and lace was based primarily on the ROM example, as you can see from the following photos.
However, amongst those that I was aware of there was enough detail to be able to create an ensemble that represented a sort of amalgam of those examples, in essence using elements of extant gowns to create an entirely unique garment. Still, the pattern of application of silver trim and lace was based primarily on the ROM example, as you can see from the following photos.
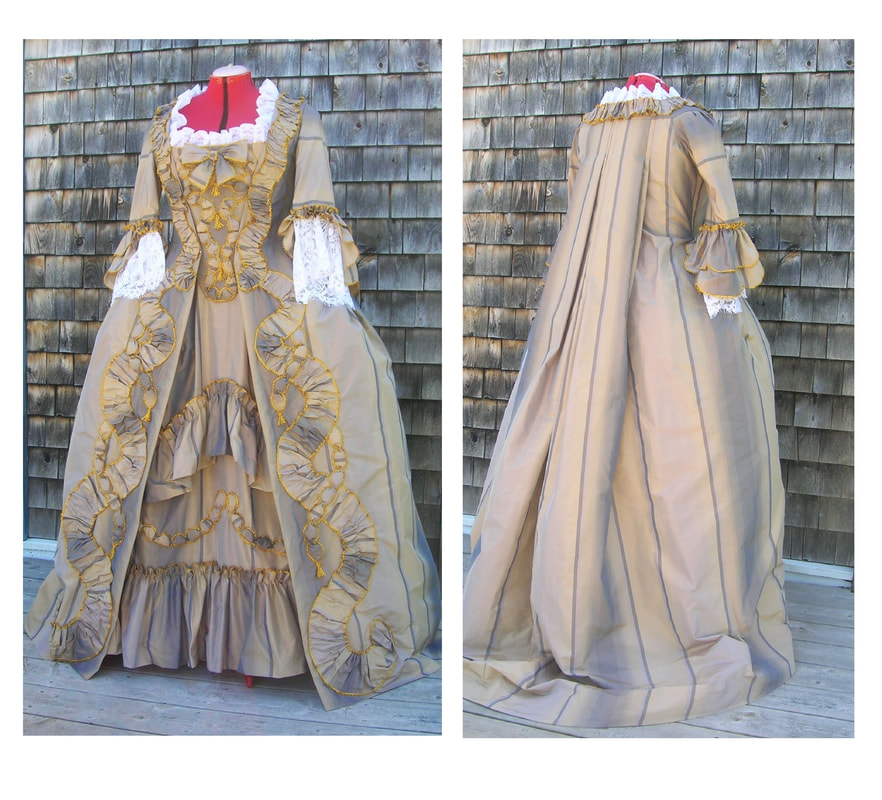
Compare the front and back of my completed creation with some of the photos above, to see where I drew elements of inspiration:
Solving some practical issues:
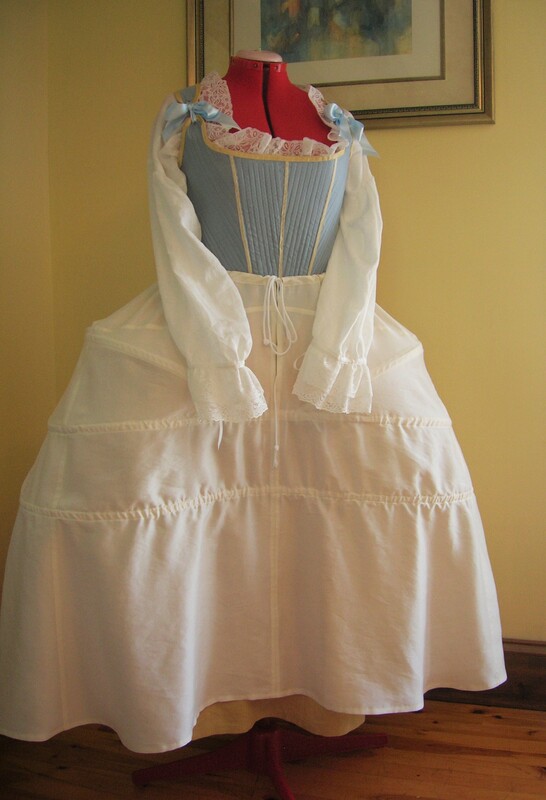
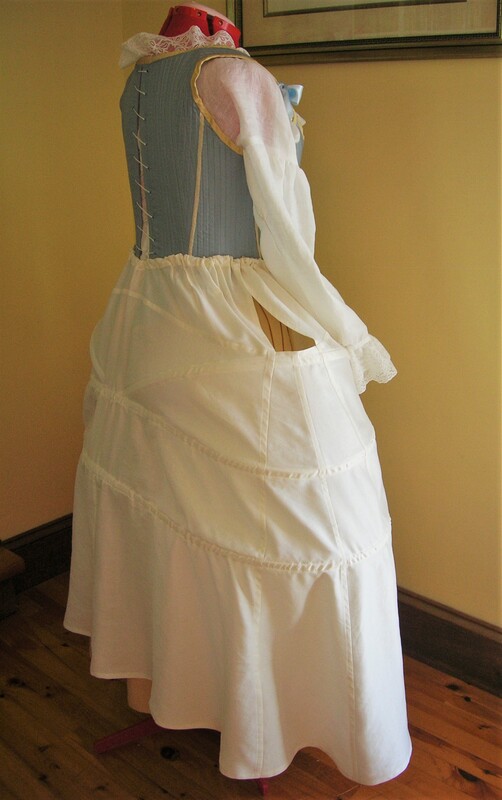
Every good maker must consider how best to adapt to and work with their raw materials, including determining the order of construction based on practical necessities, in order to achieve the desired result. In this case, I was working with a substantial brocaded textile, about the weight and drape of modern duchesse satin. I also knew that over 12 metres of 5cm wide silver lace trim, plus about 1.0m of heavy metallic silver lace, plus at least 10 metres of silver trim, were going to require a well-supported gown structure.
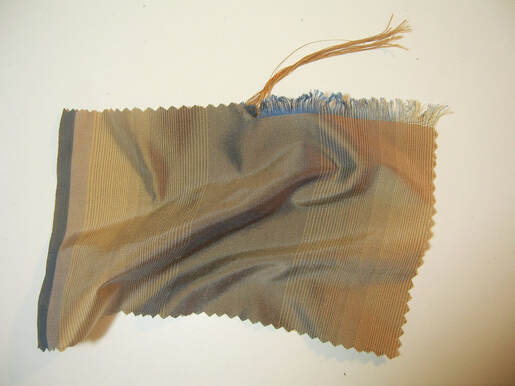
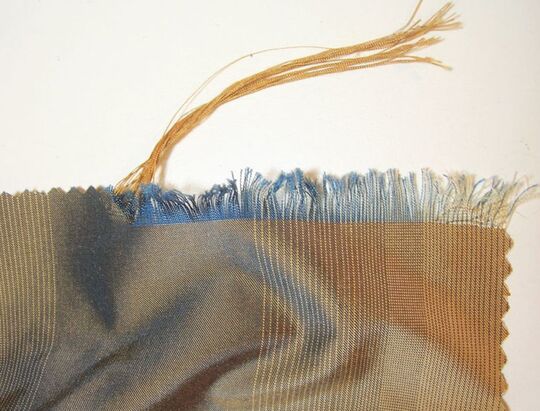
In addition, the nature of brocade is such that the reverse side is usually quite rough and uneven, with many threads carried over during the weaving process, creating a rather delicate surface that might be subject to fraying, snagging, or tearing from ordinary movement when worn. The photo below shows the wrong side of the brocade used in this gown, where you can see the crossing red threads used to create the scattered red motifs, and the metallic gold threads carried over the textile's tan coloured ground:
In addition, the nature of brocade is such that the reverse side is usually quite rough and uneven, with many threads carried over during the weaving process, creating a rather delicate surface that might be subject to fraying, snagging, or tearing from ordinary movement when worn. The photo below shows the wrong side of the brocade used in this gown, where you can see the crossing red threads used to create the scattered red motifs, and the metallic gold threads carried over the textile's tan coloured ground:
Accordingly, I decided it was prudent (in fact necessary) to fully line the petticoat, and to create deep facings for the edges of the gown itself. Although most gowns and matching petticoats of the era were not lined (aside from the linen linings of bodices), there were apparently exceptions.
One such gown is studied in detail in the book "Costume in Detail" (by Nancy Bradfield). That gown, a blue silk damask sacque, dated as ca.1742-52, is described as having its skirts fully lined in dull red cotton, with thin blue silk stitched over it along the edges. (I actually suspect the gown is somewhat later than the 1742-52 date, as the style seems more typical of ca. 1760-70. But the principle of protecting the costly silk is the same).
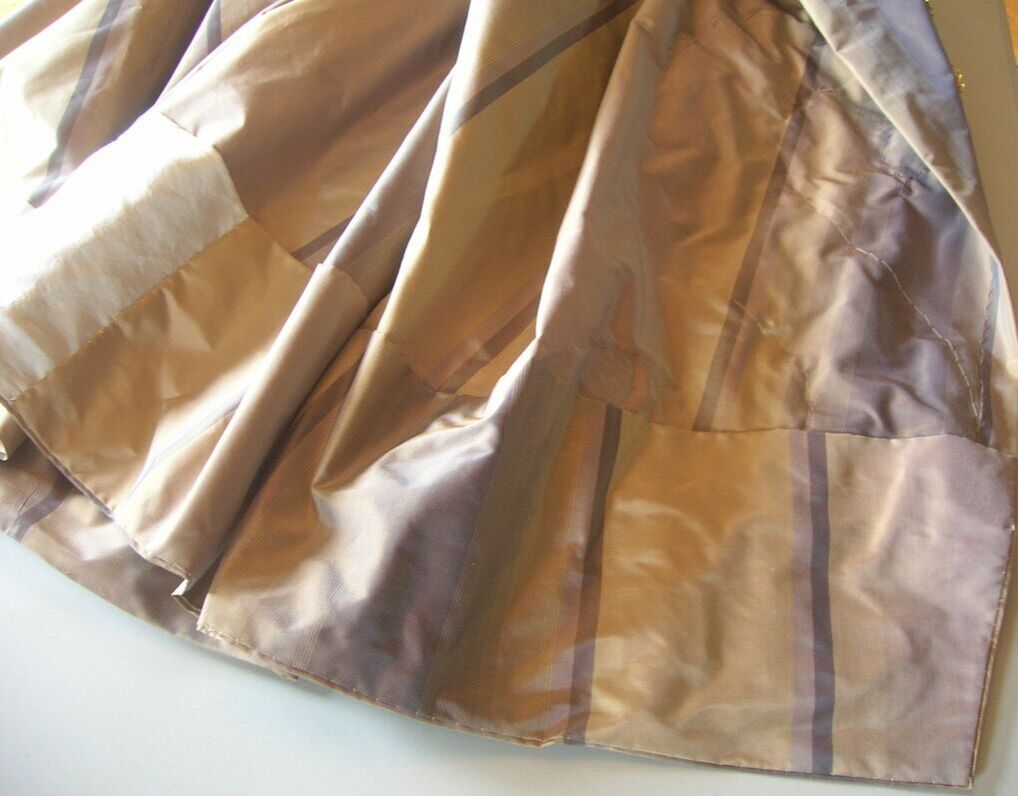
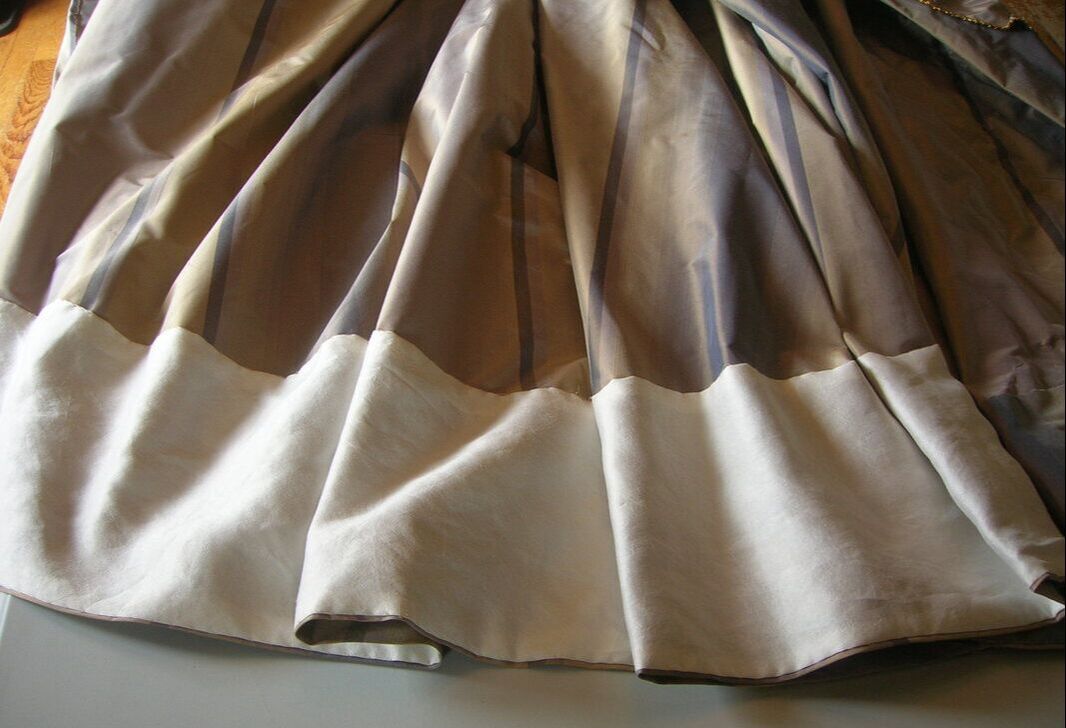
In my case, I constructed a full petticoat lining from gold coloured silk shantung, and created deep (about 30cm/12") hand-applied facings from a thin tan coloured silk shantung all along the front edges and hem of the gown (see photos below). These facings actually serve two separate purposes: those along the front edges of the gown are permanent, intended to prevent abrasion of the delicate threads on the wrong side, whereas the facing along the hem is intended to protect the train from dirt and wear, and to be removed and replaced if need be.
One other practical issue involved the sleeve flounces. It was clear to me that, given such a substantial brocade, creating double-tiered flounces was going to be not only a challenge, but likely end up looking unsightly, with heavily bunched-up gathers at the sleeve end all vying for space in the less than 30cm (12") circumference of that edge.
I reluctantly decided there was no choice but to create just one flounce for each sleeve, and rather than lining each one with linen (as I usually do), I chose the same thin tan silk that I planned to use for the gown's facings.
However, in order to better balance the thick appearance of the flounces, I increased their depth, and planned instead to furnish the flounces with lavish and generously cut two-tiered engageantes, as shown in the photos below.
MORE CONTENT COMING SOON -- Please check back!
]]>It seems that everyone is creating Regency fashions these days, although I must admit it wasn't Bridgerton that influenced me (I really didn't like the series much at all, and found the costumes very poorly done). No, this idea sprang up in my head a few years ago (BCE = Before Covid Era) to attend a garden party at a venue where fashions of the 1800 to 1815 era would be ideally appropriate.
First, as usual, I had to complete all the underthings, working from inside to outside (something I would always recommend to any historical sewist). However, this time it was for an era that was somewhat unfamiliar to me, which involved some serious research and note-making, as well as leaning a bit on the work of an expert Regency pattern designer.
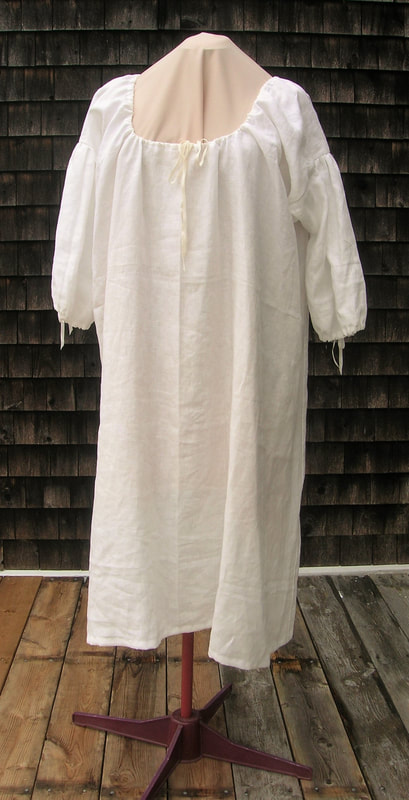
The shift was first of course. Making a new shift for the Regency era was a relatively simple task that I completed with a few hours of machine sewing (I like to save wear and tear on my hands by using hand-stitching where it really matters and will be seen). I made my shift of a beautifully diaphanous and lightweight 100% linen in order to minimize bulk under my Regency layers -- the shift is a joy to wear!
Even though I normally draft everything myself, this time I leaned on a design from a fellow historical pattern-maker for the very uniquely constructed and historically accurate Regency corset (I say "unique" because it neither resembles the earlier stays nor the later Victorian corsets). My blog on creating the corset can be found here:
Next came a full-length, sleeveless underdress. Here again, as my time was very limited (or at least so I thought), and I wanted to spend the majority of it on the outer gown, I decided to use another pattern design from Laughing Moon. This did indeed save me a lot of fussy time with cutting and fitting, and I had the garment completed in short order (unfortunately I don't currently have photos of the underdress itself, but I'll add some soon). The underdress was made of a flowing, very lightweight silk/cotton blend, making it washable when necessary. It provided the necessary visual opacity to prevent any unpleasant "see-throughs", especially on a sunny day outdoors!
There was a long hiatus between shift and corset/underdress, due to a number of causes, which resulted in my putting the whole project aside for nearly 10 months. Ultimately I ended up wearing a Georgian ensemble to the event, which was just as well received I think as had I been in synchronous attire. In November, 2023 I was finally able to turn back to this project to try and get it completed -- for the next year. Thank goodness for repeating annual festivities!
The Gown:
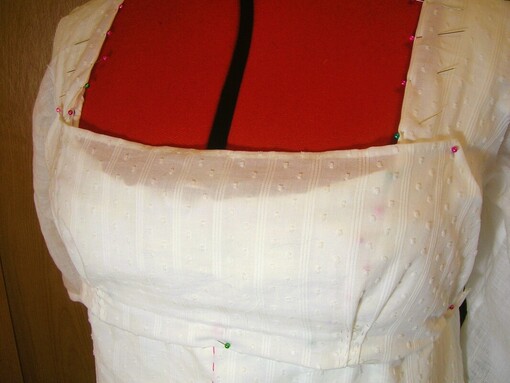
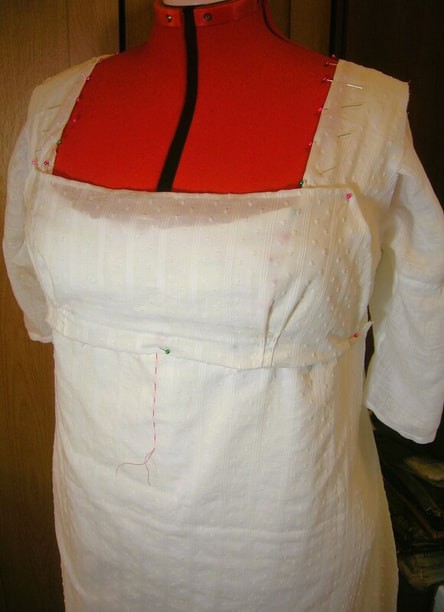
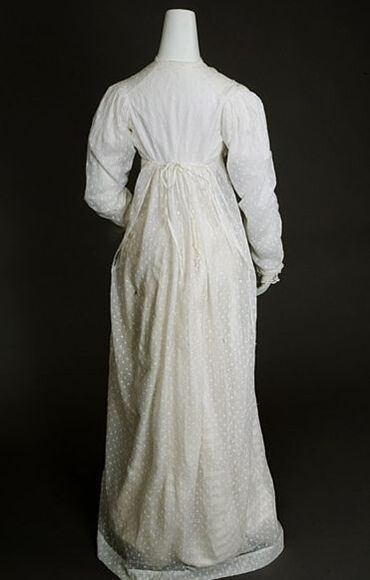
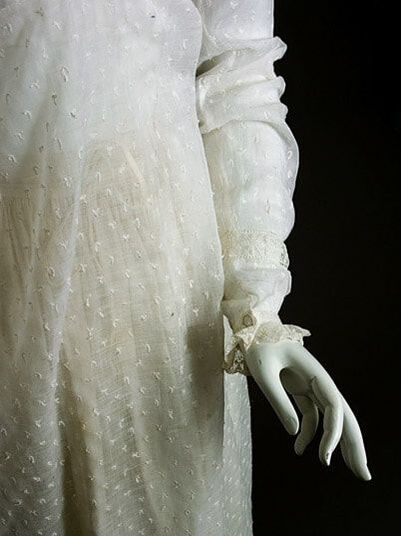
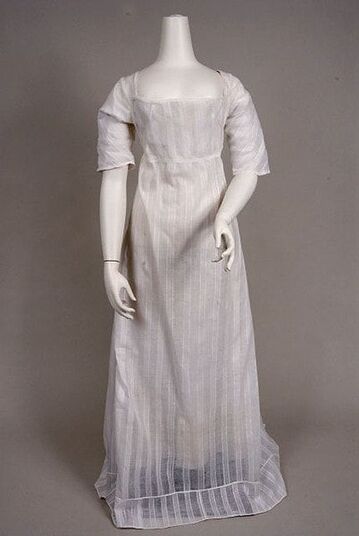
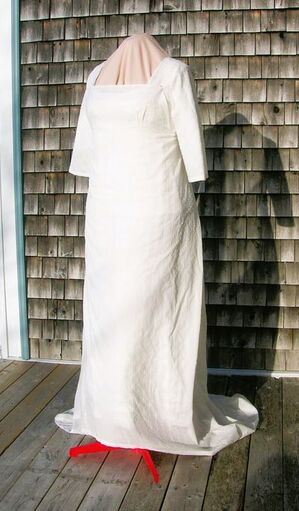
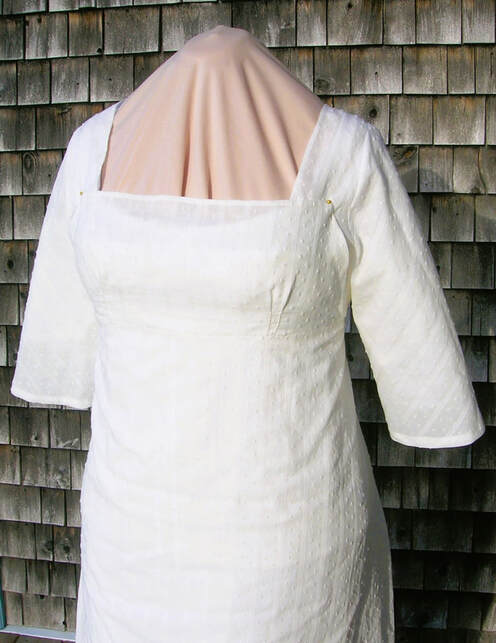
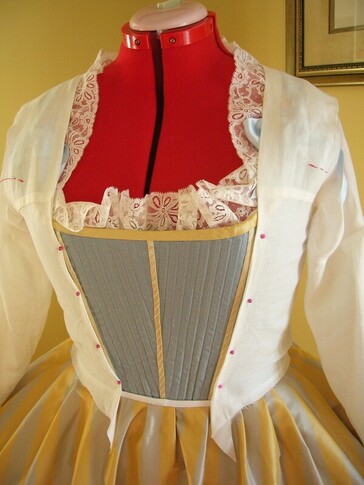
It's odd how sometimes a near-forgotten material will eventually find its best use! The semi-sheer cotton dimity (self-coloured spotted and striped weave) which I bought on a whim at least 15 or 16 years ago and which sat in a box unloved all that time, suddenly became the perfect -- and most obviously appropriate -- textile for this gown. Not only that, but I actually had enough of it to create a trained Regency dress (how many times am I just a tad short of the necessary yardage, but not this time). The fabric is pretty, and gracefully translucent, yet not too sheer and unseemly for a woman of my vintage, as you can see from the photo below (showing the work-in-progress, with the bodice temporarily pinned in place):
It's odd how sometimes a near-forgotten material will eventually find its best use! The semi-sheer cotton dimity (self-coloured spotted and striped weave) which I bought on a whim at least 15 or 16 years ago and which sat in a box unloved all that time, suddenly became the perfect -- and most obviously appropriate -- textile for this gown. Not only that, but I actually had enough of it to create a trained Regency dress (how many times am I just a tad short of the necessary yardage, but not this time). The fabric is pretty, and gracefully translucent, yet not too sheer and unseemly for a woman of my vintage, as you can see from the photo below (showing the work-in-progress, with the bodice temporarily pinned in place):
The gown is self-drafted, and although I cheated with the skirt seams and used my sewing machine to create the narrowest French seams I could manage, I decided to completely hand-stitch the bodice. All the pins you see in the photos are holding the tiny hem edges in place until I get them sewn down.
I usually work so much in silks and linens that I'd forgotten how different it is to hand-sew cotton, with its limp yet forgiving hand and malleability. In any case, with the very small bodice pieces involved, it's actually easier to control the seams by hand than by machine, and certainly far easier to achieve an invisible finish on the outside.
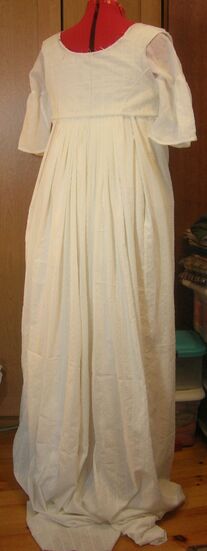
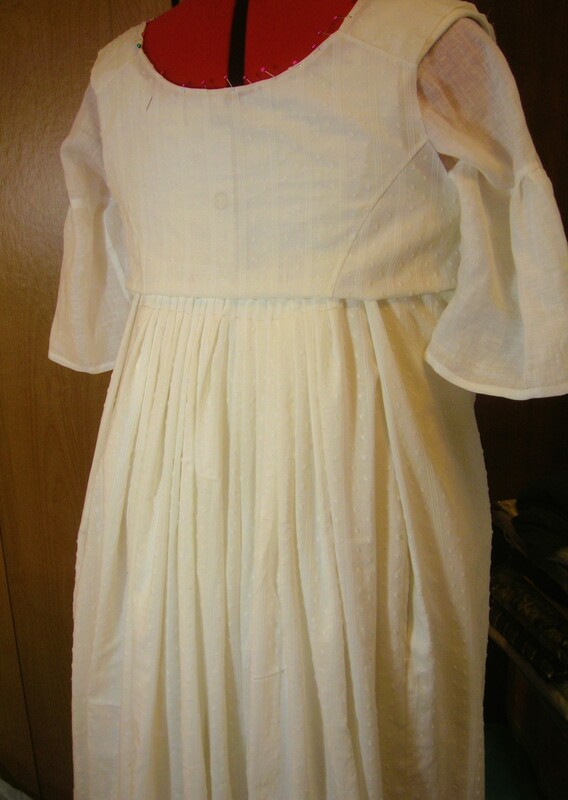
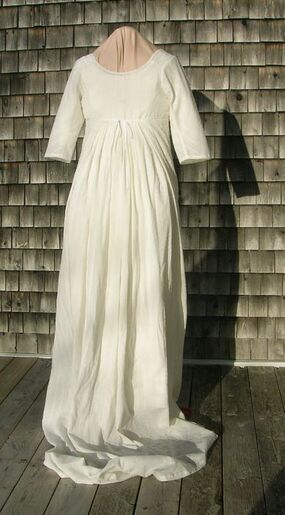
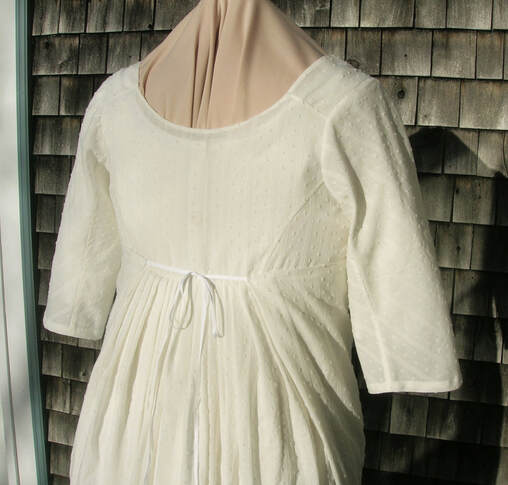
I designed this gown after an extant ca.1805 garment that was sold privately some years ago (from which I had saved photos). It was at times a bit difficult to discern construction details, but between the pictures and my general understanding of Regency design, I've managed to puzzle it out. How absolutely different the whole construction concept of these gowns was, compared to dresses of just 25 years earlier! Here is the back of the gown (still in progress, without sleeves and unhemmed (and admittedly not a very good photograph), but it does show the lovely Regency silhouette of these dresses).
Elements of a Regency Gown:
To briefly explain the construction, the skirt back is very finely and densely knife-pleated at for about 9cm each side of centre back, in such as way as to place the gown's "side" seams in fact well into the back. The front skirt panel is cut in one and wraps around the body smoothly but with enough ease to fall freely, seamed to the skirt back on each side back position, with an opening about 35cm long to allow the skirt front to be lapped over the back when fastened.
This is a variation of the "apron front" design, so the small front bodice will be attached to the skirt front as far as possible at the raised waistline, with a narrow fastening tie sewn to the top finished (open) edge of the skirt front. The bodice back is cut with curved seams sewn to side sections which then wrap up over the shoulders as straps, and down over the sides of the bust, with fastening ties sewn to each bottom forward edge. The bodice centre back area is sewn permanently onto the pleated skirt edge, as far as the side-back seams, leaving the lower front portions of the bodice back free to allow them to be wrapped around the chest and tied at front.
The gown is put on by first arranging the back and shoulder/side bodice areas on the body, fastening the ties under the bust at front. The "apron" (that is, the small front bodice and joined front skirt) is pulled up over the front of the bust, pinned (or buttoned) at the shoulders, and the upper skirt edges are fastened with ties at centre back.
As the description and photos above make clear, another point of realization for me was that despite the apparent simplicity of these gowns, the concept can actually be fairly complicated and relies on a precision I hadn't expected, a bit like origami. Although the components aren't rigidly formed or structured, they must fit perfectly and must drape on the body beautifully in order to properly reflect the neo-classical aesthetic. I found this was the biggest challenge, and I hope I succeeded.
Although I'm relatively tall, I'm not the willowy slip of a young thing that (frankly) looks best in these fashions, but I think it's possible to look graceful at any age with the right style and fabric. For this reason, for a mature woman, I'd say that a semi-sheer or semi-translucent fabric is better than the almost transparent muslins we tend to associate with historical fashion of this era.
A full Regency corset, including some boning, is a very good idea for the mature person, both for support and for smoothing the form underneath those floating layers. If you're fortunate enough to be both young and slender however, you can get away with a Regency short corset with very little structural boning and enjoy wearing a scandalously sheer fine muslin gown!
A full Regency corset, including some boning, is a very good idea for the mature person, both for support and for smoothing the form underneath those floating layers. If you're fortunate enough to be both young and slender however, you can get away with a Regency short corset with very little structural boning and enjoy wearing a scandalously sheer fine muslin gown!
My only real conundrum is choosing the sleeve design. I originally wanted to make elbow-length sleeves (which I feel are more graceful on a woman "d'un certain âge" than the little puffed sleeves seen on many Regency gowns suitable for young women).
But I also love the overly-full-length sleeves seen on some Regency dresses, usually cut on the bias, which "pool" a bit around the wrists. I have just enough fabric left to do one type, but not enough to re-cut if I change my mind and want the other.
So -- which should I choose? Long and flowing, perhaps more formal-looking, or elbow-length and restrained, but permitting the wearing of opera-length gloves? Definitely more pondering required...
An interesting aside is that the Regency silhouette was revived exactly 100 years later, from about 1902 to 1907 (referred to in French fashion at the time as "style Empire"). I'll be writing about this historical fashion phenomenon in much more detail soon in the "Research and Essays" section of this website.
Oh yes, a postscript!
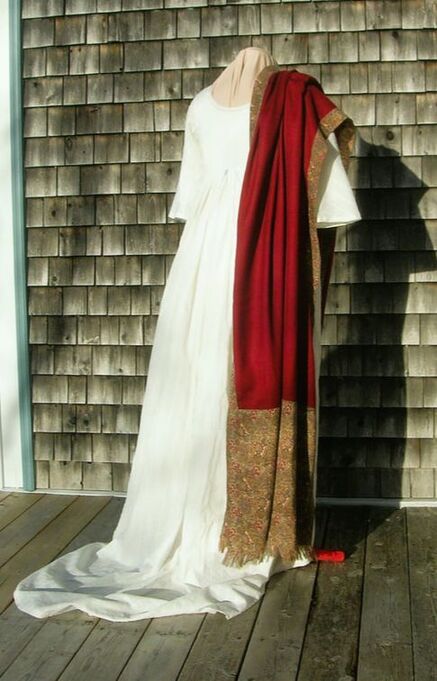
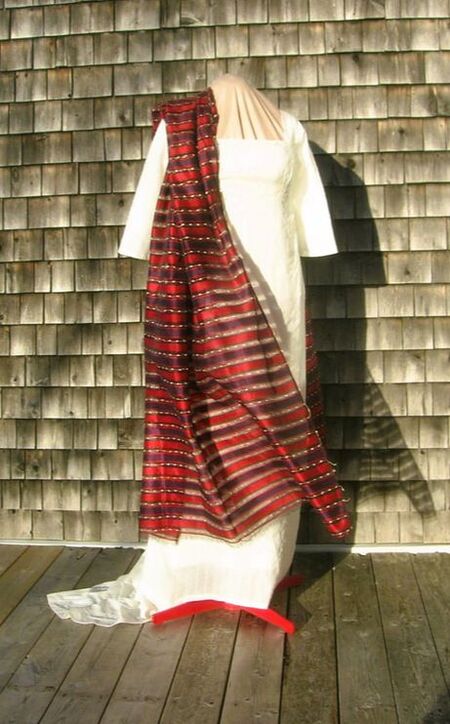
During the process of designing my Regency ensemble and wondering how on earth I was going to create an appropriate Regency shawl, I remembered another "orphan" fabric -- a beautiful length of fine, lightweight wool challis in a stunning claret colour. I loved this fabric when I bought it years ago, but never really knew what to do with it. Hence it got stuffed into a box in an undisturbed corner for years. It has now triumphantly re-emerged from its long exile to become an elegant Regency shawl.
During the process of designing my Regency ensemble and wondering how on earth I was going to create an appropriate Regency shawl, I remembered another "orphan" fabric -- a beautiful length of fine, lightweight wool challis in a stunning claret colour. I loved this fabric when I bought it years ago, but never really knew what to do with it. Hence it got stuffed into a box in an undisturbed corner for years. It has now triumphantly re-emerged from its long exile to become an elegant Regency shawl.
Update:
In the end, I opted for mid-length sleeves, which will allow me to wear formal-looking elbow length gloves with my gown. The gown and two shawls are now complete; my only remaining task is to design and create an appropriately formal looking turban-style headdress, which should be a fun and creative project!
A few photos follow, of the finished gown with the two shawls -- one is the beautiful claret coloured fine wool challis which I fashioned into a sort of "faux Kashmiri" shawl, and the other is actually an interesting semi-sheer synthetic striped fabric (imitating silk) in rich berry tones that I never knew what to do with -- until now!
]]>In the end, I opted for mid-length sleeves, which will allow me to wear formal-looking elbow length gloves with my gown. The gown and two shawls are now complete; my only remaining task is to design and create an appropriately formal looking turban-style headdress, which should be a fun and creative project!
A few photos follow, of the finished gown with the two shawls -- one is the beautiful claret coloured fine wool challis which I fashioned into a sort of "faux Kashmiri" shawl, and the other is actually an interesting semi-sheer synthetic striped fabric (imitating silk) in rich berry tones that I never knew what to do with -- until now!
As a maker of historical patterns, I'm the first to acknowledge the value of another maker's work if it's technically well-drafted (what I call "good pattern engineering"), reflects historical accuracy, and includes clear and complete instructions. So I'm not averse to turning to a fellow pattern-maker in a pinch, in order to avoid having to reinvent the wheel and/or go from zero to 90 to create a garment from an historical period with which I'm largely unfamiliar (not to mention with a short deadline looming). Now, I'm not going to go so far as to advertise another maker's pattern here on my own website, but please read on -- I'm perfectly willing to tell you whose pattern I made use of!
This past year I finally caught the Regency bug (i.e. a sudden, inexplicable compulsion to make a ca.1800-1815 ensemble). This of course I knew would require a brand new corset, in a style I had never attempted before. I was feeling more than a little overwhelmed by the thought of having to start an entire wardrobe for myself and my husband from scratch with all the other tasks I need to do in spring (we have a large garden), and with just a few weeks to accomplish all of it.
Given the short, 6-week timeline to my planned event, I realized I could probably easily spend four weeks of it just delving into Regency corset research and drafting alone. I decided that relying on someone else's corset pattern and knowledge of the era was a far better idea than starting completely from scratch!
Given the short, 6-week timeline to my planned event, I realized I could probably easily spend four weeks of it just delving into Regency corset research and drafting alone. I decided that relying on someone else's corset pattern and knowledge of the era was a far better idea than starting completely from scratch!
I was aware of the reputation of Laughing Moon patterns and their focus on late 18th and early 19th century designs. What I didn't know was that the company's owner and designer had been following me and admiring my work too!
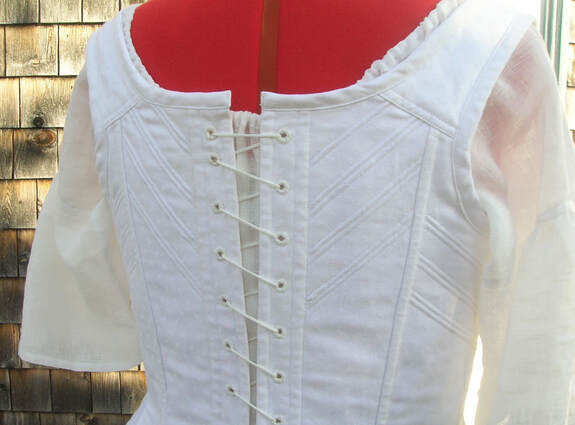
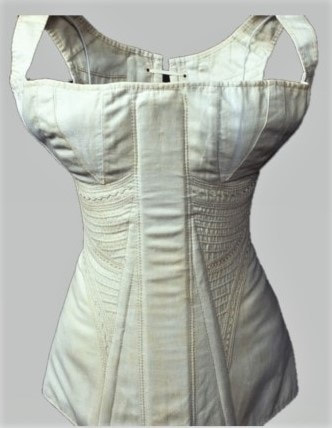
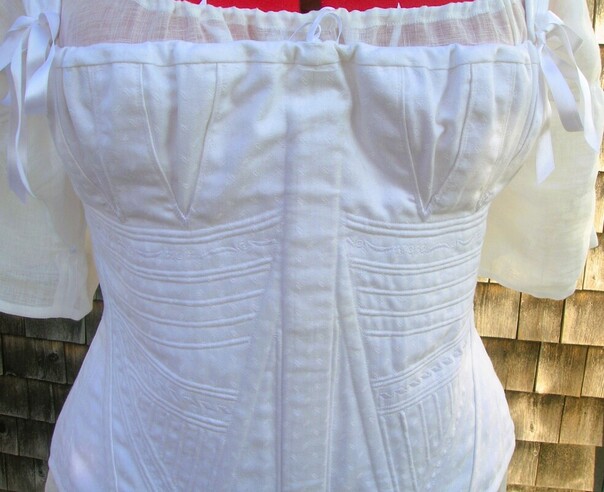
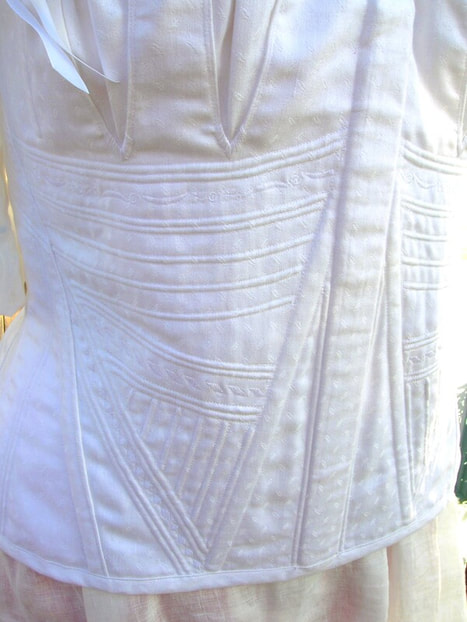
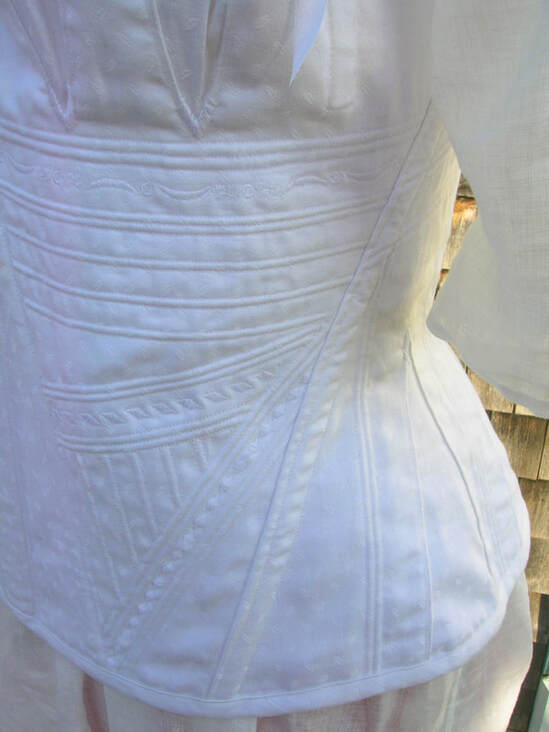
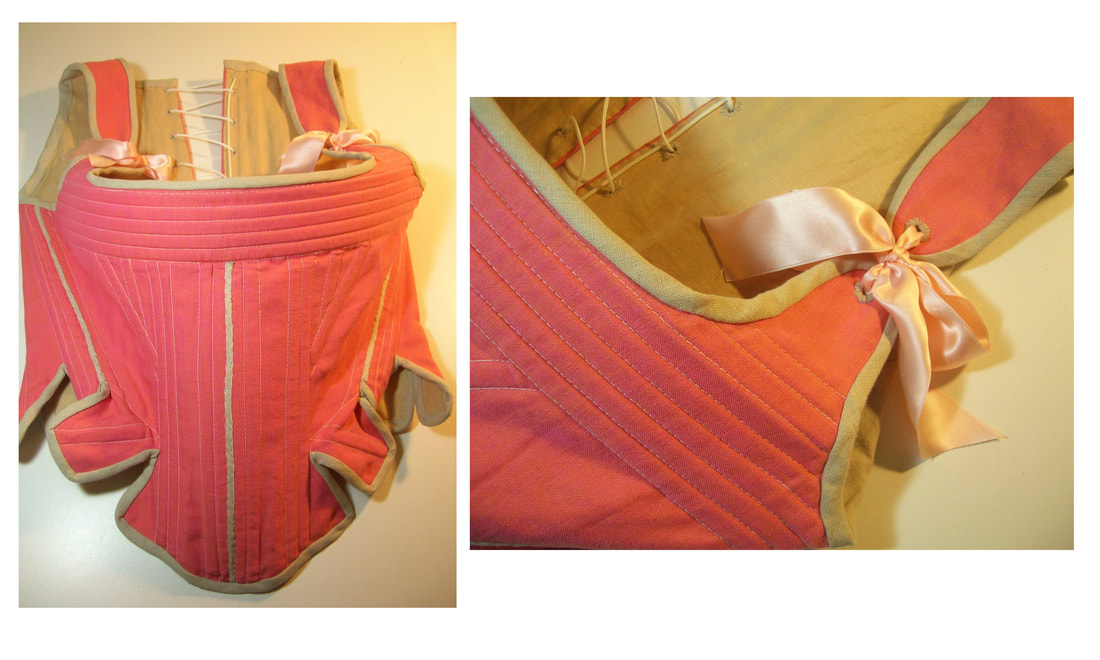
Accordingly I chose a ca.1800-1810 style historically accurate corded corset pattern (Laughing Moon #115) which I thought would serve my purpose well. I did make a number of alterations, adjustments and revisions based on an extant corset of ca.1810 that I particularly liked (see photo above), and I spent some considerable time brushing up on, practising, and experimenting with, my cording techniques! Of course I don't have the perfect figure and tiny waist that the owner of the original antique corset must have had, but on the whole I was very pleased with my resulting Regency corset.
I've made many 18thC. stays and early 20thC. corsets in my time, but this experience was quite different, requiring a very different approach.
For my corset, I chose a very pretty 100% cotton lightweight coutil in an off-white colour, with a tiny sprigged design in the weave (see photo above), and a lightweight white polished cotton for the lining. I decided to interline the entire corset with a lightweight 100% linen in natural white, in order to give some extra body for the cording and to provide additional breathability.
Oh yes -- and I had to track down a proper wooden busk! Fortunately there was a Canadian seller on Etsy with just the thing. Although the busk was narrower than what I preferred, its 3.5cm width was sufficient.
Knowing what I do about patterns that are accurately based on historical designs (which this one is), before I cut anything, I made a full toile of cotton muslin to check and adjust the fit. To better work with my own figure and height, I lengthened the corset, added some extra boning channels into the design, and altered the cording pattern considerably. I should note here that the Laughing Moon pattern also includes a "theatrical" version that would appeal to those who don't want to go on a complicated journey of making a fully historical Regency corset, or who just don't have the time to devote to a fully historical replica.
Probably the most challenging part of the process of cutting the pattern was determining which of the various bust and hip gore sizes to use. In the end, for my overall medium-large size frame, I found that the smallest bust gores actually worked best to provide a proportional look and fit through the bust area (meaning 4 narrow, inserted gores), and the smallest 4 gores for the hip. There was a great deal of careful sewing involved in inserting, stitching, and finishing all the gores in the outer layer, the lining, and the interlining of the corset.
Next came the cording, embroidery, and boning. What I quickly realized was that, unlike Edwardian or Victorian corsets, it was essential to correctly determine the order of working on these various elements. In other words, each section and design element had to be carefully planned as separate tasks, to be done sometimes before, sometimes after, completing section seams, and in the right direction to avoid puckering or interfering with an already finished portion of the corded design.
The pattern instructions were fairly helpful in this respect, although not always completely clear or detailed enough. It took me some time to make notes and an "attack plan" before beginning, and I would strongly recommend this for anyone creating a similar corset of this era.
The pattern instructions were fairly helpful in this respect, although not always completely clear or detailed enough. It took me some time to make notes and an "attack plan" before beginning, and I would strongly recommend this for anyone creating a similar corset of this era.
Another challenge in creating a corded corset is estimating the shrinkage (and shrinkage direction) that cording produces and allowing for this in cutting the sections. I cut the areas that I knew I would want to cord fairly heavily with an extra 1.5cm at each joining seam allowance, and I corded all the way to the edge of each piece. I then machine-basted the section seam(s), tested the fit against my (uncorded) toile, and trimmed off the excess cording ends. This method provided a near-perfect fit.
Unfortunately, because time was short I didn't take photos of the construction process itself, but I've included a number of pictures of the finished corset (including some close-ups), most of which can be found at the end of this article.
I used my sewing machine (due to time constraints) for almost all of the joining seams, the busk channel, the gore insertion stitching, and the edge binding. I also did all the cording by machine, as well as the rows of dainty white-on-white embroidery. For all this machine work I used a strong, 100% cotton quilting thread made by Gutermann (this thread is stronger, more tightly spun, and somewhat finer than Gutermann's standard cotton machine thread). Finishing, including all the eyelets and gore points, was done by hand using an 80/2 weight linen thread.
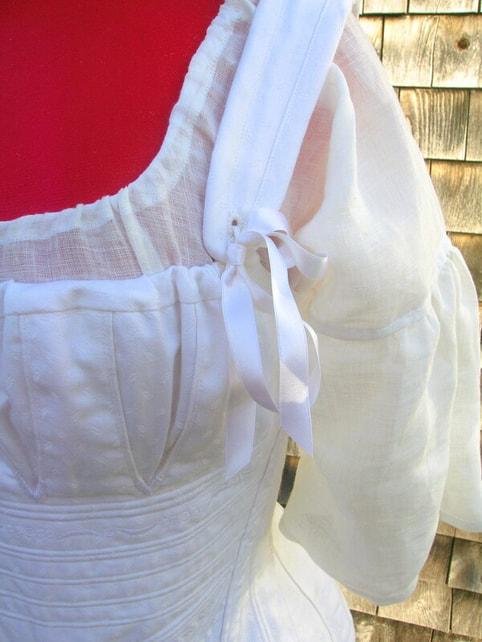
To complete the corset, I cut my own self-fabric bias binding for the top and bottom edges of the corset, as well as for binding the shoulder straps. Incidentally, I discovered that despite the widely-spaced straps, the historically correct shaping, which produces a curved edge, holds quite well without slipping off the shoulders. The straps are held to the body of the corset by means of 1.5mm silk satin ribbon strung through eyelets (see photo below).
As for the back lacing, at this time period most corsets were still made with spiral lacing, and this is the method I used for mine. I personally like to use a (non-historical) nylon cord for the back lacing on all my 18thC. corsets, as I find it mimics the smoothness and strength of what would have been high quality twisted silk cording employed at the time for better stays, and I used the same type of cord for this Regency corset. It has the advantages of being easy to handle, extremely sturdy, and of sliding quickly and easily through hand-made eyelets.
Like all my 18thC. stays, this corset was laced using my "hybrid" spiral lacing method, a technique which allows for no-fuss lacing up, and simpler self-lacing where necessary. (If you haven't seen my procedure, using the hidden pull-cord on one side, click on the button below to view a demonstration).
Even an old pro can learn something new!
So, what did I, as a skilled pattern-maker, and historical couturière, learn from the experience of making this Regency corset? Well, much more than I expected!
- Regency corsets are not the simple, uncomplicated garments they may appear to be at a casual glance! Although we tend to think of them as a sort of devolution from the more complex stays of the 18th century, I would say that this current experience has proven to me that a well-made, well-fitted corset of the 1800-20 period is actually a work of art and a technical achievement that stands on its own. In many ways, I now feel that later Victorian (and Edwardian) corsets were actually a simplification of the beautifully, carefully finished and delicately embellished corsets of the Regency era.
- Closely related to the comment above, I discovered how much -- a lot! -- of work is involved in making an historically accurate and nicely fitted and finished Regency corset. In fact, this little cotton corset took me longer to make and more planning than any 18thC. stays I've ever made, and certainly far more than an Edwardian corset, even allowing for the extra time I took to delve into the cording process and create my design.
- My appreciation for the technical and design skill in creating these seemingly simple little undergarments has completely changed. I will never look at museum extant corsets of the Regency era in the same rather dismissive way again! You know -- oh, just a simple uncomplicated cotton corset.
- I was very pleasantly (and unexpectedly) surprised at how much support and shape this corset, and in particular those rows of cording provide -- apparently they're not just decorative! The comfort and fit is snug and very comfortable, with a gentle "uplift" that I hardly anticipated from a "simple cotton corset". The overall shaping is smooth, with good support for the high-bust look of Regency dresses. In short, a real revelation!
- Having tried my completed Regency corset on over my newly-made Regency linen shift, a diaphanous thing created out of fine handkerchief weight linen, I now understand in a very first-hand way why no other corset or stays type would have worked with the flowing, semi-sheer fashions of the era. Anything rigid or overly structured would certainly ruin the effect of those graceful neo-classical gowns that fall freely in soft, elegant folds from below the bust.
I'm not sure I'll be building another Regency corset anytime soon, but the many hours spent creating this particular garment were repaid in more ways than I anticipated. And of course, now I have the perfect support piece for my planned Regency ensemble!
To complete this story, I have to add that (as sometimes happens) the event which elicited all this excitement and preparation got postponed in the end. This has actually worked out to my advantage (as also sometimes happens), as I now have several more months to create my full ensemble at my leisure. Check back later to see the results!
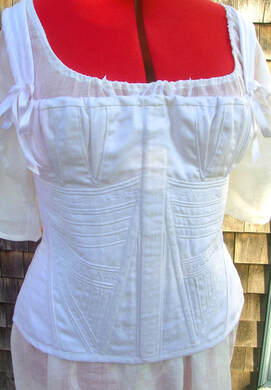
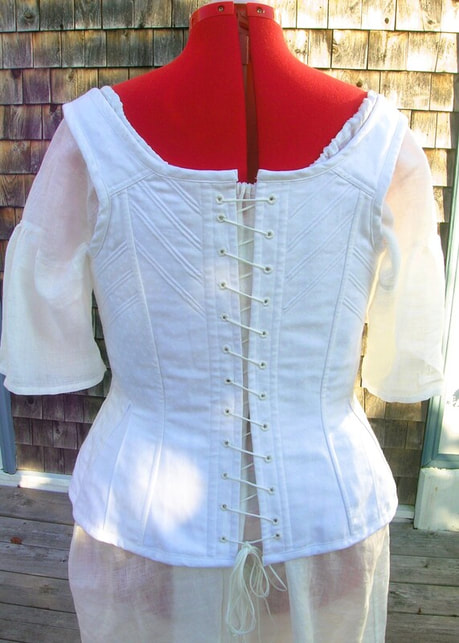
In the meantime, below are some additional photos of my completed Regency corset (shown over my newly-made lightweight semi-sheer linen Regency shift).
In the meantime, below are some additional photos of my completed Regency corset (shown over my newly-made lightweight semi-sheer linen Regency shift).
| It was wonderful to be asked again this summer to act as a roving historical interpreter for the town of Annapolis Royal, reflecting dress that might have been seen here in the 18th century particularly, and sharing the deep history of this place with visitors and townspeople alike. I and my husband will appear in town, mostly from about noon onward (weather permitting), three or four times a week, sometimes together. |
Our first appearance this year will be on Canada Day, July 1st, at and around the festivities in the centre of town -- fingers crossed for a sunny day!
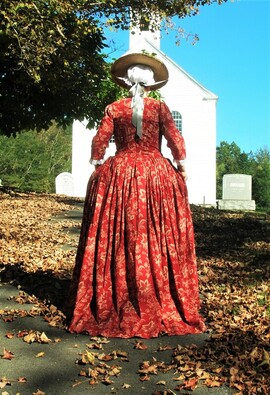
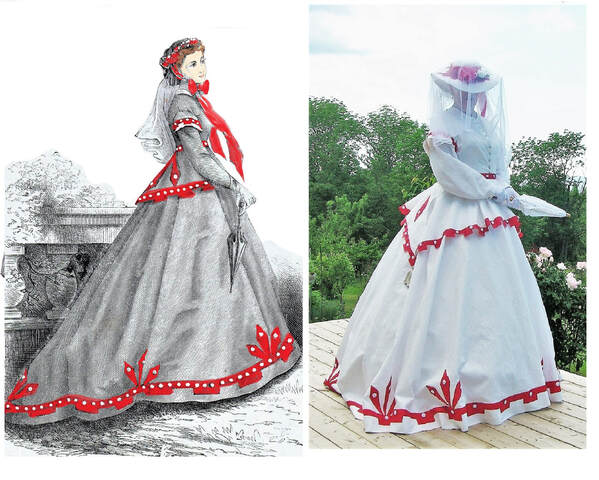
So, out will come my Canada Day dress (ca.1867, the year of Canada's confederation), in all its white and red glory, which has been packed away since 2017.
So, out will come my Canada Day dress (ca.1867, the year of Canada's confederation), in all its white and red glory, which has been packed away since 2017.
If you happen to be passing our way or spending some time in the Annapolis Royal area this summer, do come by and say hello! I'll be hard to miss in my historical garb of one type or another -- here are a few examples of what you might see me wearing, and some photos of us in our role as historical interpreters:
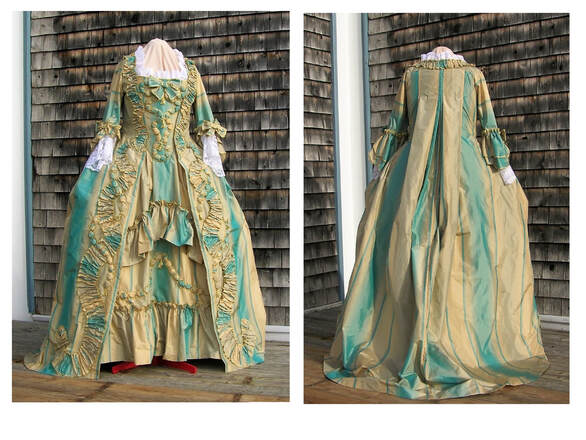
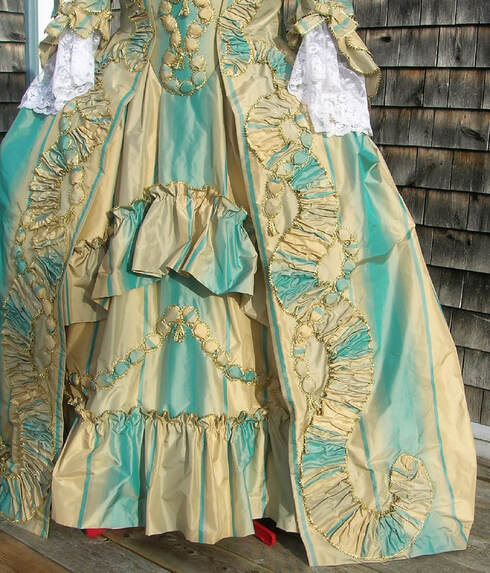
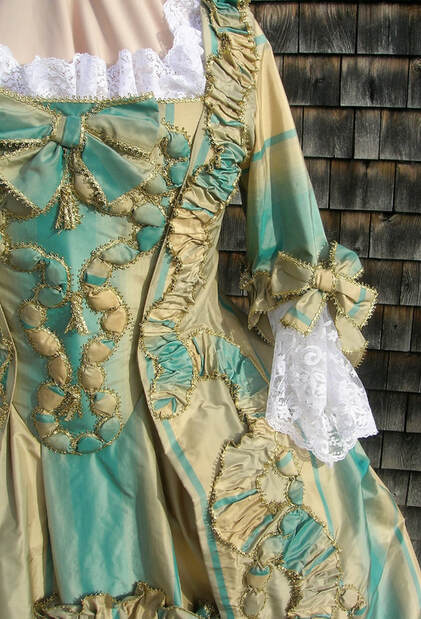
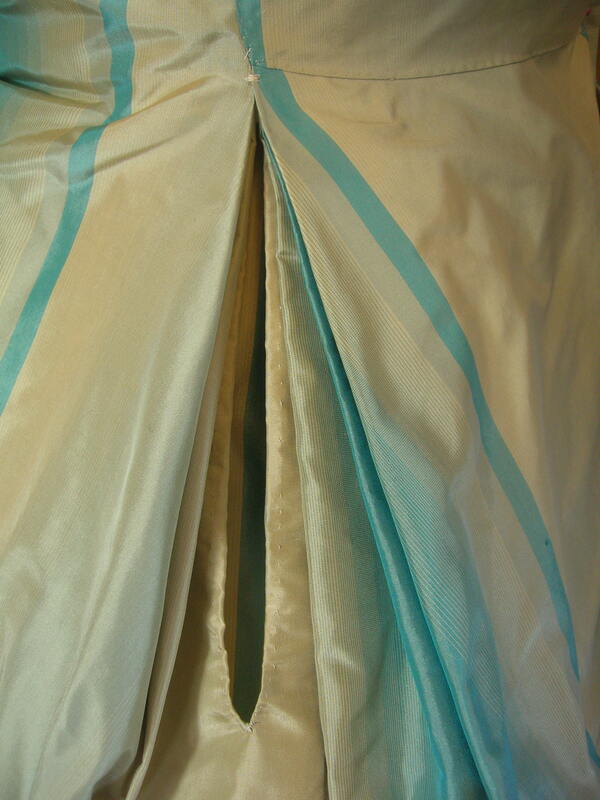
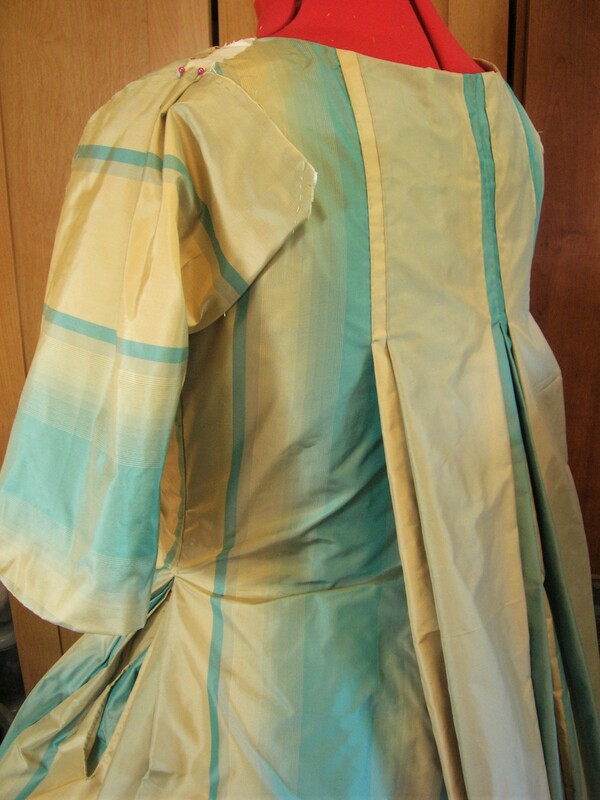
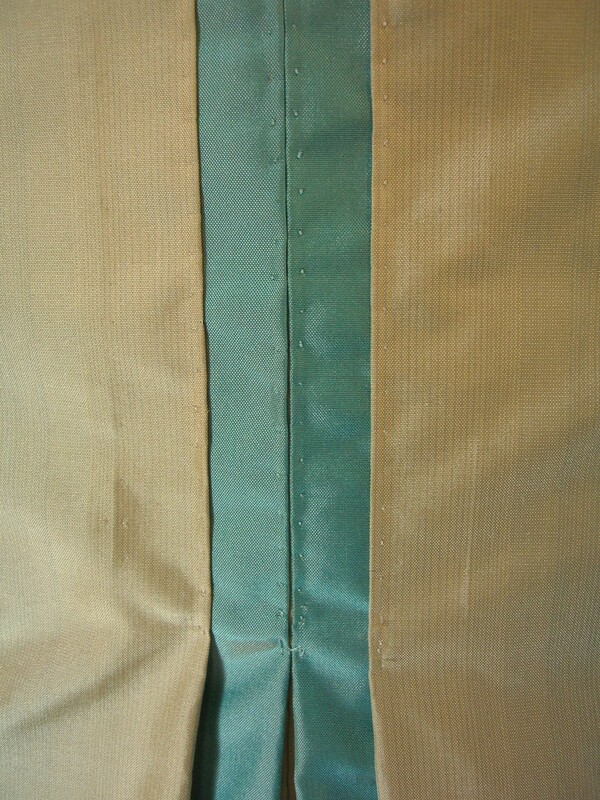
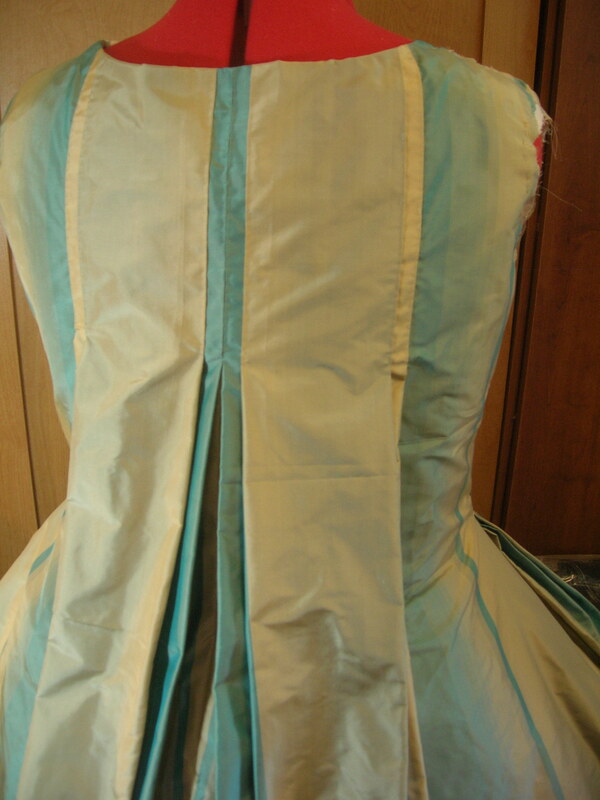
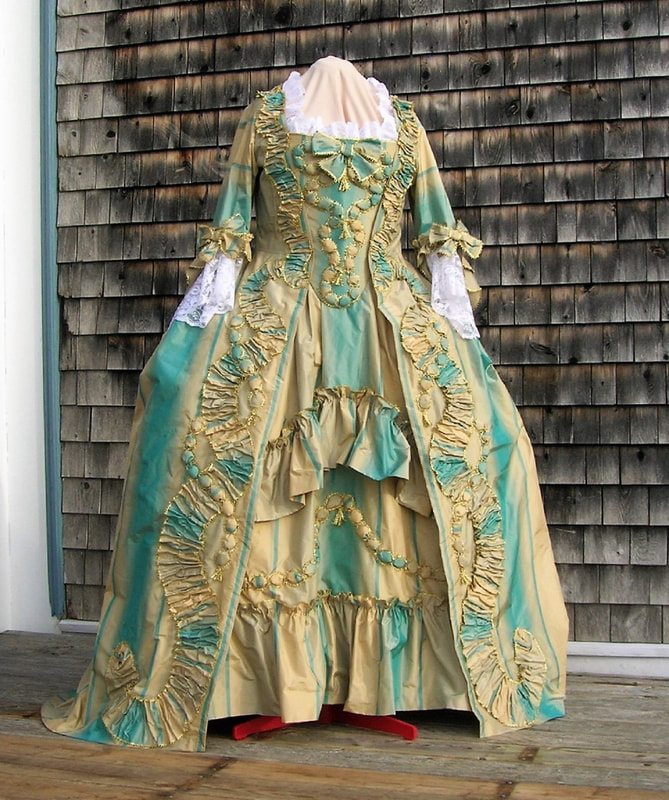
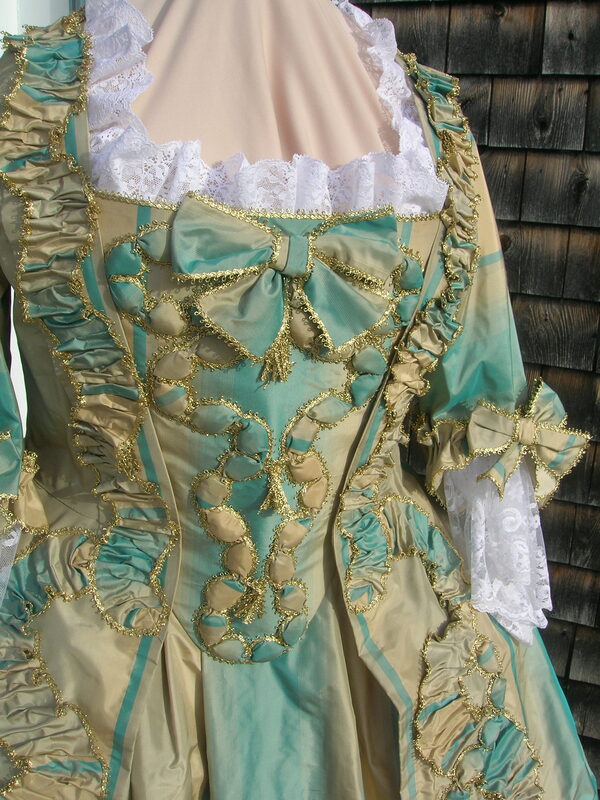
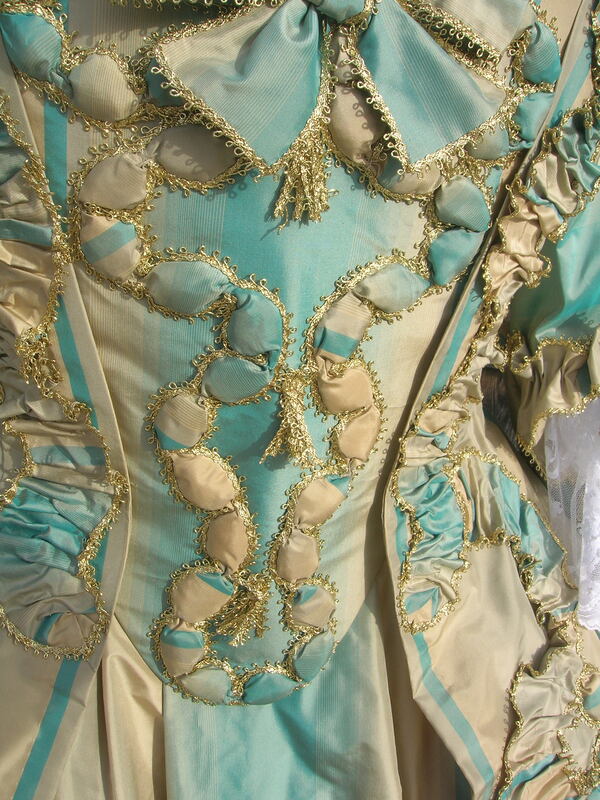
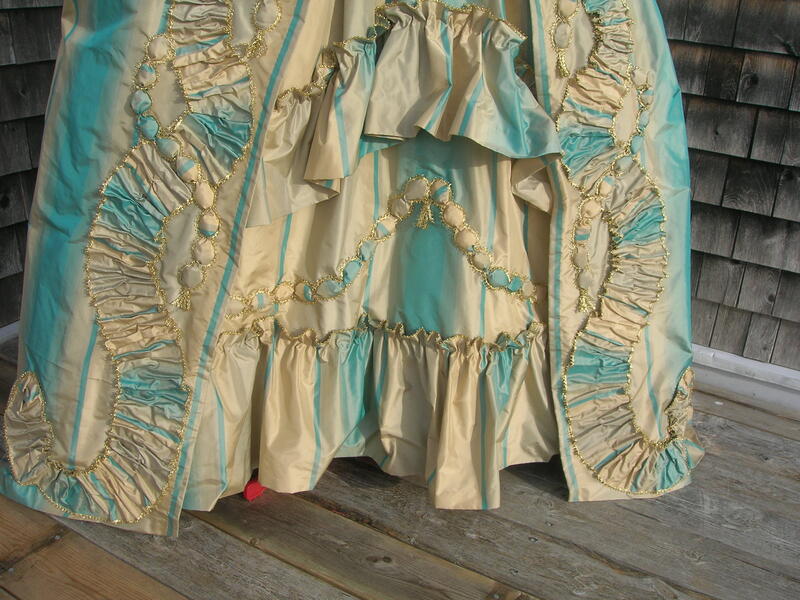
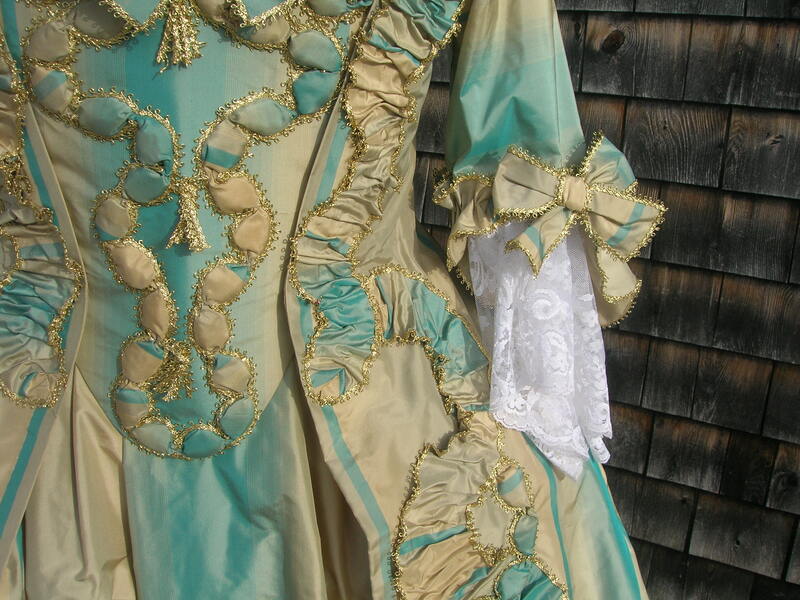
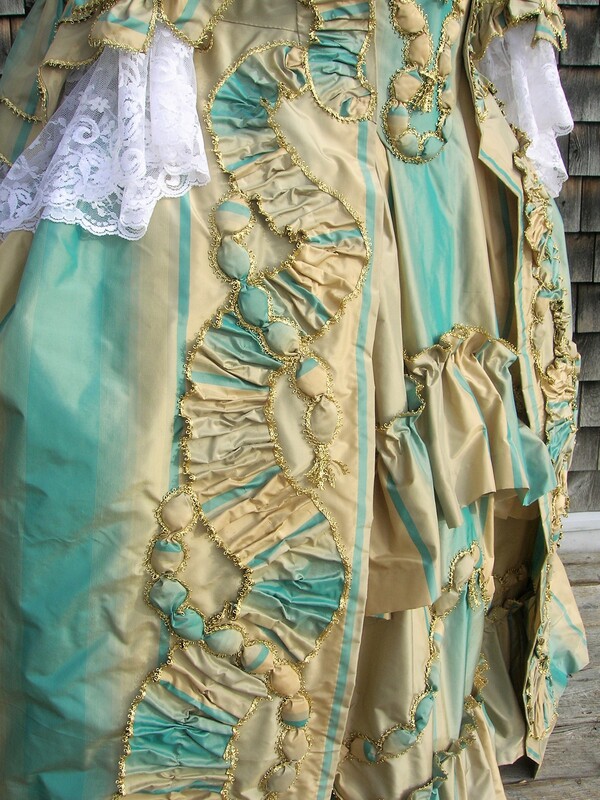
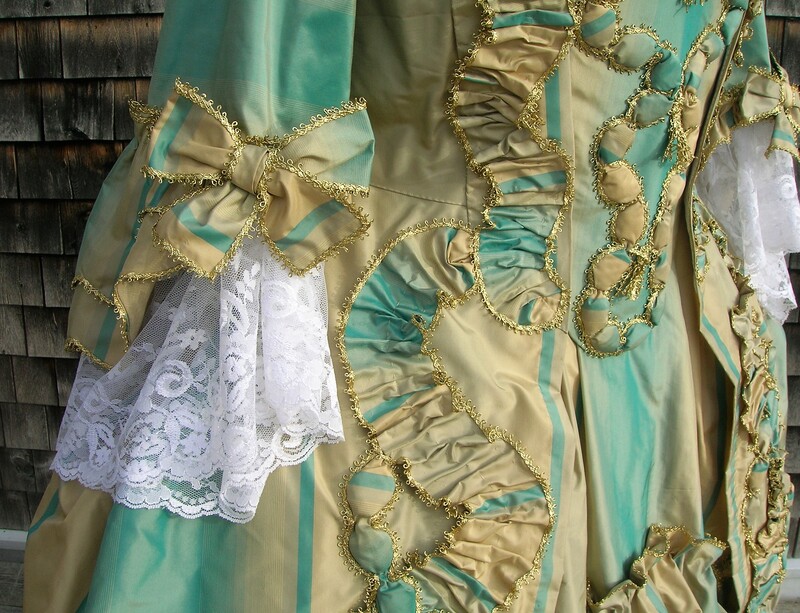
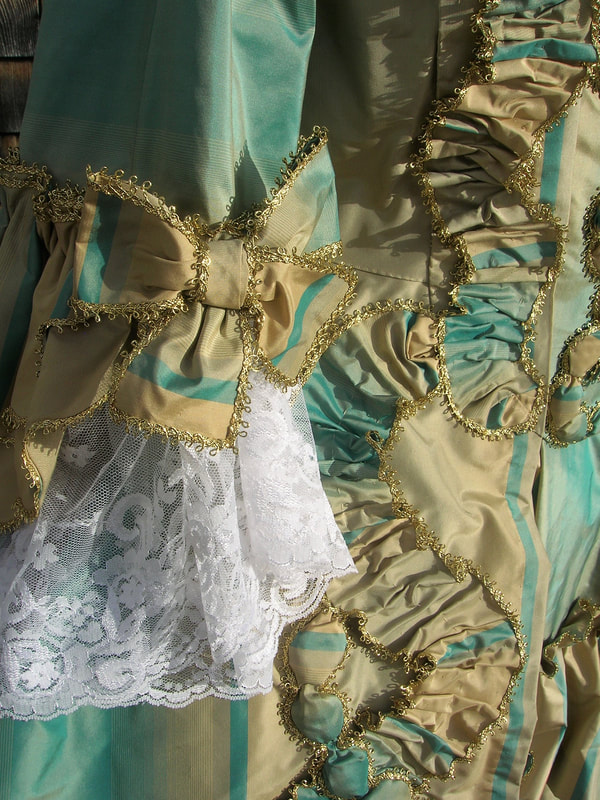
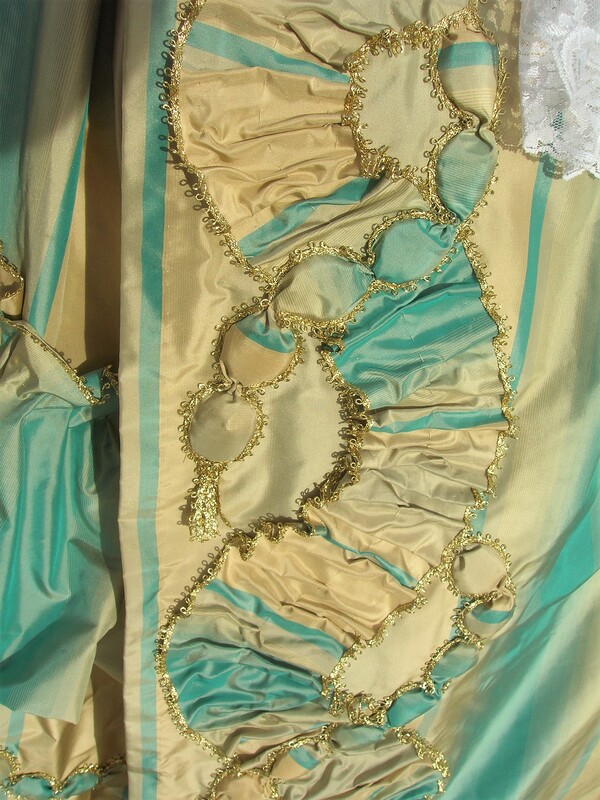
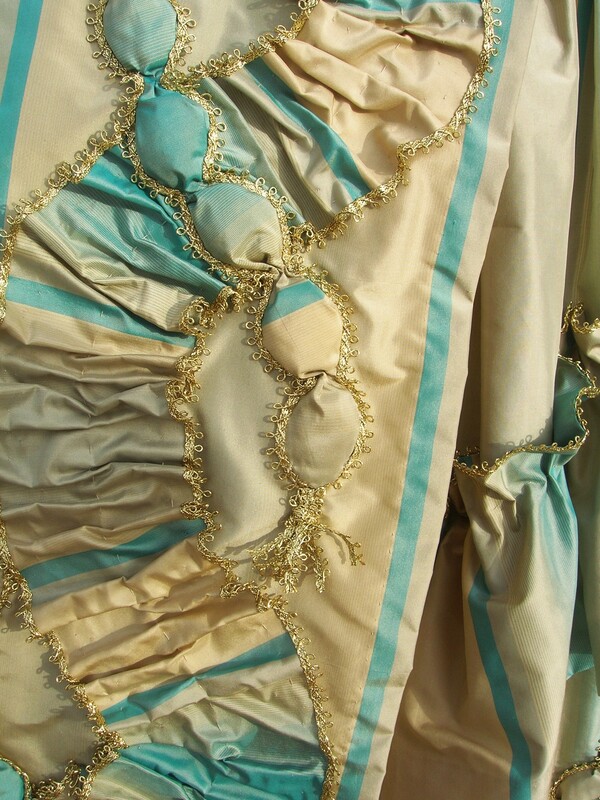
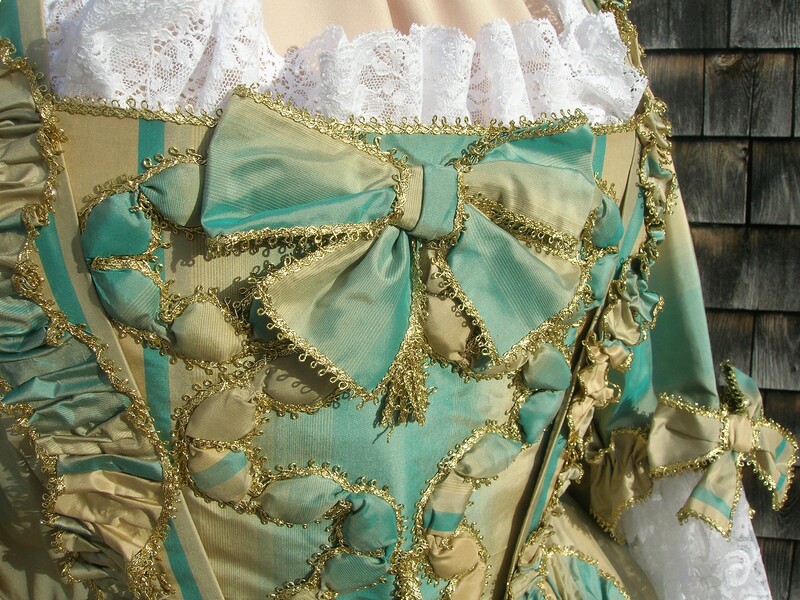
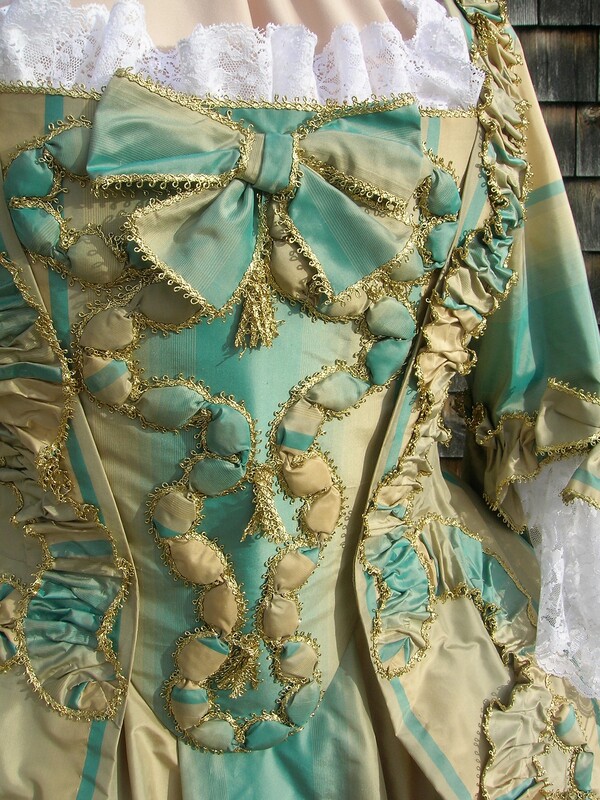
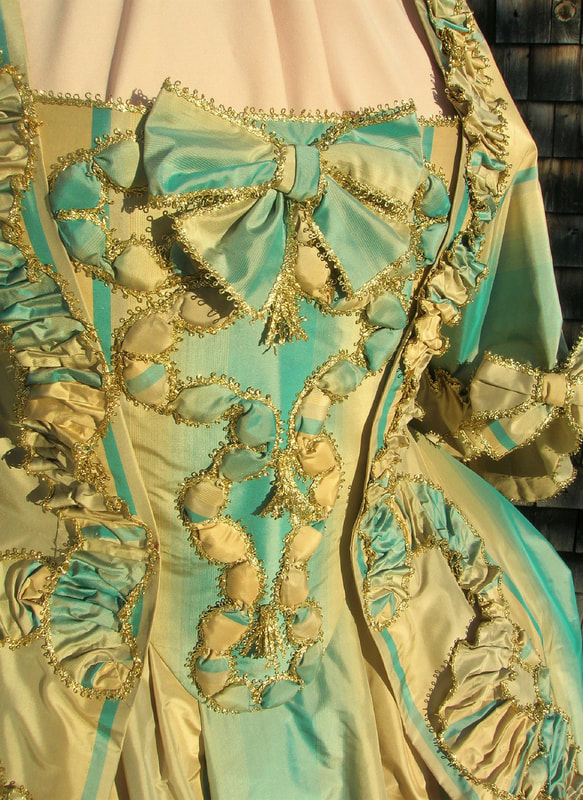
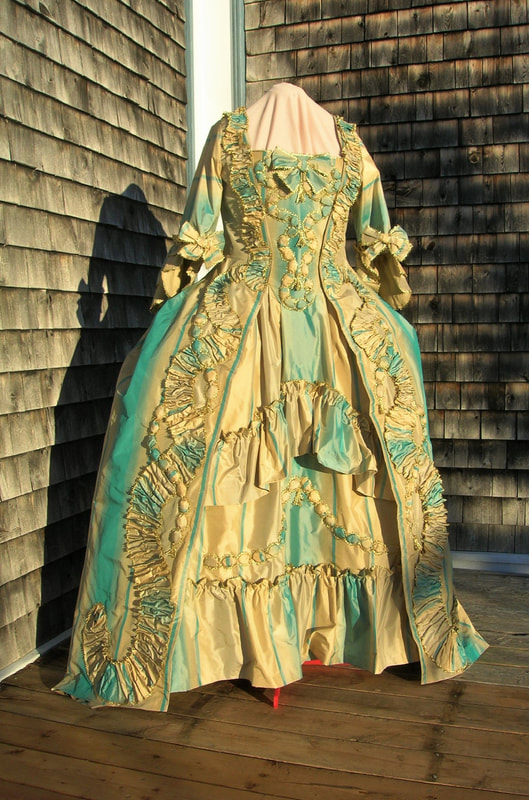
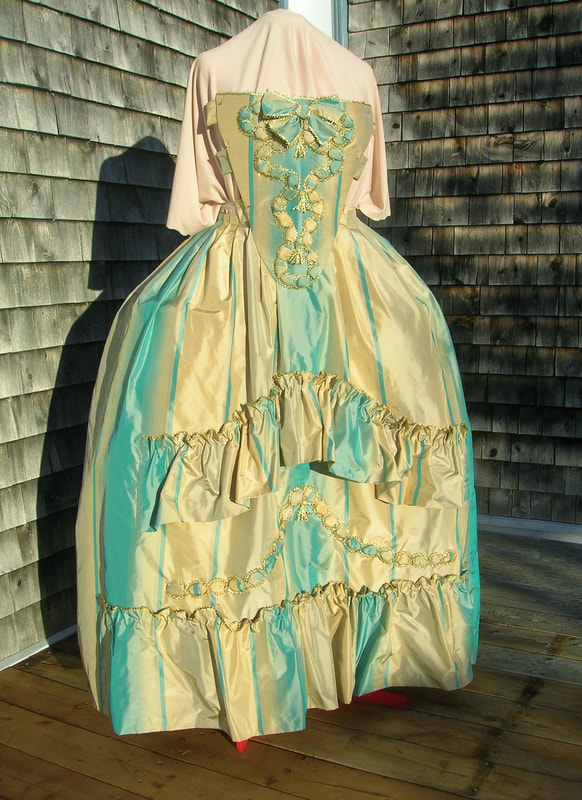
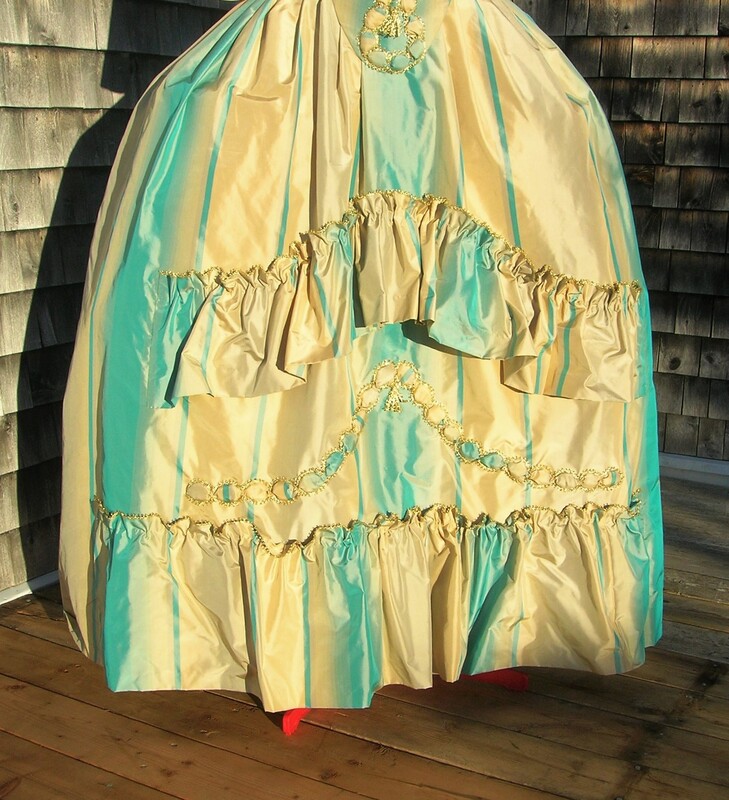
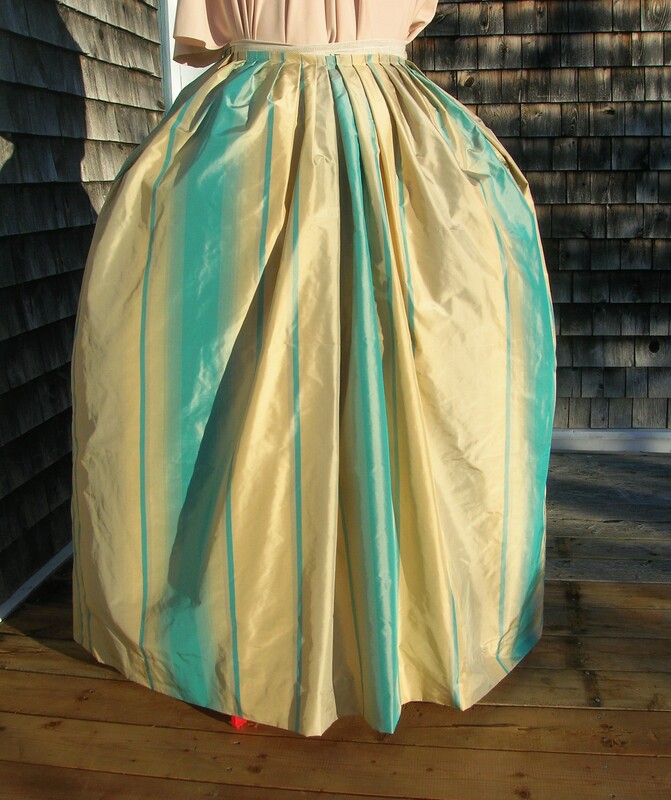
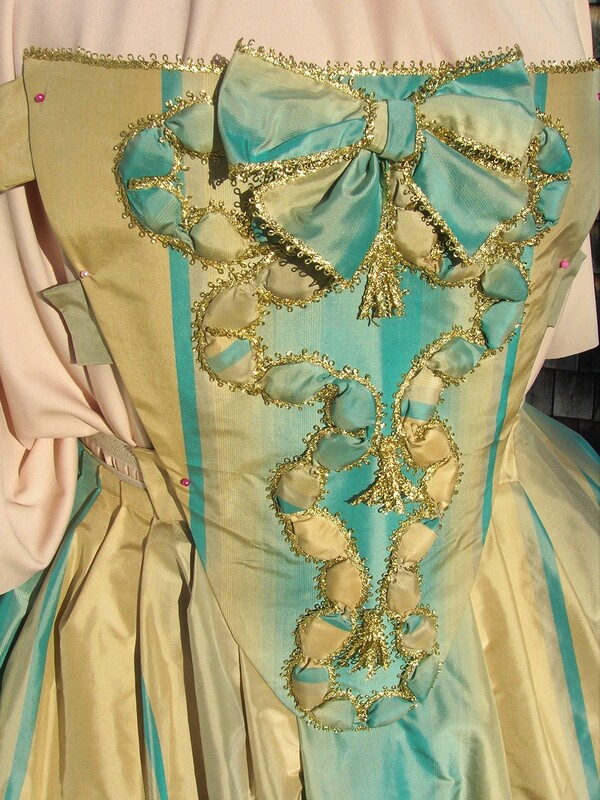
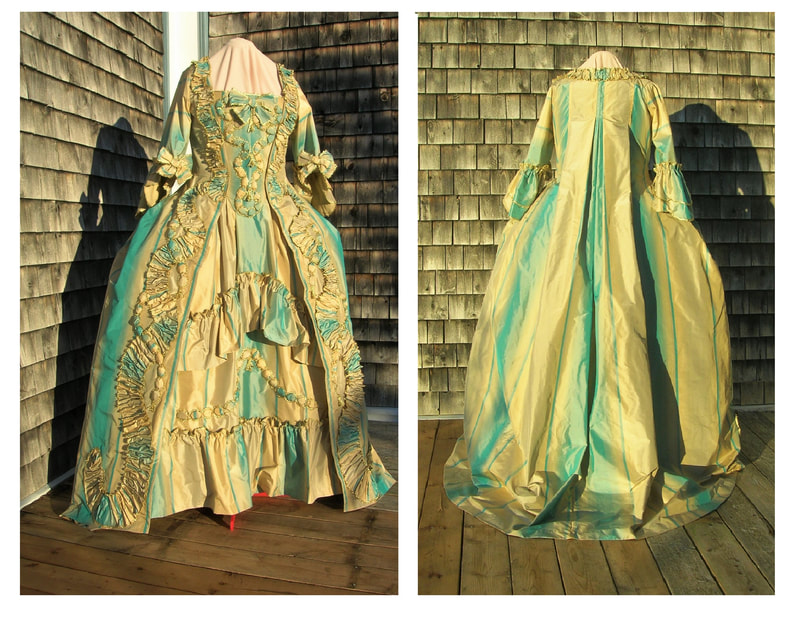
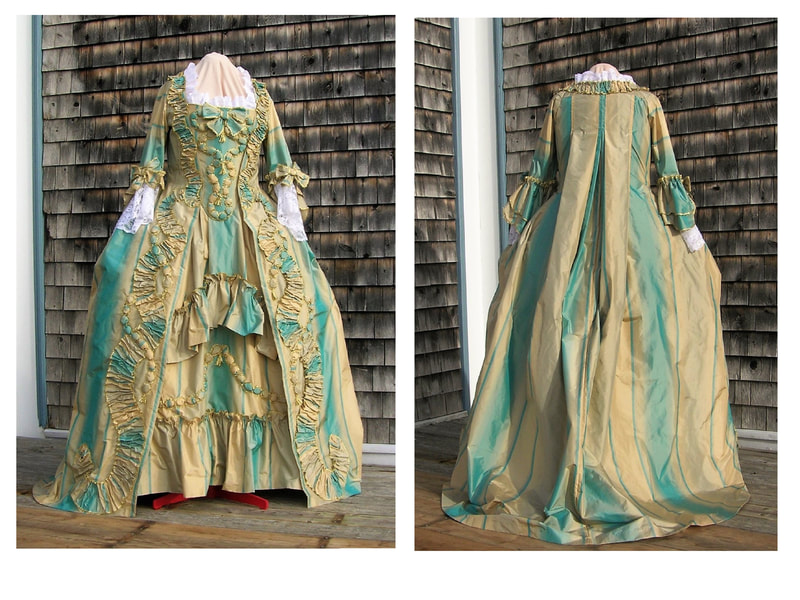
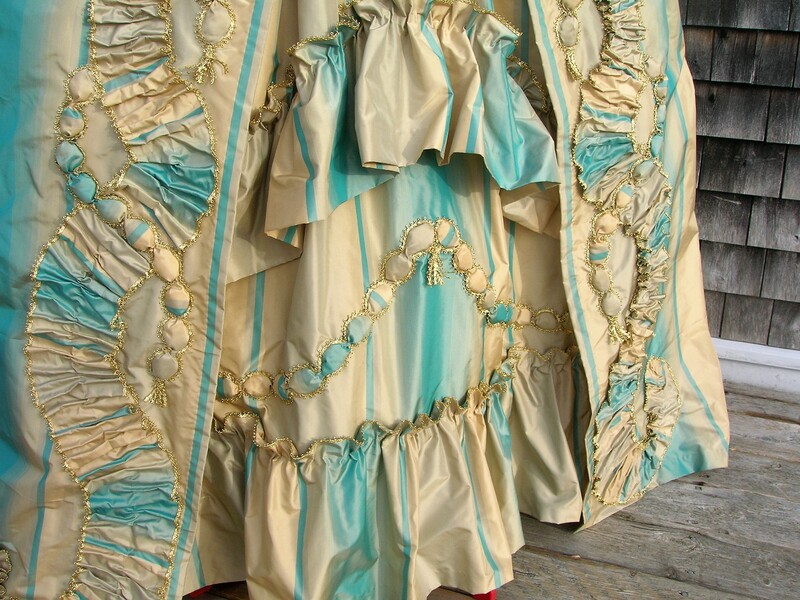
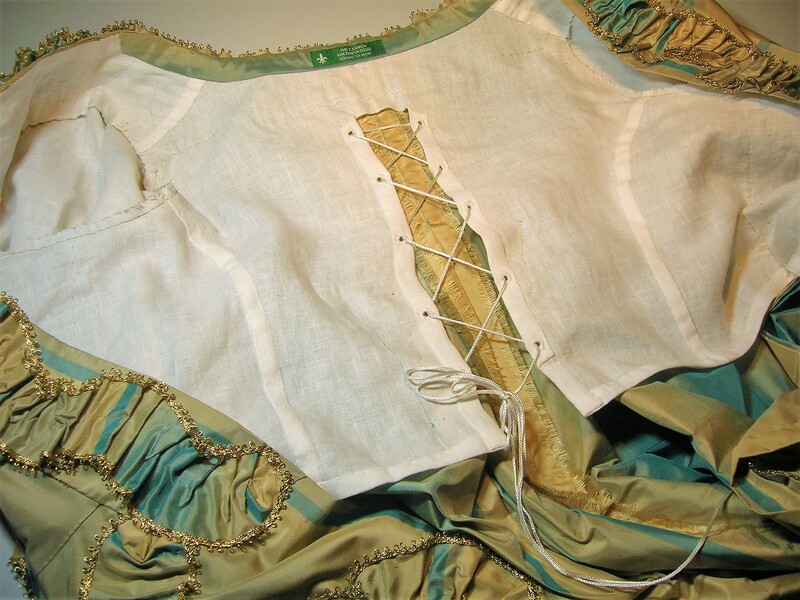
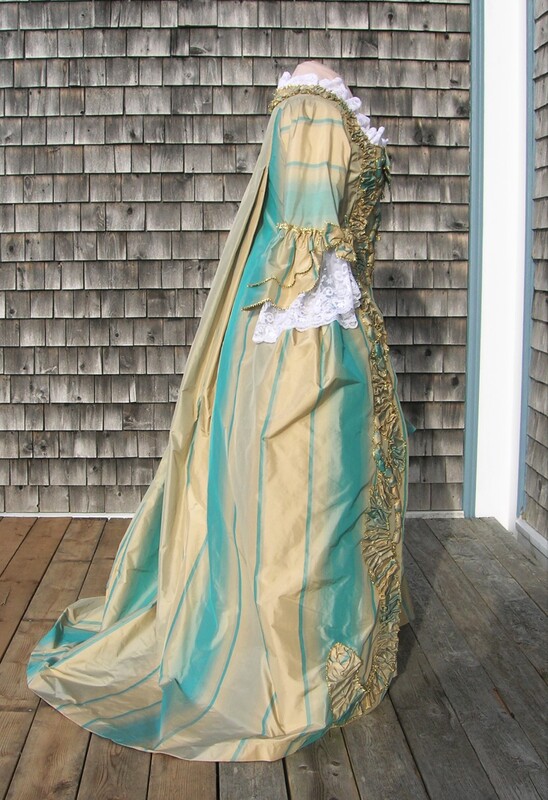
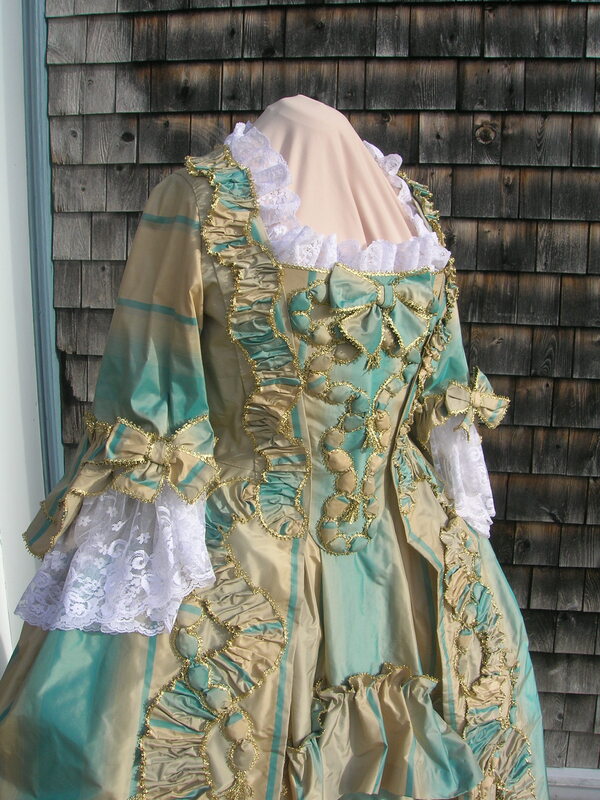
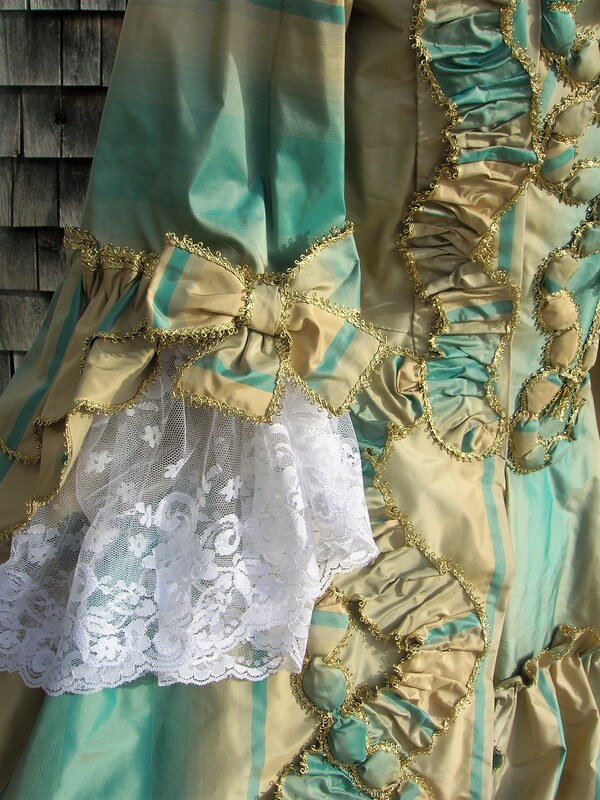
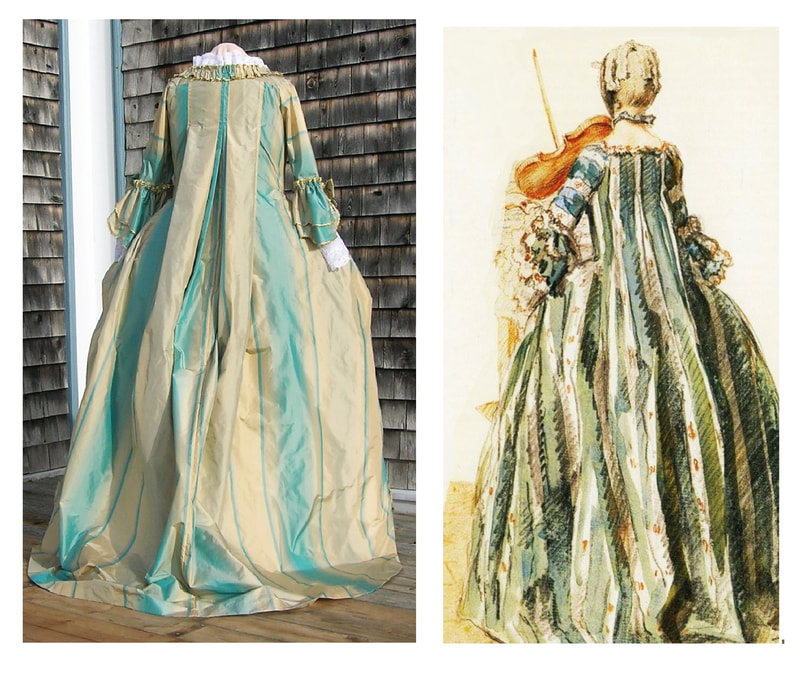
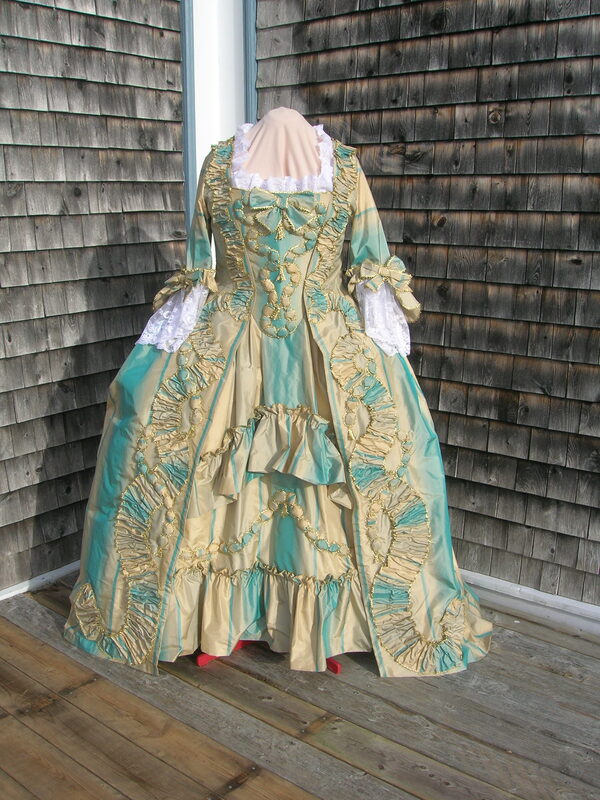
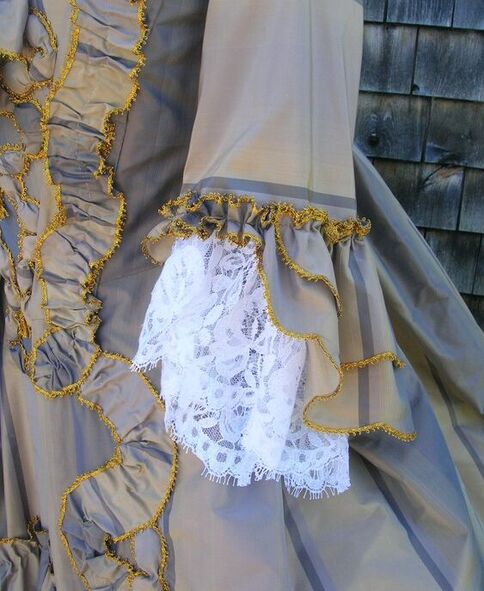
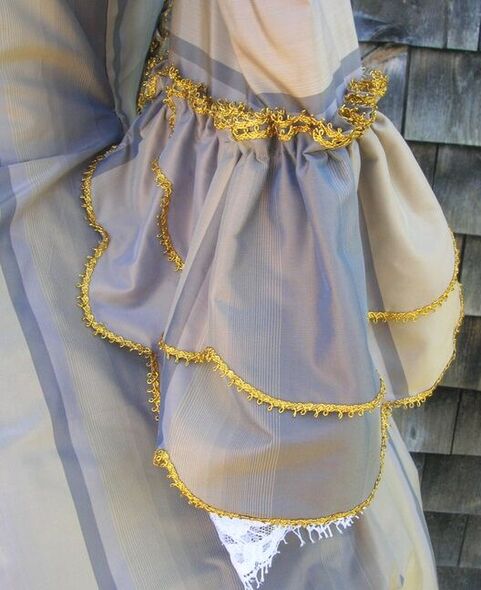
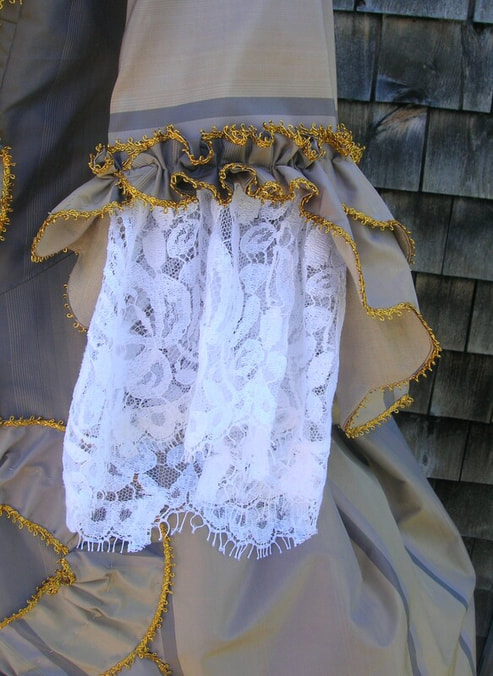
I admit, I'm crazy about sacques! For this second iteration of my design for a ca. 1755 "grand habit" (formal evening gown, in the "robe à la française" or French style) I decided to use a glorious iridescent silk taffeta with a golden ecru ground and variable soft turquoise-teal stripes. The colours are truly luscious!
(Click on "Read More", below right, to continue)
(Click on "Read More", below right, to continue)
This is essentially the same design as the taupe version (see my blog on that one), but with some changes which I felt worked better with the lighter, softer colours of this gown. Like the taupe version, this gown is entirely hand stitched. Well over 200 hours of hand sewing went into its construction and embellishment. The gown with matching petticoat and stomacher required more than 11 metres of silk taffeta, 1.5m of Belgian linen (bodice/sleeve lining), over 50 metres of gold metallic edging, and 4 metres of fine lace (for the engageantes and neck frill).
The ensemble consists of a trained robe à la française (known in English at the time as a "sacque" or "sack" gown, although I can't imagine how the English came up with that ugly word!), with fine net lace engageantes and a vintage cotton net lace neck frill, along with a matching silk taffeta petticoat and lightly boned stomacher. With this version I opted for a light gold metallic trim, rather than the "old gold" colour used on the taupe gown, as I thought the lighter gold was more in keeping with the delicate, pretty colours of the silk.
This ensemble would have been typical of those worn by the upper/aristocratic classes as formal evening dress for balls or soirées (often referred to in French as a "grand habit", meaning "great/grand attire"). However, it is not a "robe de cour" (court gown), which was a more extreme form of dress usually reserved for high occasions at royal courts.
This ensemble would have been typical of those worn by the upper/aristocratic classes as formal evening dress for balls or soirées (often referred to in French as a "grand habit", meaning "great/grand attire"). However, it is not a "robe de cour" (court gown), which was a more extreme form of dress usually reserved for high occasions at royal courts.
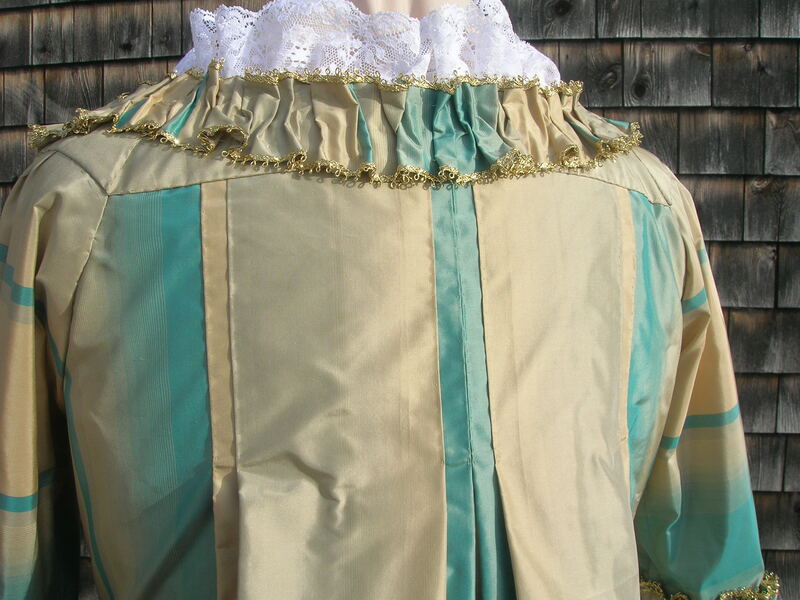
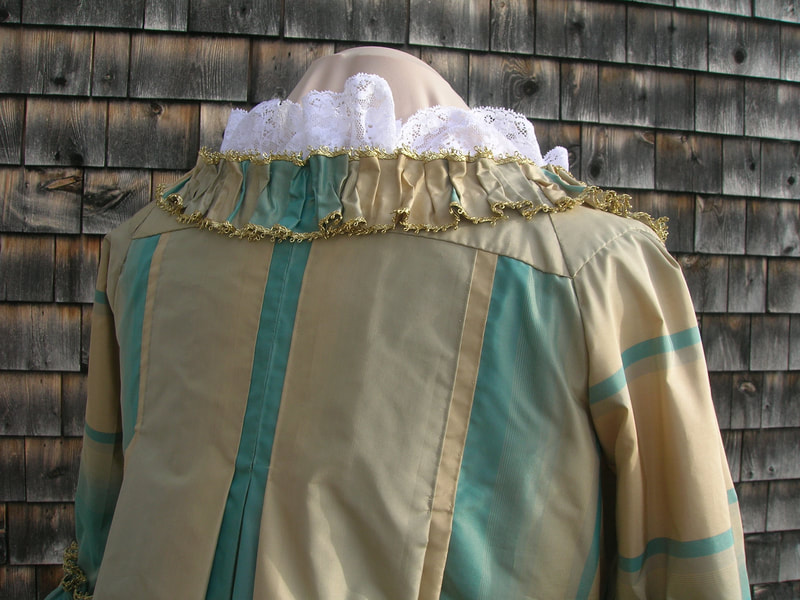
Although I didn't take as many pictures of the construction process on this gown as I would have liked, I did take photos of the finished ensemble in two different outdoor lighting situations, which demonstrate how remarkably different the iridescent taffeta in this gown can look depending on the illumination. I think this gown will sparkle, shimmer, and scintillate in the variable glow of candlelight.
This gown will be offered for sale in my Etsy shop, but I'll be keeping the taupe version -- just in case I do get to Versailles one day! To see the Etsy listing (while available), click on the button below (it will open in a separate window).
Here are a few pictures taken during the construction process, and photos of the completed ensemble, taken in mid-day light as well as in the waning afternoon glow of an autumn day -- notice how the colours in the silk change to reflect the warmer quality of the light.

Three of the "Wandering Interpreters" (including myself, at right) that will be seen around the town this summer. (Photo credit: Town of Annapolis Royal)
It was an honour for me to be asked by the Town of Annapolis Royal to represent our town this summer as a "Wandering Interpreter" and presenter of historic demonstrations. With its rich history and many lovely vistas, Annapolis Royal is a wonderful place to be at any time of year, but especially in summer, with the warm weather, blue skies, and ocean breezes. This year, after two difficult and empty summers due to Covid, it's so terrific to be able to see once again all the lively events and activities this little Town has to offer for visitors and residents alike.
Annapolis Royal is a unique place in all of North America, being the earliest of recorded European landfalls and settlements (the French under Le Mons and Champlain in 1605), and with its official founding as a town and capital of the region under the reign of Queen Anne in 1710.
In a sense, Annapolis Royal is a living museum, with most of its historic houses and other architecture still inhabited and in regular use by owners today. I consider it a privilege to live in this region, and to call Annapolis Royal "my town". I'm delighted to be able to welcome tourists again to enjoy all there is to see and do here.
Here are some examples of the 18th century ensembles you may see me in:
]]>It's hard not to love the graceful beauty of the 18th century robe à la française (often called in English a "sacque" or "sack" gown), with its elegant lines and ability to flatter practically any woman of any age and shape. It's no wonder this style remained in fashion, with a number of variations, for nearly five decades of the 18th century, from the late 1730's to the late 1770's.
For this project, I wanted a silk robe à la française in a more formal style (what in 18th century France might have been termed a "grand habit"), something appropriate for evening wear in an upper class setting: a dinner or evening soirée at a château!
Although 18th century sacques all shared common construction features, what set more formal styles apart were the textiles, the extent and type of surface embellishment, and the size of under-structure worn with it. The pinnacle of formality in sacques were the court gowns ('robes de cour') of the 1760's and 1770's worn over ludicrously wide panniers. This was not the extreme I was looking for, but something "moderately" formal, which relied on a balance of form and embellishment rather than mere outsized grandeur!
Creative Imaginings & Inspiration:
If you regularly do historical sewing, you'll understand this part of the process! Sometimes in initially conceptualizing a project, the final image seems to have great clarity, but at other times it's more nebulous and coalesces out of inspired parts. In this case, the textile intrigued me, and I would say even called to me to give it form -- a length of 140cm (55") wide, iridescent silk, in an "shot" weave, made up of gold and blue threads, which from a distance produced an overall hue of warm taupe. The question was: what form?
All it took to spark the project shown in the finished pictures was just the right 18th century inspiration, which came from an extant formal (but not "court") gown of ca.1750-60, said to be of French origin, currently held in a German museum.
(I believe these photos were posted online by someone who viewed the gown in person, but I unfortunately can't provide photo credits. I'd be happy to do so if anyone recognizes them and can give me details).
(I believe these photos were posted online by someone who viewed the gown in person, but I unfortunately can't provide photo credits. I'd be happy to do so if anyone recognizes them and can give me details).
Calculations:
My first task was to determine how many metres of my silk would be required to create the gown I had in mind. The basic robe à la française is actually an intrinsically simple garment, consisting primarily of vertical panels of fabric pleated and shaped to fit an underbodice (often called "lining") of linen.
My 140cm wide (55") silk was approximately twice the historical 18th century silk width, which made it easy to visualize the entire gown made from just two lengths of full-width silk, with one centre back seam and the front edges along the selvedges. This is the simplest of possible arrangements to create a sacque, relying on the fortuitous width of a modern textile.
My 140cm wide (55") silk was approximately twice the historical 18th century silk width, which made it easy to visualize the entire gown made from just two lengths of full-width silk, with one centre back seam and the front edges along the selvedges. This is the simplest of possible arrangements to create a sacque, relying on the fortuitous width of a modern textile.
Now, I know there are some people who might say that in order to precisely replicate 18th century construction, modern wide silk fabric should be cut in half lengthwise and re-seamed (as if it were an historical narrow textile), or -- perhaps even sillier in my opinion -- "faux" seams should be made down the centre of the entire length of modern fabric, to mimic historical widths.
This seems to me to be rather irrational nonsense, like deliberately building an unnecessary flaw into the process! Personally, I believe the real spirit of 18thC. garment-making was to efficiently maximize the use of available material, and minimize waste wherever possible. I have absolutely no doubt that if an 18thC. maker had had access to fabric 140cm wide, he or she would have used it in the most effective way possible, minimizing unnecessary cutting or seaming.
This seems to me to be rather irrational nonsense, like deliberately building an unnecessary flaw into the process! Personally, I believe the real spirit of 18thC. garment-making was to efficiently maximize the use of available material, and minimize waste wherever possible. I have absolutely no doubt that if an 18thC. maker had had access to fabric 140cm wide, he or she would have used it in the most effective way possible, minimizing unnecessary cutting or seaming.
Now that I've got that pet peeve off my chest (I hope you'll forgive me!), here are the simplified, rough calculations for making my gown and matching stomacher:
- Gown proper: Consists of two 2 metre panels, with the anticipated remnants from the lower front hem to be used for part of the trimmings. For my height, a 2 metre (roughly 2-1/4 yard) back length provides enough for a moderate train and generous hem at bottom and top. So the gown itself (not including embellishment) would require 4 metres (about 4-1/2 yds) of silk.
- Petticoat: I find I can easily get a petticoat out of a 2.4 metre length of 140cm (55") wide fabric -- I simply cut the 2.4m piece in half, creating two 1.2m long sections, and adjust the top to level the petticoat before completing (click on the button below to see my description of this method, included in this blog article).
- Gown Sleeves, Stomacher, and Embellishment: I usually allow about 3/4 metre to cut the sleeves and flounces (in this case a double flounce), plus another 1/2 metre for the stomacher. But I keep every single scrap of silk from cutting the main pieces and trimming off any excess. Nothing gets tossed away. All of these "bits" are used (pieced if necessary) to help reduce the total yardage needed for the embellishment. Because most 18thC. trim is cut across the grain, it's possible to get a lot of trim out of small sections cut off other main pieces, such as each side of the lower front hem of the gown.
- Total Fabric Used: The finished gown (see photos near the end of this article), including all the embellishment shown, required just under 8 metres (about 8-1/2 yards) of 140cm (55") wide silk. This even took into account the fact that I had to carefully arrange the appearance of the sleeves and ruched trim to balance the darker, "ombré" portions of the silk. In the end result, I had no more than a handful of small silk remnants! I was gratified to feel that my efforts would have been in harmony with the spirit of the efficiency and thrift of an 18thC. gown-maker.
If you'd like to delve further into calculating yardage for an 18th century sacque, see my article on the topic here:
Planning the Order of Construction:
This is a crucial step in constructing any garment, but especially important when making historical clothing of any kind. If you've never made an 18thC. gown before, it's a good idea to actually write out the planned steps for making your project. In fact, it's such a good idea that I'd recommend never skipping this step unless you've made several sacques -- it may save you frustration and grief later.
I've made enough sacques to know the order of construction well without making notes, but I still take a few moments to visualize the process before starting. Here are my usual steps, in order, for constructing a robe à la française:
I've made enough sacques to know the order of construction well without making notes, but I still take a few moments to visualize the process before starting. Here are my usual steps, in order, for constructing a robe à la française:
- Ensure there will be enough yardage for my planned gown, plus at least 50cm [about 3/4 yard] to spare, to account for contingencies;
- Cut the bodice "lining" pieces from linen; fit, adjust and complete the lining;
- Cut and sew the petticoat first (but leave embellishment for later);
- If the fabric is wide enough (about 140cm [55"] or more), cut the two long panels required for the body of the gown. Sew the C.B. seam. Narrower fabric may require a different arrangement of panels (see my article on calculating yardage for a sacque linked above).
- If front panels will be needed (for narrower fabric), cut them now and set aside. In most cases, this will mean cutting one approximately 1.8m (2 yard) length of fabric in half lengthwise -- one panel for each side of the gown.
- Whatever remains of your gown yardage can be set aside to add to the total required for a stomacher (if required), and surface embellishment (assuming self-fabric trimmings).
- Drape the seamed back panels onto the back lining and create the back pleats;
- Create and finish the pocket openings. If separate front panels are being used, these are seamed to each back panel, with a pocket opening on each side of the gown.
- The remainder of the work consists of draping the bodice to fit the linen lining, and finishing the gown's front edges, and hem. Any remnants cut away from creating the final shape of the hemline are saved for trimming.
- The sleeves (and shoulder/upper back finishing strips) are next. The sleeves of course are constructed separately and mounted as finished pieces.
- Now all the trim and furbelows are added to the gown itself.
- Next is usually the stomacher, although I like to have a simple "mock-up" made from inexpensive fabric to stand in for the real thing so that I can properly adjust the gown's front edges and see the effect as a whole.
- The final element is the embellishment of the petticoat. I do this as the last step so that I can balance the surface decoration of the petticoat with that of the gown, thus avoiding having a petticoat that either steals all the attention or appears under-trimmed.
Foundation First!
Every 18th century gown I make starts with a carefully fitted linen foundation. Many texts will refer to this as a "lining", but this is really a misnomer, as a "lining" is usually something that provides a smooth inner surface for a garment. In a very real sense, an 18th century lining is the structure, and the outer garment is the smooth surface application. So I prefer to think of an 18th century lining as a foundation, a basic understructure perfectly fitted to the wearer's body, to which everything else is then attached.
If you understand the concept of a foundation, you'll be leaps and bounds ahead in terms of designing and constructing your 18thC. gowns. Envisage the foundation as a scaffold on which the outer (visible) garment is built, layer by layer. The beautiful thing about a well-fitted foundation is that everything else mounted onto it will fit you! This frees you from the necessity of separately fitting and altering the "fashion" layers of the garment, and allows you to use your creativity in shaping the final garment. This, in my view, is why patterns for sacque gowns may be more difficult to work with to obtain a perfect fit than simply fitting the fabric to the person (or to a mannequin).
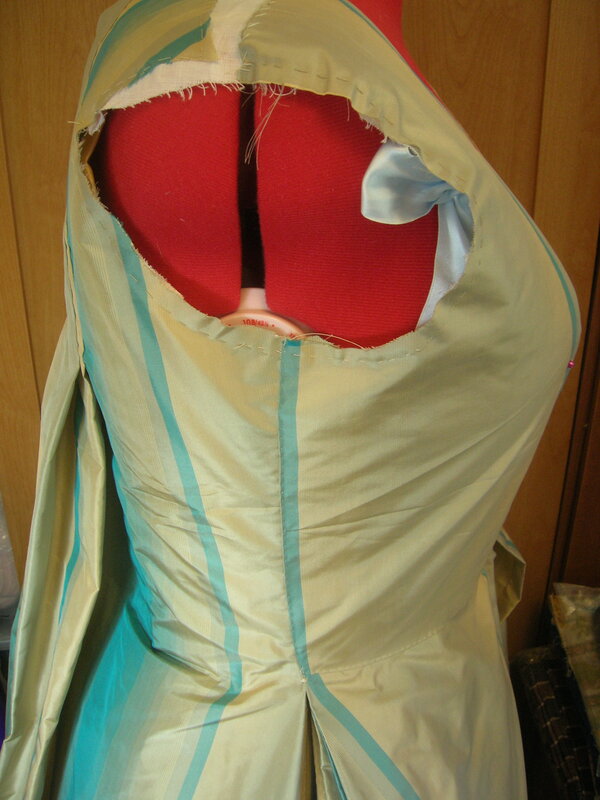
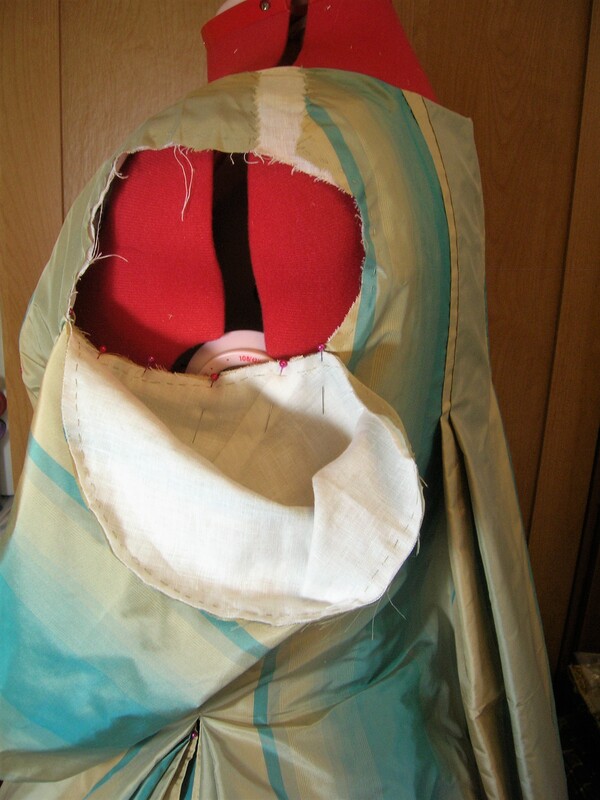
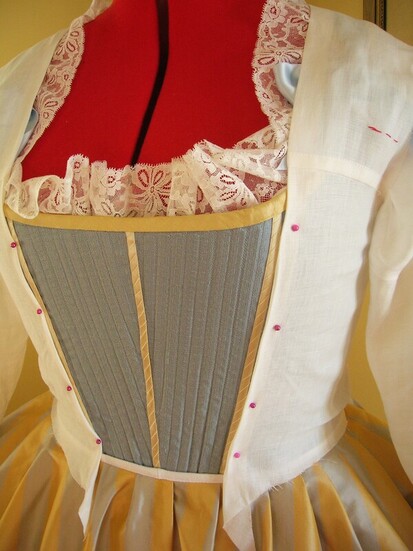
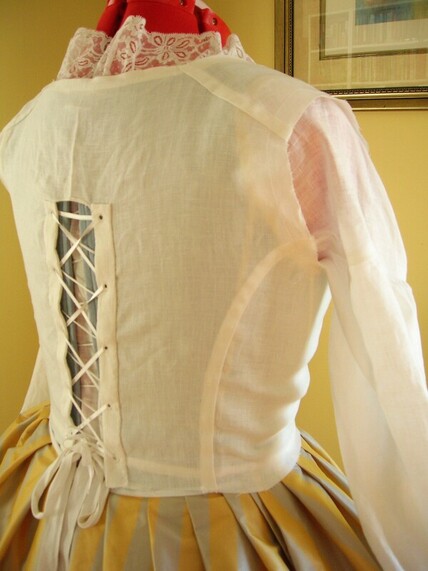
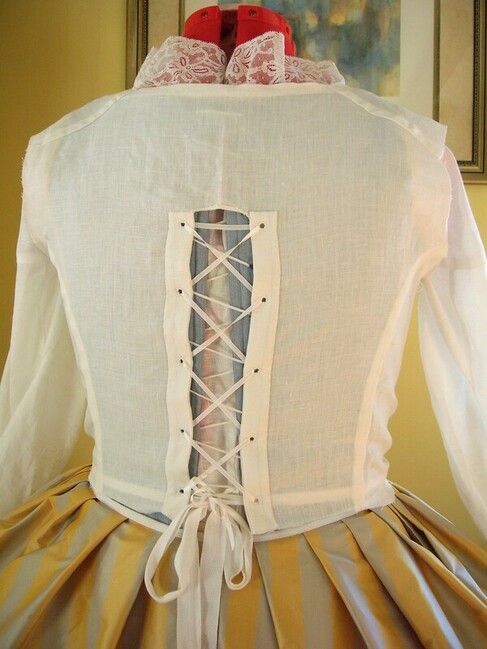
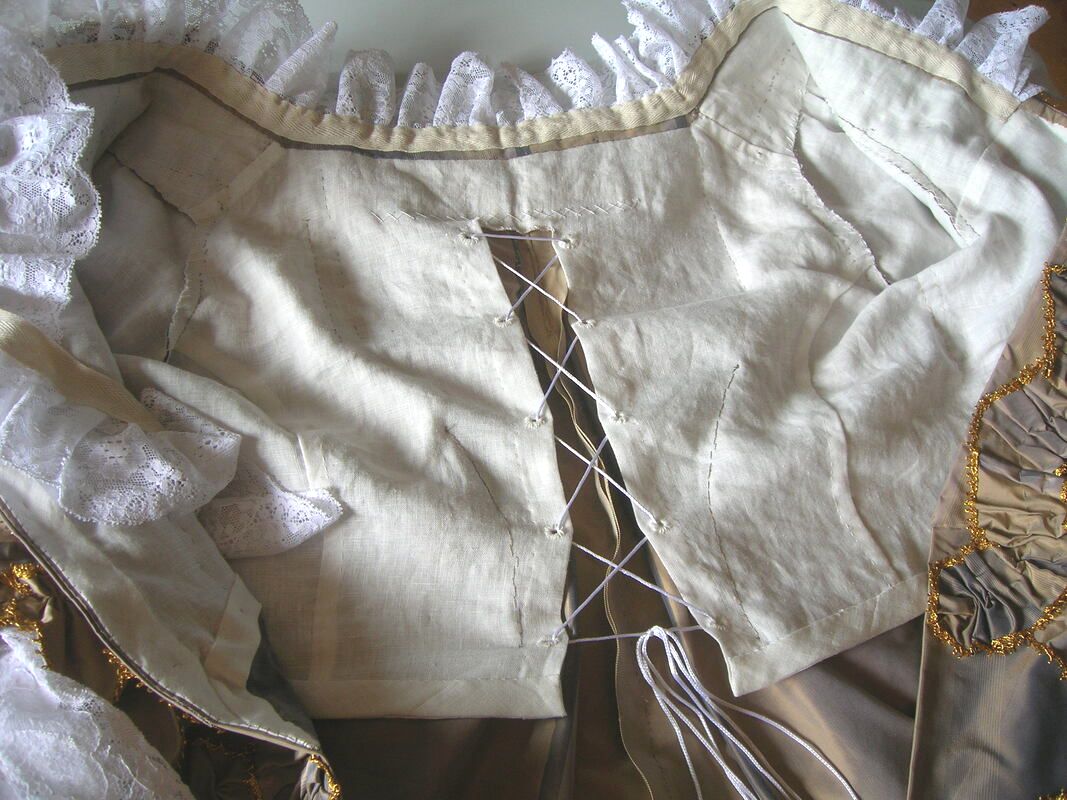
The photos below show some aspects of the construction and fitting of a foundation for a gown of this type. You'll notice the open centre back laced panel -- this is something I always include in my sacque gowns, as it makes the finished gown easy to adjust for any slight weight gain or loss. This clever 18th century feature is unfortunately not possible for later centre-front closing English gowns, which must be accurately (and closely) fitted to the wearer's body size both at back and front.
When creating a foundation, never hesitate to take in, let out, move or otherwise re-make seams, creating fitting darts in place (known as "fish" in 18thC. parlance), or even re-cut the foundation to a different shape or size.
While we're on the subject -- why use linen for an 18thC. gown foundation? Well, for one thing, it's the textile that was historically used (at least up until the 1790's) for gown foundations, partly because it was a sturdy choice for the structural portion of a garment and much less expensive than silk, but also no doubt because it was understood to be breathable and comfortable as an interior layer. In addition, it protected the expensive gown fabric from direct contact with the body. There really is nothing to match linen for comfort, especially in warm weather. Even cotton will absorb and release less moisture and heat (and cotton in any case would rarely have been used for utilitarian purposes prior to about the 1780's).
(Note: I do plan over the next few months to create a series of video tutorials on the process of making and fitting an 18thC. foundation -- watch for it on this site!).
Draping & Shaping:
I always find this part of the process the most satisfying -- and most anticipated -- step in creating a robe à la française, because this is when I begin to see the final shape of the gown take form.
As with every sacque gown I've made, I start with the back panel. I like to do some initial folding, then I stand back and make sure that I'm happy with the width and arrangement of the pleats, and the way the textile falls.
In the case of this fabric, with its uneven pattern of wide and narrow stripes, I needed to do some trial-and-error folding to get an attractive result that mirrored the striping on both sides of centre back. I then removed the panel temporarily from the foundation and secured the pleats with tiny prick-stitches, to within about 12.5cm (5") of the top edge.
In the case of this fabric, with its uneven pattern of wide and narrow stripes, I needed to do some trial-and-error folding to get an attractive result that mirrored the striping on both sides of centre back. I then removed the panel temporarily from the foundation and secured the pleats with tiny prick-stitches, to within about 12.5cm (5") of the top edge.
Once the pleats are secured, the back panel can be pinned and basted onto the back of the foundation, leaving an allowance of about 6.0 to 7.0cm (2-1/4 to 2-3/4") along the top for turning over to the inside, trimming, and basting down along the back neckline of the foundation.
The next step is to create the pocket openings. In this case, since I was using the entire width of my modern 140cm wide silk for each side of the body, the only selvedges were at C.B. and C.F.
Accordingly, the fabric was next draped around the torso area (to be certain of the placement of the pocket openings) and a vertical cut made from the underarm to just above waist level to shape the fabric to what will be the side seam (leaving a generous allowance on each side). The front and back areas of the fabric are brought together and pleated at the sides so that pocket placement can be determined.
A careful cut is then made into the fabric at what would normally be the skirt side seam, about 20cm (8") straight down from waist level, to create the pocket opening on each side of the body. There is usually enough fabric on each side of the cut to allow for at least two moderately-sized pleats (for wearing ease, and to fit over the shape of the hoop-skirt at the sides).
This may all sound very complicated, but actually it's just a matter of pleating up the fabric to fit over the hoop skirt or paniers at the sides, making sure enough width is left to go across the front of the torso to the edge of where the stomacher will be (leaving an allowance for finishing along the gown's front edge).
For the pocket openings, I like to turn the edges to the wrong side twice to create a very narrow hem (which is then prick-stitched into place), tapering the turned edges to the bottom point of the cut. I always add reinforcing whip-stitches at the very bottom and a reinforcing bar tack at top, especially if there are no fabric selvedges (see photo above).
From there, it's a matter of smoothing the front portion of the fabric over the foundation and along the side, then trimming away the excess fabric (usually these remnants are enough to make the shoulder and upper back finishing strips), neatly folding the edge of the front part of the fabric panel under so that it overlaps the back to create a side seam, and hand-sewing the seam in place through the foundation with prick-stitches.
The sleeves and their flounces are constructed separately (which is why the bodice foundation has no sleeves). The sleeves are then mounted by hand into the armscyes and the finishing strip (shoulder strap) is sewn into place, preceded by the upper back finishing strip if needed. See the following section for more details on that part of the construction.
During all of this process, never discard any remnants -- they can almost all be used for some part of the trimming!
Flouncing Around
My usual practice is to prepare the sleeves of a gown completely separately, then mount them into the gown. Normally this also involves designing, cutting and adding any flounces, cuffs or other trimming. In the case of this particular gown, I finished and mounted the sleeves first, then added the flounces. Either procedure will work, but adding the flounces after the sleeves are mounted does allow the maker to better judge how to arrange the flounces, and whether they need to be altered or adjusted in size.
I won't go into the process of cutting and constructing the sleeves (since I've dealt with this in detail in other blogs), but I'll add notes here on the decorative flounces.
I won't go into the process of cutting and constructing the sleeves (since I've dealt with this in detail in other blogs), but I'll add notes here on the decorative flounces.
I spent some time studying close-up photographs of a number of extant gowns with sleeve flounces before deciding on a final design.
Considering that the flounces on my sleeves would need to support fairly heavy metallic trim, I decided a double flounce was sufficient, but that each need to be lined to prevent them from buckling into a flat shape from the weight of their trim when worn. Accordingly, I lined each one with a fine, lightweight mushroom-coloured linen, all applied by hand. This lining addition is seen in some extant mid-18th century gowns, such as the one below (you can just see the edge of the lining sewn to the flounce along the left). From Whitaker Auctions catalogue, date unknown.
Considering that the flounces on my sleeves would need to support fairly heavy metallic trim, I decided a double flounce was sufficient, but that each need to be lined to prevent them from buckling into a flat shape from the weight of their trim when worn. Accordingly, I lined each one with a fine, lightweight mushroom-coloured linen, all applied by hand. This lining addition is seen in some extant mid-18th century gowns, such as the one below (you can just see the edge of the lining sewn to the flounce along the left). From Whitaker Auctions catalogue, date unknown.
First I should mention that it seemed to take me forever to decide on the colour of the metallic trim for this gown! I originally wanted to use silver, but a test on some ruching was the end of that idea (too dull for the colour of the silk). I then decided to try using some light gold coloured metallic trim I had available, but -- alas! -- I had nowhere near the roughly 30 to 40 metres I'd calculated I would need.
Hence the "old gold" coloured metallic trim you see in the photos, of which I had a whole lot available, actually over 60m., which meant I could be as lavish with decoration as I wished. It took me a while to adjust to what I initially felt was the wrong metallic tone, but ultimately, as a whole, it turned out to be a good foil for the restrained colouring of the silk.
Once I'd finally decided on the edging trim, I could launch into the real fun of the project.
The bottom edges of the sleeves were finished by turning sleeve and lining in onto each other and securing by hand (using a "point à rabattre sous la main", or underhand hemming stitch). I applied the metallic trim to all outside edges of the flounces, then ruched the top edge (including the narrow band along the front of the bottom flounce) to fit the bottom of the sleeve. The flounces were then securely tacked onto the sleeve bottom. (The following photos show the finished result).
The engageantes seen in the photos were made from a high quality vintage French cotton lace I had purchased years ago, which reasonably mimicked the look of antique Belgian needle lace. These were added at the very end, once the gown was completed. Each engageante was cut in a semi-circular shape, gathered at the top and simply sewn onto a length of twill tape (which was then tacked to the inside of the sleeve). The same was done with the neck frill (filler).
All the Pretty Additions:
1. Serpentine Ruching on the Gown Front:
For the ruching (meandering serpentine bands on the bodice, and on the gown front edges), there were two separate procedures. First, I designed the ruching to go around the bodice edges so that it would be a consistent width (allowing for a roughly 1.5 gathering ratio, a 1.0cm finishing hem along each lengthwise edge, and some additional length to allow for the meanders). I pieced the strip where necessary.
The finished width needed to be visually appealing, but not so wide that it overwhelmed the bodice, nor so narrow that it looked insignificant from any distance. This is strictly a matter of applying an artistic eye for balance, not mathematics, so is entirely at the maker's discretion. After some "experiments", I decided that a 5.0cm (2") finished width would be about right.
As with all the other ruched trim on this gown, I turned the two long edges to the wrong side by about 1.0cm (3/8"), and loosely hemstitched them in place (being sure to take just a tiny "nip" of fabric from the right side so as to make the hemming inconspicuous). I then applied the gold metallic edging with a modified prick stitch (essentially an uneven running stitch with the occasional diagonal tacking stitch for reinforcement).
Next I ran a long running stitch down the centre of the strip, pulled up the gathers evenly, and arranged the ruched strip around the neckline of the bodice. The final step was to tack each long edge into place onto the bodice, using a running stitch with very short stitches on the surface, but longer ones on the wrong side.
Here I want to point out that the very best thread to use for this type of application is, in my experience, Tire #50 pure silk. It comes in a vast array of colours, is surprisingly strong, and practically disappears into silk fabric. There is really nothing to surpass it for fine hand sewing on surfaces of silk textiles!
Gown (Skirt) Embellishment: For the gown (skirt) front edges, I calculated the total length I'd need and how much graduated width I wanted from top to bottom (taking into account a gathering ratio of about 1:5, and adding sufficient extra length for the serpentine arrangement). I added 2cm to the calculated width of each strip, and cut each one out with pinking shears along the lengthwise edges (I had to do some lengthwise piecing, but this was easily hidden later, in the ruching folds).
The biggest challenge where this embellishment was concerned was to ensure that the wide, darker (ombré) bands of the taffeta's stripe pattern were arranged evenly on each side -- I didn't want a patchwork quilt look, but a visually symmetrical arrangement of colour and stripes on each side of the gown. That took some forethought! But I think I succeeded nicely (see photos below) -- and without having to re-cut anything. Where trimming an 18thC. replica gown is concerned, planning is always better than unpicking and re-doing!
All of this trimming involved one or two preparatory "test runs" with short trial sections to be sure my calculations were fairly accurate, although in the end the trimming on a sacque must look artistically balanced and attractive from a short distance away, not be driven primarily by mathematical measurements.
I then turned the long, pinked edges of each flat band under by 1cm and loosely hand-hemmed them onto the wrong side of each band. Next I carefully stitched the gold edging on by hand all along each finished edge.
Once that was done, I ran a long line of hand gathering stitches (in matching silk thread) down the lengthwise centre of each band and very loosely pulled up the ruching. I then pinned one ruched band onto side onto the gown, manipulating the gathers as I went.
The last step was to carefully hand stitch the band onto the gown from the outside, close to each long edge of the ruched band. I then repeated the process on the other side of the gown, matching up the ruching so the wide, darker coloured "ombré" sections were parallel to each other -- which was the biggest challenge!
The puffed trimmings were done quite differently (see the next section).
The puffed trimmings were done quite differently (see the next section).
2. Puffed Trim:
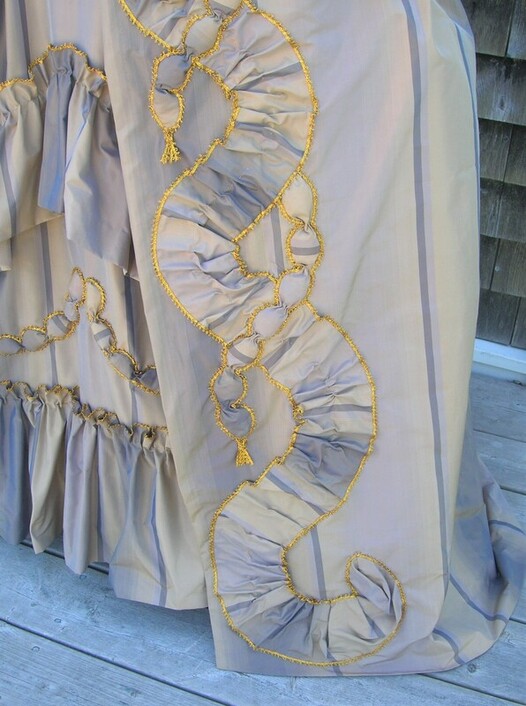
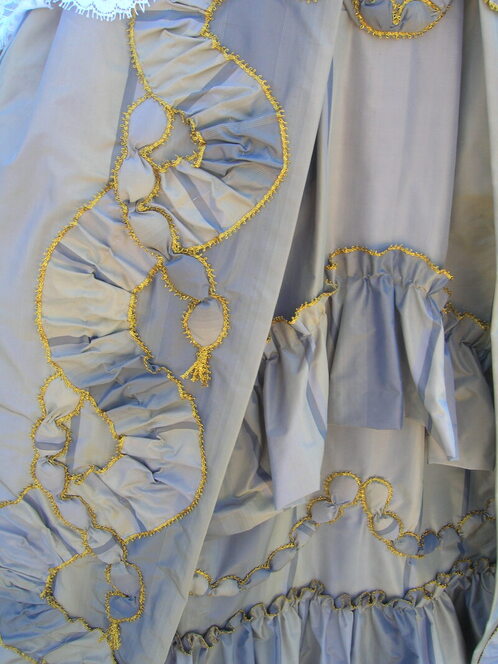
On the extant ca.1750 gown from which I was designing my replica, the puffings were applied in three separate places: (1) as sort of trompe l'oeil meanders intertwined with the wide ruching on the gown skirts; (2) as a swag on the petticoat; and (3) on the stomacher.
There were a few documented sources I was able to draw on in order to re-create this type of trim (including some very helpful close-up photos of extant gowns), but I had never been able to personally examine a gown with this type of embellishment. Ultimately, through a few trials and errors, I worked out a reasonable solution to reproduce the effect as accurately as possible.
There were a few documented sources I was able to draw on in order to re-create this type of trim (including some very helpful close-up photos of extant gowns), but I had never been able to personally examine a gown with this type of embellishment. Ultimately, through a few trials and errors, I worked out a reasonable solution to reproduce the effect as accurately as possible.
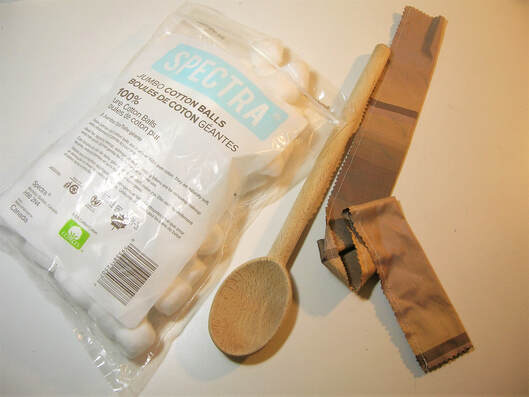
Although I was aware of some descriptions by historians of these puffed decorations being filled with wool batting, I was unwilling to wait a month or more to have an online order of wool batting delivered. As an alternative, I decided that ordinary cotton balls would work just as well!
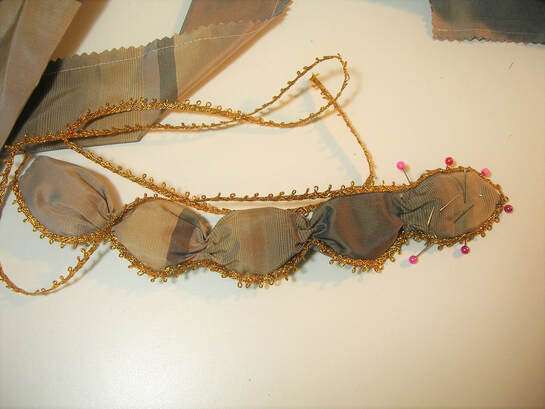
I couldn't recall ever coming across an explanation of precisely how these "puffings" were constructed in the 18thC. -- short of tearing the trim off an 18thC. gown to prove how it was made, I can't imagine how their construction could be determined. In the end, I found that the most maneuverable and reasonable method was to create a narrow "tube" for each length of trim, then stuff each segment with cotton wool (using a large, long, fat wooden spoon), closing the end of the segment by "pinching" the tube with a few stitches, and then going on to the next segment.
Once each length of "puffings" was complete, I hand sewed the gold trim onto all the outside edges. I had experimented with sewing the gold trim on before stuffing the sections, but this tended to create a bit of an untidy final product, and made it very difficult to control the shape while stuffing the segments.
I suspect that on some 18thC. gowns with larger scale "puffings", this type of embellishment may have been created and applied differently than my method, i.e. by means of a single, flat band of fabric (perhaps with trim already applied), manipulated into puffed segments as the maker worked, stuffing each one separately, turning the edges under and stitching them down onto the gown. However, for the size and shape of the puffed trim on my gown, this might well have been an almost impossible task!
In the end, I was fairly pleased with the result. I followed the pattern of puffed trim seen on the extant gown and petticoat, including the intriguing trompe l'oeil serpentine puffings on the front edges of the gown:
3. A Matching Stomacher:
The stomacher was made of an outer layer of silk taffeta to match the gown, with inner layers of buckram and tan coloured mid-weight linen, and lightweight tan linen lining on the side that would be placed against the body. The stomacher was boned (between the buckram and inside linen layers) with 4 long, evenly-spaced bones to give the piece strength and rigidity. I used the same method of creating puffs to embellish the outside of the stomacher as I had used for the gown itself.
Although I ultimately created a design on the stomacher that was somewhat different from that of the 18th century original, like an 18th century maker I tried to keep it in harmony with the rest of the gown.
4. Tiny Tassels:
It took some careful observation on my part to notice that the extant gown which formed the basis for my design had little tassels added here and there in strategic places on the gown, much like decorative punctuation marks!
After some fun experimentation with my metallic trim, I managed to fashion little 3cm long tassels that looked much like the 18th century originals, and positioned them on the gown in a similar way. I also felt they might look good on the stomacher, so I added one in each of the open spots on the stomacher surface (see photo above).
Final Touches:
One final step, after completing the hem of the gown, was the addition of a hem facing. I add a hem facing to all my silk gowns (especially those with a train), mainly to protect the underside of the fabric from soiling and wear, but also to provide extra loft and body to the gown's hemline.
My usual method is to make the front portions of the facing by piecing any scraps of gown fabric I may have left, and the rest of the facing from a plain, less expensive silk or fine cotton. This way, the inside front facings will not be conspicuous if the front edges open out slightly when walking or sitting.
Generally I make the facings at least 10cm (4") deep, to ensure the lower edges of the skirt are well protected. Depending on the shape of the hemline, the facing may need to be either cut to the shape of the lower edge, or shaped with tucks to fit.
Generally I make the facings at least 10cm (4") deep, to ensure the lower edges of the skirt are well protected. Depending on the shape of the hemline, the facing may need to be either cut to the shape of the lower edge, or shaped with tucks to fit.
Normally I turn the bottom edge of the facing in, placing the finished edge just barely above the gown's hem. I then loosely slip-stitch the bottom edge of the facing onto the gown's hem allowance. Since the whole purpose of the facing is to be replaced if necessary, the application stitching shouldn't be made so that's too difficult to remove -- fairly long, loose stitches are best.
If the gown silk is very lightweight, I simply cut the top edge of the facing with pinking shears (to prevent fraying), then loosely hem-stitch it in place, taking very tiny "pecks" into the skirt fabric with my sewing needle, to avoid too many visible stitches on the outside. For a more substantial silk, which was the case with this gown in quite a sturdy taffeta, I usually turn the top edge in slightly, then stitch.
Choosing a fabric to make the plain portion of the facing is important. A lightweight textile with a smooth surface, close weave and slightly crisp hand is best (it should in any case be lighter in weight than the gown fabric, but not too stiff). China silk, fine silk broadcloth or taffeta, lightweight low-slub silk shantung, lightweight silky cotton percale or fine pima cotton shirting, are all good choices.
On wool gowns, linen can be used as a facing, but its rather rough texture may pick up more dirt than a smooth silky fabric, which will glide over rough or uneven patches of ground. A lightweight fabric won't pull down on the gown skirts, putting pressure on the attachment stitching (which could create tearing in the gown skirts). To attach the facing, use a thread that is equal in strength to, or weaker than the facing fabric: very fine silk or cotton thread works best on most facings.
On wool gowns, linen can be used as a facing, but its rather rough texture may pick up more dirt than a smooth silky fabric, which will glide over rough or uneven patches of ground. A lightweight fabric won't pull down on the gown skirts, putting pressure on the attachment stitching (which could create tearing in the gown skirts). To attach the facing, use a thread that is equal in strength to, or weaker than the facing fabric: very fine silk or cotton thread works best on most facings.
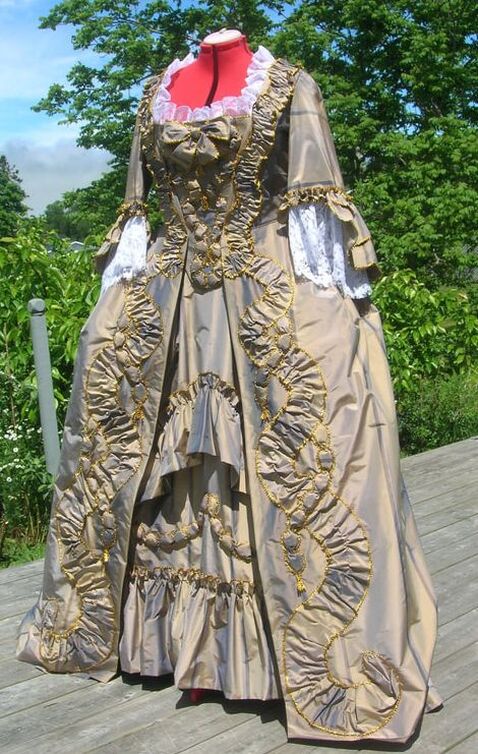
And so my formal gown was completed, with all the style points of a fashionable ca.1755-60 silk sacque. What I didn't expect, when I placed the gown in full outdoor sunshine to take additional photos (all the photos so far were taken in the shade), was that the effect of sunlight on the iridescent, shot taffeta, and on all the gold trim, would be practically blinding. Actually, this gown is not at all attractive in full sunlight, frankly I found it rather off-putting. There is just too much garish glinting and sparkling to assault the eye all at once -- in fact, the camera didn't really even capture the full effect! As the photo below will attest, bright sunlight provides anything but a subtle effect!
However, dressy gowns of this type, made of taffeta, with metallic silver or gold trim everywhere, were never intended to be worn outdoors during the day, but were always meant to be seen in evening lighting. And not just modern evening lighting of course, but flickering candlelight, which would pick up occasional lovely glints of reflection, hinting at the wearer's social status and the total luxe of her gown.
In the end, my purpose in making this replica was not primarily to wear it to a specific event (although I hope some day to have an opportunity to wear it in the type of candlelit setting for which it was designed), but rather to enjoy the journey of designing and making an authentically replicated 18th century gown.
I realize it's probably clear that much more was involved in the hand sewing and embellishment work than might be obvious from the photos of the finished garment or my brief descriptions. All in all, over 100 hours of handwork was involved in re-creating this replica gown. Whether I'll be able to enjoy wearing it, or decide to offer it for sale remains to be seen.
Still, I find the experience of creating these pieces is always worthwhile -- and extremely satisfying. It gives me a deep, close-up, and very unique personal appreciation of the skill and craftsmanship of 18thC. gown makers, and respect for the wonderful understanding they had of fitting garments to the human body. All of which is why I love trying to "follow in their shoes"!
Still, I find the experience of creating these pieces is always worthwhile -- and extremely satisfying. It gives me a deep, close-up, and very unique personal appreciation of the skill and craftsmanship of 18thC. gown makers, and respect for the wonderful understanding they had of fitting garments to the human body. All of which is why I love trying to "follow in their shoes"!
A surprising postscript...
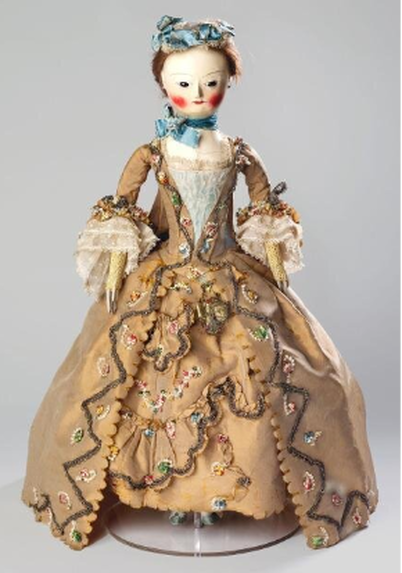
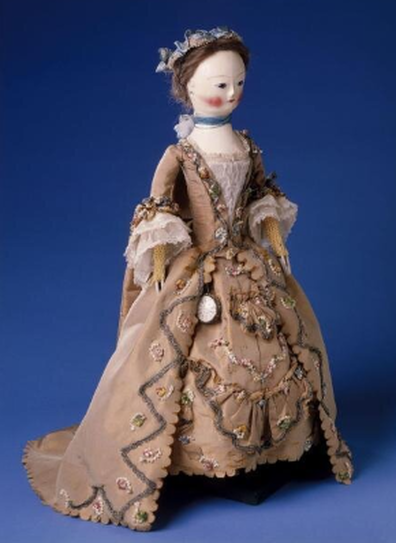
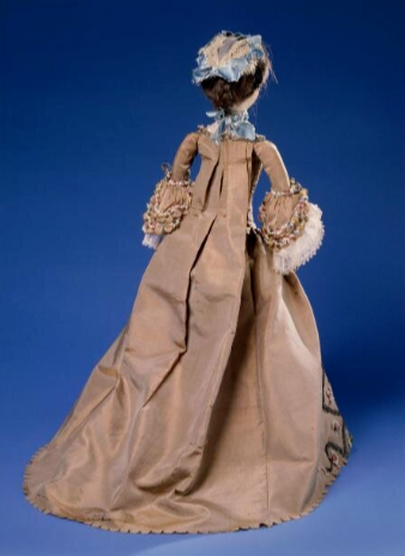
After making this taupe silk taffeta gown, I happened upon a startlingly similar design, in a very similar hue, from about 1750 in the collection of the V&A (Victoria & Albert) Museum.
This doppelgänger, as it happens, is a doll, not a child's toy, but probably one of the many exquisite little ladies used in the 18th century to showcase the latest in (usually) French style, complete with all the undergarments and accessories. Despite ongoing wars between France and England throughout the 18th century, fashion dolls never failed to make their way to prospective customers, or dressmakers eager to see the newest styles from Paris. It's quite possible, given that this particular doll was so well and lovingly preserved for over 270 years, that (as the V&A suggests) this may have been a design for a wedding gown.
Nothing, it seems, ever stops the fashion parade!
I like to imagine that my ca.1750 silk taffeta gown would meet with 18thC. fashion approval!
]]>If one element of women's fashion defined formal daytime elegance during the Edwardian era, it was the high, fitted, boned collar. Unlike their rigid, often plain, Victorian predecessors, the Edwardian boned collar was usually a thing of delicacy and charm, made of fine materials such as lace, chiffon, silk net, or lightweight linen, boned in narrow whalebone, featherbone, or (later) fine zig-zag wires. I've seen all these types in both museum examples and in pieces in my own collection of antique garments, although I have not seen steel bones of any kind used in Edwardian collars.
Being able to construct one of these iconic period collars is a key part of creating an ensemble that reflects the time period accurately. I see many sewists struggling with this aspect of historical construction, and am hoping my insight and experience can help! (Please click on "Read More" at right, to see the full tutorial)
First, a little background.
This type of lovely, delicate boned collar began to appear toward the very end of the 1890's, but really came into high fashion after about 1901, when lighter, more softly draping materials became the norm in daytime dresses and blouses. Virtually all dresses and blouses worn during the day had a high boned collar. Open necklines were considered only appropriate for evening wear during the early Edwardian years (although this changed later on).
This type of lovely, delicate boned collar began to appear toward the very end of the 1890's, but really came into high fashion after about 1901, when lighter, more softly draping materials became the norm in daytime dresses and blouses. Virtually all dresses and blouses worn during the day had a high boned collar. Open necklines were considered only appropriate for evening wear during the early Edwardian years (although this changed later on).
As the decade progressed, the boned high collar was everywhere, including on the better quality "lingerie" blouses. From about 1906 to 1912, boned collars on day gowns or silk or wool blouses tended to be made of the most delicate materials possible: silk chiffon, lightweight lace, and fine silk net being especially favoured, often with horizontal pleating, insertion lace, and a frill of lace along the top. Many of these collars were small works of art in themselves.
Around 1910, and throughout 1911 and 1912, open (collarless) necklines began to become accepted as appropriate on many daytime dresses and blouses, especially for summer wear. Boning was also frequently omitted on less formal linen or cotton summer blouses or dresses that did have high collars. Generally though, a high boned collar would still be part of a more dressy or formal blouse or day gown, especially those made of silk or wool.
Somewhere around 1913, open necklines (that is high, round or squared necklines) began to be more common for daytime wear than necklines with high boned collars, and even open "V" necklines became acceptable. By the WWI period the delicate lace, net or chiffon high boned, closely-fitting collar more or less disappeared from fashion, replaced by the Medici-style collar or sailor collar with an open V-neck. Fashion presumably recognized that, given new freedoms out of necessity during WWI, women liked the more comfortable styles and no longer wanted to be the tightly-bound, restricted creatures they had been previously, always requiring someone else to dress them.
Yet the high, boned, fitted collars of the Edwardian era had their charms, certainly not the least of which was their ability to set off and enhance a face framed by a magnificent hat. In this, these collars had much in common with the Elizabethan ruffs of the late 1500's and early 1600's, or the handkerchiefs and fichus of the 18th century.
Constructing a Classic Edwardian Boned Collar.
Making a classic Edwardian boned collar is essentially a matter of layers. In most original Edwardian collars (for example, those made of net or lace), the boning was "sandwiched" between fine layers of chiffon, net or silk, partly to prevent the bones from being too visible from the outside, and partly to provide a soft layer of chiffon against the neck, rather than having the skin in direct contact with the bones or boning tapes.
Making a classic Edwardian boned collar is essentially a matter of layers. In most original Edwardian collars (for example, those made of net or lace), the boning was "sandwiched" between fine layers of chiffon, net or silk, partly to prevent the bones from being too visible from the outside, and partly to provide a soft layer of chiffon against the neck, rather than having the skin in direct contact with the bones or boning tapes.
In some later garments (towards 1908 and onward), zig-zag wires rather than boning was used as stiffening, inserted into channels made from sheer chiffon, net or silk, or else directly whip-stitched loosely into place. Often these wires were sold pre-wrapped in silk floss or thread to soften their surfaces and prevent direct contact with textiles or skin.
Either type of stiffening method can be used today (the spiral wires can still be purchased, or made by hand from non-rusting fine wire). However, I find that narrow plastic boning is simplest to work with and does a fine job of replicating the antique type.
Either type of stiffening method can be used today (the spiral wires can still be purchased, or made by hand from non-rusting fine wire). However, I find that narrow plastic boning is simplest to work with and does a fine job of replicating the antique type.
The following steps set out a technique modified for modern use which I've developed from many years of studying extant Edwardian garments and constructing replicas. This "sandwich" method can be used with virtually any combination of typical Edwardian/1910's delicate fabrics, such as a lace or net collar with chiffon or organza inner layers, either with boning or wire stiffeners.
I prefer using silk organza for the inner collar layers, as it is lightweight and sheer yet strong, providing additional support throughout the collar. Silk chiffon or a fine net can be used for the two inner layers instead, although these will be somewhat more demanding to work with.
The reason for two inner layers is that one is used to hold the boning, but with its good side lying smoothly against the collar's fashion fabric, and the second layer provides extra inner support for the collar. The second layer can be omitted if you wish, especially if you are making a collar out of very fine, sheer fabric such as chiffon, where the weight of an extra layer might actually make it more difficult to keep the collar staying upright when worn.
The example shown in the photo tutorial that follows here is a boned linen collar, with two inner support layers of organza (one of which -- the one closest to the outside layer of the collar -- is boned). The collar lining in this example, which is the layer next to the neck when worn, is of fine handkerchief linen, but for a lace or net collar might be made of China silk or chiffon. The collar shown forms part of a 1912 dress available as History House pattern #1912-A-016, which can be purchased at the link below.
The first step in making a boned Edwardian collar is to decide on the type and width of boning to use. I like to start with 7mm wide German Plastic Boning (the type with visible ridges -- see photo below), and cut about a 20cm (8") long piece. Then I carefully cut the piece lengthwise between the ridges, to create two very narrow 20cm (8") lengths of boning about the width of the historical fine whalebone used in collars of the era.
If you can't obtain German Plastic Boning, then "synthetic" or "faux" whalebone (a plain plastic boning) will do, but may be a little more difficult to cut into narrow lengthwise strips. In that case, I'd advise buying the narrowest width you can find, which is usually 5mm. A 7mm width will work, but will make your collar stiffer.
If you can't obtain German Plastic Boning, then "synthetic" or "faux" whalebone (a plain plastic boning) will do, but may be a little more difficult to cut into narrow lengthwise strips. In that case, I'd advise buying the narrowest width you can find, which is usually 5mm. A 7mm width will work, but will make your collar stiffer.
For the average boned collar, you'll need six 5cm (2") long pieces of boning. If you plan to bone the two back edges of the collar, you'll need 2 more bones. Instead of boning, you can make your own "zig-zag wire" collar stiffeners, although this requires more effort and time. Cut fine rust-free steel wire into approximately 8.0cm (3") lengths, then with pliers bend each along its length to create wave-like shapes, forming a narrow band (no wider than about 1.0cm [3/8"]).
The photos below show a sample of a modern purchased "zig-zag wire" that has been cut to the desired length for use and one end bent in already. It is essentially the same as the collar wires sold in the 1910's. I like to use these wires on collars made of the finest, sheerest materials, as they are less visible from the outside than the synthetic boning. Be careful to bend in each end of the wire tightly with pliers to prevent it poking through into your neck once it's in the collar!
The photos below show a sample of a modern purchased "zig-zag wire" that has been cut to the desired length for use and one end bent in already. It is essentially the same as the collar wires sold in the 1910's. I like to use these wires on collars made of the finest, sheerest materials, as they are less visible from the outside than the synthetic boning. Be careful to bend in each end of the wire tightly with pliers to prevent it poking through into your neck once it's in the collar!
Another option would be to make your own featherbone (assuming you have access to natural feathers with quills of the right type and width). If you make your own featherbone, you'll need to be prepared to do some experimenting to get the proper "spring" vs. stiffness and strength. Frankly, there is little advantage to using featherbone over finely cut German Plastic boning.
Once you've cut and prepared your boning (or zig-zag wires), the next step is to cut all the layers you'll need to create your collar. In the following photos, for this linen collar, I've cut one layer of dress-weight (fashion fabric) linen, two layers of silk organza (which will be the inner layers of the "sandwich"), and one layer of lining fabric (in this case I used fine, lightweight handkerchief linen, but China silk, lightweight taffeta, silk satin, or cotton batiste would also work well).
Take one of the organza collar sections and lay it on a flat surface. Mark with pins or fade-fast marker your desired bone positions. This is largely a matter of personal preference, but the pattern of boning shown below is typical of an early 1910's boned collar -- one on each side of centre front, one on each side of the neck, and one on each side (but not too close to) of what will be the centre back of the gown or blouse. Remember that you will need to leave sufficient allowance at each end for finishing and about a 4.0cm (1-1/2") overlap for closure.
If desired, you can also cut two bones to be used to stiffen the two back ends of the collar. I find this is generally unnecessary unless I'm constructing a collar of chiffon, net, or fine lace, in which case the two back bones will help to support the centre back closures and keep the collar upright at the back.
Next, cut your boning tapes: I like to use bias-cut strips of silk organza about 3.5cm (1-1/4") wide, folded in half lengthwise, which works well with my narrow-cut plastic boning. Historical garments often had bones inserted into narrow silk grosgrain ribbon, which is almost impossible to find today, although silk satin ribbon is an alternative. However I find the bias organza bends and shapes nicely without wrinkling, and is sheer enough to be almost invisible for all but the sheerest collars once encased in the collar layers.
You can use anything else for boning channels that is lightweight and relatively inconspicuous, such as bias-cut China silk or modern seam binding in a colour matching your collar. However, be sure you test a sample of your planned boning tape to be sure your boning will fit into it once the tape is sewn. This will save you unnecessary grief later on.
Pin each boning tape onto one side of the organza piece at your boning marks. With organza, chiffon, or silk net as this layer, it really doesn't matter which side of the fabric you choose to pin the tapes to, just be sure to pin them all on the same side. However, some fabrics (such as certain satins for example) may have a good and a wrong side -- pin the tapes to the wrong side.
Keep in mind that the photos above show a shaped collar for a 1912 day gown. Dressy gowns from about 1909 and later generally closed at centre back, but earlier gowns usually had complex, asymmetrical closures, with the collar being permanently attached only on one side of the bodice front. Your gown pattern should guide you as to which type of construction is involved.
I've included an example below of each type of closure as a reference. The first is an extant ca.1900 green printed silk gown with a complex front closure and a collar that is attached permanently on one side only, then brought around the other side of the front and to the centre back, to overlap and close.
The second example is a 1910 replica dark green velvet gown with all closures at centre back. In this case the collar is permanently attached all the way around the neckline and open at centre back, where one end overlaps the other to close.
Next, insert the bones into their channels/tapes, being certain to cut the bones to a length that allows some room at top and bottom, in other words, about 0.7cm (1/4") inside the top and bottom stitching lines. To permanently close the channels/tapes and secure the bones in place, stitch just barely inside the seam lines all around.
If you plan to place two bones at centre back, you'll need to try on the collar for fit after the above bones are sewn in, but before the other collar pieces are added. Make any adjustments at the back edges on all layers of the collar before continuing. For example, you will need to check the overlap at centre back and allow for necessary finishing allowances. This may involve trimming away some excess or using some of the allowances already provided in order to increase fit.
Finish Making the "Sandwich"
Leaving the organza strip on a flat surface with the boned side facing up, lay the other two layers in place, with their good sides facing up: first the other organza layer, then the fashion fabric layer. Match raw edges and pin all three layers together.
Important! If you plan to add lace insertion, tucking, or embroidery to the outside of the collar (fashion layer) this must be done first, before assembling the layers. When adding lace or embroidery, remember to leave sufficient room at the top and bottom edges of the fashion layer of the collar for seam allowances and finishing. For tucking, you will need to calculate the extra depth needed when cutting the outside (fashion) layer, to allow enough for the tucks. In 'History House' patterns, where tucking is required, instructions are given for making tucks in the material before cutting out the collar from the fashion fabric.
On the other hand, if you plan to add a lace edging (frill) or a bias satin or velvet band to the top of the collar, this can be done after the collar is completed.
Turn the entire stack over so that you can work from the underside of the first organza layer -- this makes it easier to see where the bones are and avoid nicking them with the machine needle when sewing. Stitch around the outside edges, just within the seam allowances, to secure the layers together.
Now the only step remaining before mounting the collar to the gown is to sew on a lining. Pin the lining, right sides together, to the fashion layer along the top edge and stitch. Trim, grade, and clip the allowances, then turn the lining to the wrong side of the collar and press well. (The two short ends will be finished by hand after the collar is mounted to the garment and fitted to the wearer's personal preference).
Next Steps:
The collar can now be temporarily pinned to the garment neckline (do this from the outside), matching centre front points. Try on the garment with the pinned collar attached, and determine how you would like the back closure to be finished -- depending on the design of the garment, the two back edges of the collar can either overlap one over the other (by about 2.5cm [1"]), or meet together at centre back with no overlap (this is a more difficult finish to create a neat, firm closure).
Mark the position of the finished edges with thread-tracing, then trim any excess, leaving a 2.0cm (3/4") allowance on each edge. If you've planned to add a bone along each back edge, do it now by encasing each bone in seam binding or silk satin ribbon folded lengthwise. Neaten each end of the binding or ribbon, then invisibly slip-stitch the finished, covered bone onto the back of the collar, keeping the lining free. Turn the allowances in on collar back edge and lining over the bones, and neaten the back edges by hand.
If you plan to add a narrow velvet or satin trim to the top of the collar (a typical Edwardian/1910's touch), or a Valenciennes lace edging, this should be done now, that is, after the two back edges of the collar have been finished. Keeping the lining free, sew ribbon along both long edges, with the top edge as close as possible to the top of the collar. If you're using a bias strip of fabric, be sure to turn under both top and bottom raw edges when applying it to the collar. If you're adding a lace edging, you only need to attach the bottom edge of the lace to the top of the collar.
It's best to sew the trim along the entire top length of the collar by hand, making the attachment stitching as neat and invisible as possible.
Here are some photos of current 'History House' designs that have high boned collars, some of silk or linen, others of lace. All these authentic sewing patterns are available on Etsy (use the link below to browse).
There were a number of different methods for boning collars during the Edwardian and 1910's era, most of them being fairly similar to the technique I've described above. However, some had creative alternatives to the usual boning methods and patterns, especially for very sheer, lightweight fabrics.
Below are photos of a fine black wool bodice of ca. 1907-08 from my own collection, showing a rather unusual arrangement of the collar supports. In this case, the boning is featherbone, wrapped in silk, sewn on by hand into two "wishbone" shapes, with their tops encased in little silk "pockets". Although unusual, this method was probably not rare; I've seen these "wishbone" style arrangements in other extant bodices of this era. You could certainly create a similar support using very narrow strips of German Plastic boning, but I would recommend wrapping them in silk satin or China silk (as here) to prevent chafing against the neck. Often a sheer collar such as this would have an additional layer (lining) of chiffon or net on the neck side for this reason.
The collar itself is made of black chiffon, finely tucked, and lined with just one layer of ecru coloured China silk, some of which has weakened and is falling away. The two back collar edges are supported with flat likely baleen bones, encased in ecru silk grosgrain ribbon. A fine black Valenciennes lace edging trims the top. The whole collar gives the most delicate impression, the tucked black-over-ecru chiffon being repeated on the bodice and sleeve cuffs.
Edwardian and 1910's high boned collars were almost always sewn on by hand, and this is still the easiest method of getting a perfect finish and controlling the fabric. Mounting an Edwardian or 1910's collar to the garment neckline will be the subject of a separate tutorial, but I hope that the guidelines here will take some of the mystery away from making a beautiful, authentic-looking boned collar for your next Edwardian or 1910's dressy ensemble.
Happy Sewing All!
]]>One question that comes up frequently in online historical costuming discussions is that of how much fabric would be needed to cut a particular type of gown, or else how best to make use of available yardage.
This was certainly a serious question in the 18th century, when the high cost of materials (particularly silk) meant that an effort was made to use every possible scrap of fabric to best advantage in constructing a gown. This is revealed in the many ways in which garments -- particularly silk ones -- were cleverly pieced.
In this article I'd like to focus on the problem of estimating yardage for a typical robe à la française (known in English as a "sacque" or "sack" gown. (Click on "Read More", lower right, to continue)
For those who may not be familiar with the terminology, a robe à la française, or "sacque" gown was a fashion that developed around the late 1730's from an earlier, rather loose and informal style of gown introduced (or so it's said) into the court of King Louis XV by one of his mistresses to conceal a pregnancy. This was a robe constructed more or less along the lines of a very loose kimono with flowing back pleats, called the "robe volante" ("flying gown") or sometimes "robe battante" ("beating gown"). Both of these names arose from the fact that courtiers found these gowns, with their enormously wide silhouettes and hemlines, to take up far more space than the earlier, more vertical mantuas.
This style of gown, originally a very informal piece of déshabillé (undress), faded from fashion fairly quickly, being transformed by the late 1730's through the introduction of a little more waistline definition and a little less volume around the torso, into that iconic gown of the 18th century, the robe à la française (French-style gown), or sacque/sack gown (the term "sacque" was in use in English in the 18th century).
The robe à la française was a style that, with a few changes in construction and details (especially the width at the hips) was to remain fashionable from the 1740's through to the very early 1780's. And no wonder! With its elegant flowing back pleats, fitted bodice, defined waistline and graceful lines, the sacque gown enhanced practically any woman's appearance. At first this type of gown was considered -- especially in the French court -- as rather informal, but later in the century became the epitome of 18th century formal dress.
By the beginning of the last quarter of the century, the robe à la française was made in all types of fabrics (including silk and various blends of textiles, as well as cotton prints that were becoming so fashionable by the late 1770's), but silk was the textile that made the most of this wonderful style of dress.
By the beginning of the last quarter of the century, the robe à la française was made in all types of fabrics (including silk and various blends of textiles, as well as cotton prints that were becoming so fashionable by the late 1770's), but silk was the textile that made the most of this wonderful style of dress.
I was recently able to purchase some beautiful silk taffeta on sale that had a brocaded floral motif on a lengthwise stripe of soft sage green and warm tan -- perfect for a robe à la française. I had ordered 13 metres, thinking that would be just enough for the gown, a matching petticoat and stomacher, and all the furbelows and trimmings I might want to add. Unfortunately, after ordering, the company called to advise that they had only 9.5m left (about 10-1/4 yards) -- and did I still want it?
I took a deep breath, quickly calculated my options (fairly certain of my ability to work out a solution), then said yes! I'm sure I'm not the only one who has ever been in this position. This experience gave me the idea to offer some tips and thoughts on yardage requirements for a sacque. Silk may not be as costly for the average person as it was in the 18th century, but it's still an expensive investment for an historical gown. So anything that can be done to maximize the use of available yardage is a good thing.
Do I Really Need a Pattern?
The answer is probably not, provided you're willing to do a little research (which in itself can be interesting, even fun). A pre-designed, printed sewing pattern for a sacque gown would seem to make calculating yardage easier, but the problem with such patterns is that (a) good ones are rare; and (b) they are often standardized for an average style and average figure, and may not take additional personal design choices into account.
Most accomplished makers of 18th century reproduction clothing that I know of don't use pre-printed commercial patterns to cut gowns, particularly not a robe à la française. This is because they understand the basic contours and shapes of the style, knowing that such a gown would have been constructed to fit the specific wearer's body. They also know that working from a general knowledge of the cut of such a gown and draping and fitting the pieces on the body is actually more efficient and precise than using a pre-printed pattern.
Beginners contemplating making a beautiful sacque gown may be in awe of such ability, especially when confronted with the daunting task of cutting into metres of expensive silk, but the concept is actually fairly straightforward. Once learned, it can be applied to virtually any gown of this type.
My aim in this article is to offer general guidelines for those who are unfamiliar with the process of 18th century garment-making in general, and to provide some specific pointers on estimating yardage, not primarily on construction methods.
In approaching making a robe à la française, it's important first of all to put aside all ideas of modern sewing patterns -- start on a mental blank slate, so to speak!
On that blank slate, to begin with, should be the concept that an 18th century sacque (in fact almost any 18thC. gown) would be built up on a closely-fitted "lining", usually made of linen. It's generally referred to it as a "lining", but this is not a lining in the modern sense. I prefer to think of it as a fitted "underbodice". Once the lining is properly fitted on the person who will wear the gown, all the rest is like layering on a collage.
On that blank slate, to begin with, should be the concept that an 18th century sacque (in fact almost any 18thC. gown) would be built up on a closely-fitted "lining", usually made of linen. It's generally referred to it as a "lining", but this is not a lining in the modern sense. I prefer to think of it as a fitted "underbodice". Once the lining is properly fitted on the person who will wear the gown, all the rest is like layering on a collage.
Accordingly, my first advice would be to create your own "template" for your gown's lining (underbodice). The pieces involved are quite simple, forming the understructure or scaffold on which the rest of the gown will be mounted. From there, calculating yardage for your sacque gown should be fairly simple, based on a few style choices.
The lining of an 18th century gown was almost always cut from linen, so you can eliminate that part of the project from your fashion fabric yardage calculations. Normally about 1.0 to 1.5m (about 1 to 1-1/2 yards) of modern wide linen will be needed for these pieces (which will include the sleeve linings).
Note that the bodice lining shown in the photos below is sleeveless because the sleeve linings will be made up with the sleeves themselves before the sleeves are sewn onto the bodice lining.
Note that the bodice lining shown in the photos below is sleeveless because the sleeve linings will be made up with the sleeves themselves before the sleeves are sewn onto the bodice lining.
Remember: these pieces must fit your body, so there is no "perfect" pattern. Start by drawing out the general shapes needed, including generous allowances to permit re-cutting and fitting, keeping in mind the ultimate style of your sacque's bodice. Then make your personal, custom-fitted template. A few trials and errors might be needed, but once you have your fitted lining completed, the rest of the gown is a matter of draping and fitting to the lining.
There are currently many resources available, both in print and online, that provide the basic outlines of pieces generally used for gown linings of this type. Two that I would recommend as particularly helpful for anyone just starting with 18thC. gowns are: "Costume in Detail" by Nancy Bradfield, and Patterns of Fashion I (by Janet Arnold). The former book has no cutting diagrams per se, but a wealth of detailed information on cut and construction. The latter volume has a limited number of garments from the era, but clear, reduced-scale cutting diagrams that provide a good basis for drawing your own pieces.
Initial Considerations in Calculating Yardage for a Sacque
There are a few preliminaries you'll need to consider before you can calculate how much fabric you'll need for your sacque:
(1) How wide is your fabric? 18th century silks in particular were made in narrow widths -- between about 50 to 70cm wide (20" to 27" wide). Almost no fabric is this narrow today, but fortunately many silks and cottons are easily twice this width. Some vintage silks are around 90cm (36") wide, a problem I'll discuss further on.
(2) What style of sacque are you making? Although the basic style of the robe à la française remained fashionable from about 1740 to the late 1770's, there were variations. Earlier styles tended to have wider, fuller back pleats, wide hips, and vertically pleated front edges, as well as wide, deep cuffs. They mostly had very little in the way of applied trim or embellishment.
Later types had somewhat narrower back pleats and sleeves had single or multiple flounces, or later ruched applied bands. More applied surface decoration, usually made from the same fabric as the gown, became the norm in the mid-1750's to early 1770's.
Formal sacques had extremely wide panniers, petticoats and gown skirts, whereas an "everyday" sacque of the 1760's could be made with almost a natural silhouette, worn over no support (hoop petticoat) at all. Most fine sacques had trains; less formal styles were "round" length (floor length) all around. A few examples of these variations are shown below.
(3) What sort of support do you plan to wear underneath? In the 1740's, hoop petticoats almost as wide as those of the 1860's crinolines a hundred years later, were worn under dressy sacques. In the mid-18th century more moderate side hoops were fashionable, but more formal gowns had excessively wide panniers ('grands paniers'). Some examples are shown below.
(4) What is your size, shape, and height? These factors on their own won't be too significant, but should be taken into account with other style considerations.
(5) What sort of embellishment are you planning? As noted above, earlier sacque gowns were quite plain, relying on the beauty of the silk alone, whereas after the early 1750's and especially toward the 1770's, extensive surface embellishment became common, such as ruched or pleated furbelows or meanders, or later puffed serpentine designs. These were generally made from the same fabric as the gown, and depending upon extent, could take quite a lot of yardage. Some examples of these types of decoration follow:
(6) Are you planning a matching petticoat? If surviving examples of 18th century sacque gowns are a guide (and there are many of them), most, especially those made of silk, had a matching petticoat, usually with some form of trimming made from the same material. There are ways to "cheat" on a full petticoat, which I'll discuss further on.
Determining Yardage for a Basic Sacque
We thankfully have the rare and helpful contemporary record made by François Garsault, around the mid-1760's, outlining in relatively good detail the requirements for, and construction of a basic sacque of the era. This appeared in his L'Art du Tailleur (The Art of the Tailor).
Of course, the 18thC. measurement system in France (and elsewhere) for dealing with fabric differed widely from today. As a result, Garsault's details of lengths, widths, and fabric requirements are difficult to grasp in relation to modern measurements. The "average" Frenchwoman in his time would also have been shorter and smaller in build than today's standard women's medium sizes. Accordingly, I've taken the liberty of marking Garsault's cutting diagrams with modern measurements, to more easily calculate total yardage needs.
Of course, the 18thC. measurement system in France (and elsewhere) for dealing with fabric differed widely from today. As a result, Garsault's details of lengths, widths, and fabric requirements are difficult to grasp in relation to modern measurements. The "average" Frenchwoman in his time would also have been shorter and smaller in build than today's standard women's medium sizes. Accordingly, I've taken the liberty of marking Garsault's cutting diagrams with modern measurements, to more easily calculate total yardage needs.
Below I've made some additional annotations (in blue) concerning construction and how the pieces fit together. Note that in Garsault's diagram above, the triangular section marked c through d was intended to be turned upside-down and sewn into the side seam below the pocket openings, as indicated in the sketch showing the back of the gown as constructed. This of course would be optional, as a means of providing extra shaping to the skirts where the panels are narrow, without using additional yardage. (This V-shaped piecing is not seen in the majority of scaled patterns of extant gowns, nor in most surviving gowns themselves, especially those that have an extra width between front and back panels).
The blank space created by the shaping cut at e, f, g could be used for smaller pieces, such as the shoulder or upper back finishing strips, or pieced to furbelows.
The blank space created by the shaping cut at e, f, g could be used for smaller pieces, such as the shoulder or upper back finishing strips, or pieced to furbelows.
There are four important factors to note in these drawings:
- Garsault was presenting a typical fairly informal sacque gown, of "round" (floor) length, without a train, as his basic cutting design;
- Fabric panels are shown in his diagram based on 18thC. silk fabric widths;
- Not all 18thC. sacque gowns were cut exactly this way (see next annotated diagram);
- I've marked a typical modern gown length, based on a standard 5'5" to 5'6" height.
It's clear from extant gowns and documented studies of construction that sacque dresses existed that were cut quite differently from Garsault's model. Many were cut with the bodice front as a separate piece (there are examples of this in Nancy Bradfield's excellent book, Costume in Detail, and in Norah Waugh's The Cut of Women's Clothes).
Some later gowns were cut without an integral allowance for front pleating (robings), these pieces being cut as separate 'strips' only for the bodice. In other cases, both the bodice front and side front/side back sections were cut separately from the rest of the gown. These factors have implications in terms of yardage requirements that I'll discuss a bit later. Here, I've superimposed on Garsault's diagram a line to show approximately how the separate bodice section would be cut:
Some later gowns were cut without an integral allowance for front pleating (robings), these pieces being cut as separate 'strips' only for the bodice. In other cases, both the bodice front and side front/side back sections were cut separately from the rest of the gown. These factors have implications in terms of yardage requirements that I'll discuss a bit later. Here, I've superimposed on Garsault's diagram a line to show approximately how the separate bodice section would be cut:
Still, we can certainly use Garsault's diagrams as a useful visual starting point for estimating yardage needed for practically any robe à la française. Keep in mind that Garsault was showing only one-half of the garment in his illustration.
First Things First...
Let's start with some assumptions for our "typical" modern sacque reproduction:
- The fabric used is approximately 130 to 150cm (51" to 60" wide);
- The wearer's height is 5'6" (without shoes), 5'8" with shoes, with a medium-large modern build (about Bust: 100cm/Waist 80cm [B:39"/W:32"]);
- The fabric is either plain, or evenly-striped lengthwise (i.e. no complicated pattern repeats to deal with);
- The gown will be "round" length, that is, floor length all around, without a train. This will give a finished length at the back hem of about 160 to 165cm (about 63 to 65 inches);
- The gown will be a plain ca. 1750-65 style, with single sleeve flounces and no self-fabric decoration or furbelows;
- The gown's petticoat will be made entirely of the same fabric as the gown;
- The gown will be worn over only moderately-sized side hoops.
Using Garsault's diagram, it can be seen that 4 widths of narrow 18thC. silk were required for the back and the side-back of the gown as far as the pocket opening. This includes enough for the lovely back pleats. For our 5'6" model, each of these back panels should be 1.7m (about 67") long, to allow for a hem of about 5.0cm (2").
For the front panels, an additional approximately 10cm (4") should be added (for the extra at top), for a total length of about 1.8m (71").
Therefore, the total yardage needed for the main sections of the gown (i.e., not including a matching petticoat or any surface trim) will be approximately 5.2 metres (about 5-3/4 yards):
- For back panels: 1.7m x 2 full widths = 3.4 m (about 3-3/4 yds)
- For front panels: 1.8m x 1 full width (cut in half lengthwise) = 1.8m (about 2 yds)
For the sleeves, compère (or stomacher), and sleeve flounces (or cuffs), allow another 1.2m (about 1-1/2 yards). This brings the total to about 6.4 metres (approximately 7-1/4 yards).
Using the Widest Modern Fabric in an Unusual Way: There is one point to add to the above yardage calculation: if you're lucky enough to have fabric that is close to 152cm (60") wide, and the gown is for an average figure of moderate height, it is just possible, with careful arrangement and judicious pleating, to make the basic gown from just two panels of about 2.0 metres each, by creating a single centre back seam between the two and using the selvedges of each panel as the forward edges of the gown.
I've done this myself in a pinch when trying to squeeze a robe à la française out of less than 5 metres of silk. You won't have much left at all for embellishment, you won't have luxuriously generous back pleats and train, and you won't be able to make a matching petticoat, but you will have a basic gown constructed out of only 4 metres of 152cm (60") wide fabric.
Some people may read this and say -- but that's not at all historically accurate! Well, my approach to 18thC. gown design and draping is to apply 18thc. principles, rather than slavishly copying or mimicking practices that make little sense for modern textiles. 18th century makers were working to the very best advantage they could in what they had available, which was narrow fabric often less than 60cm (24") wide, minimizing waste at all costs.
Since most silks are now wide (137cm or more), it makes perfect sense to make the most of this width in a similarly practical way. With wide silk, I find that one 2m long panel can be used for each half of the body for a sacque gown, with virtually no waste of fabric. The remnants that are cut off are perfect to use for trimming, etc. You'll see my process in the photos below.
This does mean creating a (rather terrifying) cut into the middle side of the material to create the pocket access opening and drape around the torso, but once done, the rest is easy, and any cut-away bits can be useful for trimming or even small bodice sections like shoulder or upper back finished strips, or even sleeve flounces.
If you're fortunate enough to have 6 metres (about 6-1/2 yards) of 152cm (60") wide fabric, you can probably also cut a matching petticoat. For trimming ideas that don't require more fabric, see "Cutting Corners and Saving Graces" further on in this article.
To Seam or Not to Seam?
At this point (assuming you're using the standard approach to cutting your panels, and your fabric is less than about 150cm [58"] wide), you can decide whether or not to either cut the 2 back panels in half lengthwise to create more historical fabric widths (which means making 3 long vertical seams, one at centre back and one on each side, to join these panels), or to leave the full modern width and simply make one seam down centre back to join the 2 back panels. A third possibility is to create "faux" narrow vertical seams to mimic where the seams would be in 18thC. gowns made of narrow fabric.
Whichever method you choose will make no difference to the yardage requirements. The back sections will be sufficient to create substantial pleats in the back of the bodice, with enough width left to go as far as the side of the torso, and the wide modern yardage will still need to be cut in half lengthwise to be used for the front panels. The back panel arrangement places selvedges conveniently along the pocket edges. Naturally, you will need to adjust the depth of pleats at centre back to accommodate your own size when draping and fitting.
The photo below shows how the back panels, once pleated, fit across the back of the torso, with room to spare for pleating above the pockets. The excess fabric along the outside edge of the back will be cut (like Garsault's diagram) in a gentle curve around the armscye and down the side, and the remnants of fabric used for trimming, finishing, etc.
The Petticoat
Petticoat yardage is quite easy to calculate if you have modern wide yardage. For a typical petticoat, made entirely of the same fabric as the gown, about 2.3 metres (about 2-1/2 yards) of fabric at least 115cm (45") wide will suffice, assuming a 5'6" personal height without shoes. This includes reasonably generous hem and finishing allowances. Of course, at the narrower end of fabric widths (115cm/45"), you'll have less fullness in your petticoat, at the wider end (150cm/58" or more), you'll have a much fuller petticoat.
I like to use one panel of the full width of fabric that is anywhere from 122 to 153cm wide (about 48" to 60" wide) for each of the back and front. This places all four selvedges conveniently at the sides, where the pocket openings will be. The only real consideration will be length (i.e. based on your personal height and on the width of your panniers, hoop skirt, etc.).
If your fabric is narrower than about 120cm (47"), you'll need to decide whether you can live with a less full petticoat, or prefer to cut additional half-width panels to create more fullness (of course this will require more fabric). To see a detailed discussion on planning, cutting and constructing a petticoat from narrow (90cm/36") fabric, see my blog on the 1764 Countess Howe Gown at the link below. Although this was an English gown, the petticoat was the standard type used with open gowns.
Summing Up
Thus far, we have the following yardage for our round length gown:
To be safe, I would recommend rounding this up to an even 9.0m (about 9-3/4 yds), to allow for slight variations and/or cutting errors.
Thus far, we have the following yardage for our round length gown:
- Gown back panels: 3.4 metres (about 3-3/4 yds)
- Gown front panels: 1.8 metres (about 2 yds)
- Compère or stomacher, sleeves, and flounces (or cuffs): 1.2 metres (about 1-1/2 yds)
- Full petticoat: 2.3 metres (About 2-1/2 yards)
To be safe, I would recommend rounding this up to an even 9.0m (about 9-3/4 yds), to allow for slight variations and/or cutting errors.
Now for the Add-on Options!
Like buying a car, you'll need to decide what (if anything) you want or can afford beyond the plain vanilla model. However, unlike buying a car, there are a few corners you can cut to save on fabric, especially if you have a limited length of yardage and can't get any more of it. First, I'll outline the possible add-on options:
For the following options, add the indicated extra to the basic yardage of 9.0 metres (9-3/4 yards). Remember that the add-ons mentioned here will need to be cumulative for all the extras you're planning to include:
- Moderate train: For a 5'6" model, a reasonably elegant, but not over-long train would be about 1.9m (about 75") from neckline to hem at centre back, plus allowances for finishing/hemming (see photo below). Add 0.5 metre (about 3/4 yard). This represents extra length on each of the two back panels. You may also need to add to the length of the two front panels, to make them meet smoothly with the longer back sections, either by extra length that is adjusted when draping/fitting, or by inserting an inverted triangular piece at the side seam. Allow an additional roughly 0.4m (1/2 yard) in total for this if your finished train will be longer than about 1.8m (about 71") from neck edge to hem.
- Wide or Formal Panniers: In the 18th century, the support structures for very formal gowns (especially those worn in court settings) could range from extremely wide to ludicrously wide. If you're planning one of these types, you'll need to allow for extra length in both gown and petticoat to fit over the panniers at the side. There is no "perfect" yardage allowance for this, as the exact amount depends on the shape and size of the panniers. But if you can afford to allow fabric, you won't go wrong estimating on too much, rather than too little extra yardage. For a ca.1750-60 gown like the one shown below, worn over formal (but not court) panniers, you should plan on at least an extra 2.0m (about 2-1/4 yards), to provide for the additional length in gown and petticoat on both sides of the body, both front and back.
- Layered Flounces: If you're planning a ca. 1750-65 sacque with pretty layered flounces, you'll need to allow a little more fabric to cut the additional (larger) flounces -- see photos below. Add 0.2m (about 1/4 yard) for each additional layer of extra flounces.
- Ruched Meanders, Pleated Frills, Furbelows, etc., on Gown and Petticoat: This is a more difficult option to estimate, as there are a lot of variables involved. However, for a gown and petticoat of about 1750-65 with a minimum of typical surface embellishment, count on at least an additional 1.5m (1-3/4 yards) of fabric.
Keep in mind that you may want some of the trim (e.g. on the petticoat) to be wider, which will reduce the amount of available trim for the gown itself. An extensively trimmed gown and petticoat may require up to 3.0 metres (3-1/2 yards) or more of additional fabric. My best advice: if you're planning a heavily self-trimmed gown and you can afford it, err on the side of extra fabric.
- Extra-Large Cuffs: If your plan is to make a gown with the very large cuffs of the 1740's, or the excessively large "à la raquette" style cuffs (see photos below), then add 0.4m (about 1/2 yard). This should provide enough extra yardage for almost any out-sized cuff.
Given our initial basic yardage of about 9.0 metres (9-3/4 yards), if all of the above "options" are included, it's possible that a total of roughly 11.5 metres ( 12-1/2 yards) would be required to make a gown with most of the fancy additions seen on a dressy (but not highly formal) mid-century robe à la française.
To be safe, 12 to 13 metres (about 13 to 14 yards) of 130-153cm wide (51" to 60" wide) fabric will allow for a variety of creative leeway in design, style, or size choices. This is the ideal for a typical sacque if you're able to afford it, and assuming that enough of your desired fabric is available from the retailer. As noted earlier, add at least another 2.0m (2-1/4 yards) for a gown worn over very large panniers.
Which explains why I ordered 13 metres of my lovely silk, only to have to settle for the 9.5 metres they did have! So now comes the noodling...
Cutting Corners & Saving Graces
So, you know you're likely a bit short on yardage, but still want to create a beautiful sacque gown -- somehow! Here are some suggestions that may help:
(1) When in the 18th century, do what the Georgians makers did:
There were clever methods used by 18thC. gown makers to economize on fabric, especially on costly silk textiles, that you can use today. These include:
There were clever methods used by 18thC. gown makers to economize on fabric, especially on costly silk textiles, that you can use today. These include:
- Make a hidden part from cheaper fabric, which for a sacque gown usually meant the upper back portion of a petticoat (see following photos for examples), since this area would never ordinarily be seen when worn. As much as half the back length can be substituted with another available fabric. This will not only save you nearly half a metre/yard of expensive silk, but that saved section can be used to cut other, smaller pieces, such as a stomacher or cuffs.
- Show But Don't Tell! A very common -- in fact, it seems, almost universal -- practice in the 18th century was to embellish only the front portion of a petticoat, since that would really be the only portion seen when worn (see photos below). This saves a fair amount of fabric, probably up to half a metre/yard or more in trimmings. Don't waste precious silk on surface embellishment where it's unlikely to be visible.
- Piece, piece, piece: Extant gowns demonstrate that piecing was a common practice, even (or perhaps especially) where silk textiles were concerned. If you find yourself just a little short near a hem of the skirts, or with not quite enough fabric to go around a bodice, feel free to neatly sew on the required scrap from any available remnant of your gown fabric.
- Skip the Trimmings: If you know you'll have just enough fabric to construct your gown, consider omitting surface embellishment (or at least omitting it where it will make the least impact). Alternatively, use a different type of trimming (such as lace or even silk gauze) -- see below.
- Lace it Up! If you don't have sufficient yardage to indulge in self-fabric surface decoration, consider lace. This was not an unusual choice at all in the decades between about 1750 and 1770 (in fact it was likely a more costly one), and can look very effective if done properly. By purchasing separate lace trim, you can indulge in creating ruched and pleated furbelows, bows, and various other decorations without using a bit of your silk. Perhaps less common, but certainly seen in some extant gowns, was the use of silk gauze (usually in a sheer or semi-sheer white colour) or even fur trim to create surface embellishment.
- Get Caught Short: Where fabric is at a real premium, especially if you own several metres/yards of a particularly beautiful silk but not nearly enough even for a plain sacque gown, why not try a slightly less formal pet-en-l'air? This garment was a shortened version (about hip-length) of the classic sacque gown, and was considered rather less formal -- good for picnics in summer, receiving friends for tea, strolling in the afternoon, or informal visiting. You won't be able to fake the petticoat back with a different fabric (because it would be easily seen), but you can wear your pet-en-l'air with a non-matching petticoat of practically any harmonizing colour, preferably in silk. (Incidentally, the 18thC. name pet-en-l'air does literally mean "fart-in-the-air", a term that some sarcastic Frenchman no doubt thought up to make fun of the style. It doesn't take much imagination to understand the reference!).
Below are a few examples of the clever 18thC. ruses and options that I've mentioned:
(2) Other Ruses and Corner-Cutting
- Make a different style of gown, or one from a different decade: If you're stuck with limited yardage, and either can't afford, or can't find more, then consider altering your original vision. Sacque gowns of the mid-1700's were highly ornamented things, but embellishment was virtually non-existent during the 1740's, and much simplified by the mid-1770's. Changing the style or time period can often give you just the design boost you need to make your gown from less than ideal yardage. If nothing else, and you really want a gown, not a jacket or pet-en-l'air, consider making an English gown (which will required less fabric overall).
- Mix Your Tricks: One good ploy to economize on fabric is to make the upper back of the petticoat in another fabric, combined with using a gown design that has a separate bodice section. As I mentioned earlier, not all sacque gowns were made precisely like Garsault's drawings. Many, especially after the 1740's, had a front bodice cut as a separate piece, or even bodice front and side front pieces cut separately. Making the petticoat's upper back from some other fabric would likely leave enough of your gown fabric to cut the bodice front. This also means you'll need to use less fabric (i.e. a shorter length) for your two front gown panels, as these will now only need to go as far as waist level. The diagram below, from Norah Waugh's The Cut of Women's Clothes, shows a typical example of this type of gown.
- Widen Your Horizons: If you haven't yet purchased your fabric, and your budget is limited (especially if you want silk), check around for the widest modern textile -- usually 152cm (60") wide. Even some silks come in this maximum modern width. As I noted earlier, it is just possible to squeeze a basic sacque gown out of 4 metres (about 4-1/2 yards) of 152cm (60") wide fabric, or a basic gown plus petticoat out of about 6 metres -- with limitations on embellishment and size of course. See my comments up above under: Using the Widest Modern Fabric in an Unusual Way". If you're lucky enough to already have 4 to 6 metres of the widest fabric, but can't possibly find more of the same fabric, this may be an option.
- Pinch Your Pleats: Although the back pleats of a sacque gown give the style its particular elegance, you can cheat a little on the actual depth of the pleats. If for example you know you'll need just a little more fabric elsewhere on the gown, this ruse can save you perhaps 10 to 15cm (4 to 6 inches) of material on each side of the gown back, at least as far as the waist area. These small pieces can then be used to cut such things as bodice shoulder straps or for extra embellishment. Be careful not to go overboard in stealing too much from your pleats -- pin the pleats and check the effect from a bit of a distance to be sure you'll still like it. It's worth mentioning here that earlier sacques (1740's to 1750's) usually had wider back pleats than later styles (1760's to 1770's).
- Go Your Separate Ways: Although it can be said that it was more usual after the early 1750's for a robe à la française to be worn with a matching petticoat, if you're truly short on fabric but still love the look of a full sacque gown, then consider the option of a petticoat made from a separate material. If your gown is a multi-coloured or striped silk, you can try to match one of the hues in a solid-coloured petticoat. Whether or not a separate petticoat might have been a common fashion would likely be connected with social status, wealth, and geographical location as well. It's worth doing your research on this point.
- If all else fails, use a softer, harmonizing, fairly neutral solid colour for your petticoat, such as cream, pastel pink or pale blue. If historical accuracy is important to you, choose a sacque style from the 1740's or early 1750's when (at least judging by a number of paintings of the era), separately coloured quilted satin petticoats were worn with such gowns (see photos below).
- Lastly, there is the option of making both petticoat and stomacher/compère from a fabric different from that of the gown itself. This isn't an impossible choice, nor even improbable, but perhaps a little less orthodox than the usual 18th century fashion. Put simply, the most fashionable sacques seem to have been those of fine silks with matching petticoats and stomachers. I should mention here that it's not always reliable to follow museums' choices in mounting these gowns over non-matching petticoats and stomachers -- often this is done precisely because these original (probably matching) pieces are missing.
Final Thoughts
Making a robe à la française (or sacque) is a big investment in materials and time, so it's worth carefully considering in advance how your design choices will affect yardage. I hope these guidelines will be helpful for your next project!
So you might wonder: what am I planning to do with my less-than-ideal 9.5 metres of silk? Well, thankfully it's wide (137cm [54"]), which means I will certainly have enough for the gown, but I'm going to need to be careful with the rest. The gown will be a slightly trained sacque in the French style of ca.1760, worn over a moderate set of panniers (one inspiration painting is shown below), with matching stomacher and petticoat, and flounced sleeves. The bodice will be cut separately, using the silk saved by making a faux upper back to the petticoat.
If I get all that out of about 8.5m of my silk, I may have a little left to use as ruched trim on the bodice, or perhaps to mix with lace as trim to make it go farther. One way or the other, this fabric deserves to be a robe à la française, and maybe I'll even get to wear it somewhere in 2022. Check back again to see my progress -- and happy sewing!
]]>Making a robe à la française (or sacque) is a big investment in materials and time, so it's worth carefully considering in advance how your design choices will affect yardage. I hope these guidelines will be helpful for your next project!
So you might wonder: what am I planning to do with my less-than-ideal 9.5 metres of silk? Well, thankfully it's wide (137cm [54"]), which means I will certainly have enough for the gown, but I'm going to need to be careful with the rest. The gown will be a slightly trained sacque in the French style of ca.1760, worn over a moderate set of panniers (one inspiration painting is shown below), with matching stomacher and petticoat, and flounced sleeves. The bodice will be cut separately, using the silk saved by making a faux upper back to the petticoat.
If I get all that out of about 8.5m of my silk, I may have a little left to use as ruched trim on the bodice, or perhaps to mix with lace as trim to make it go farther. One way or the other, this fabric deserves to be a robe à la française, and maybe I'll even get to wear it somewhere in 2022. Check back again to see my progress -- and happy sewing!
This is the first in a planned series of articles intended to help familiarize sewing enthusiasts with the origin, botanical features, history, and production of fabrics available to them, especially considering textiles which may be thought of as having similar characteristics. This Part 1 will look at the two linen "twins": ramie and true flax linen, which are really more fraternal than identical twins.
Whether your focus is on historical reproductions or modern sewing, I hope you'll find something useful in these articles to guide your choice of fabrics.
What's the difference between true linen (flax) and ramie?
Linen textiles come in a diverse and beautiful array of weights, weaves, textures, and colours, for use in everything from fine blouses to upholstery. Yet many people are unaware that a linen-like fabric called ramie exists, or if they do know of ramie, may believe that there is little to distinguish it from true linen made from flax.
Actually, there is quite a difference between these two fibres. Although both are plant-based fibres, the plants from which they come are completely unrelated botanically (see more about this further on). Flax is grown as an annual in northern climates (dies down at the end of the season), whereas ramie is a perennial, grown mostly in humid, tropical or semi-tropical regions. The process required to turn them into cloth is different, and the resulting textiles, although somewhat similar in nature, are in fact quite distinct, with unique characteristics that set them apart.
Actually, there is quite a difference between these two fibres. Although both are plant-based fibres, the plants from which they come are completely unrelated botanically (see more about this further on). Flax is grown as an annual in northern climates (dies down at the end of the season), whereas ramie is a perennial, grown mostly in humid, tropical or semi-tropical regions. The process required to turn them into cloth is different, and the resulting textiles, although somewhat similar in nature, are in fact quite distinct, with unique characteristics that set them apart.
Linen (flax) and ramie are both ancient fibres. Flax linen is known to have been made by the ancient Egyptians, and has amazingly survived (most notably as mummy wrappings) for thousands of years, given the right climate conditions. It has been in cultivation and use for textiles ever since. Ramie is believed to be even older, going back possibly 5,000 years or more in the Orient.
Today, Canada produces the majority of the flax sold on the global market (over 750,000 tonnes). The other major producers of flax, in order of tonnage are: Kazakhstan, China, Russia, United States, and India. France, Belgium, Ireland, Italy, Ukraine and Argentina produce smaller quantities, the flax from the first four of these countries being particularly valued for high-end textile production. Recently the Baltic area and Poland have seen an enormous growth in the linen thread and textile industry, particularly for home décor uses, such as bed linens, draperies and other household linens.
Today, Canada produces the majority of the flax sold on the global market (over 750,000 tonnes). The other major producers of flax, in order of tonnage are: Kazakhstan, China, Russia, United States, and India. France, Belgium, Ireland, Italy, Ukraine and Argentina produce smaller quantities, the flax from the first four of these countries being particularly valued for high-end textile production. Recently the Baltic area and Poland have seen an enormous growth in the linen thread and textile industry, particularly for home décor uses, such as bed linens, draperies and other household linens.
Garments made of linen are beautiful, eminently comfortable (especially in hot weather), and long-lasting, giving linen a prized place in mankind’s textile choices for centuries.
Ramie’s use as a textile may go back even further than that of flax linen, as ramie is an oriental native, having originated in China or Malaysia (or possibly both, as slightly different varieties are grown in these regions). It is also believed to have been known in ancient Egypt. The common name used today, ramie, comes from the Malaysian word rami. Since ramie is grown mainly as a moist-tropical plant and is perennial (no re-seeding required each season), usually more than one crop per season can be taken off the same acreage, making it an economical textile plant.
Today the primary ramie-growing areas of the world are China, Japan, Taiwan, South Korea and the Philippines.
Today the primary ramie-growing areas of the world are China, Japan, Taiwan, South Korea and the Philippines.
Both plants (flax and ramie) have been used by mankind for millennia for a variety of purposes aside from textile-making, and both are sources for the manufacturer of valuable utilitarian and industrial products, as well as providing edibles.
Here is a look at the plants themselves and the products (including textiles) that are made from them, followed by a description of the qualities of each of the fabrics made from these plants that may be helpful in identifying and distinguishing one from the other.
Incidentally, ramie is quite distinct from hemp or other natural plant fibres such as jute and bamboo (a subject which I’ll deal with at a later date). As a rule, the general term "linen" can apply to flax, ramie or other bast fibre textiles (more about this further on).
Linen (Linum usitatissimum)
Linen is most often associated with true flax, a member of the plant family classified under Linaceae, consisting of about 160 species, mostly native to the temperate (northern) regions of the world. The flax plant’s origin is murky, but it’s likely native to the eastern Mediterranean or near east. Flax is still grown primarily in the north temperate areas of the earth as an annual crop (that is, one that must be sown each spring), and is the plant from which most European linen has been traditionally made. Flax is often referred to interchangeably as "linen", although as I'll discuss later on, the word "linen" has been used to apply to other textiles.
There is a good reason this very pretty, deceptively delicate-looking plant was given the designation “usitatissisum” by botanical cataloguers: the Latin term means “of the greatest use”, or “most useful”, that is, to mankind. And so it is! Flax is one of the most valuable plants humans have had available for millennia (especially in northern regions) not only for more recent, or larger-scale commercial production, but also as a means of local and home-based textile production.
There are many people today who still like to grow, process, spin and weave their own flax fibre into fabric in the traditional, ancient way as a hobby or local eco-business. On an industrial scale, linen is big business in northern countries, whether for seed, oil, or textiles, and harvesting and processing is largely now done with modern machinery:
There are many people today who still like to grow, process, spin and weave their own flax fibre into fabric in the traditional, ancient way as a hobby or local eco-business. On an industrial scale, linen is big business in northern countries, whether for seed, oil, or textiles, and harvesting and processing is largely now done with modern machinery:
Aside from the lovely garment textiles made from this plant, flax has been used for an incredible diversity of purposes, including:
- Fine thread, including threads for lace-making
- Canvas cloth for a variety of uses, including artists’ canvas and ships' sails
- Textiles for fine book binding
- High quality paper manufacturing, both for book publishing and for artists
- Rope-making, net making, macramé and similar artisanal products
- Coverings for walls, furnishings, tables and beds, as well as utility textiles such as towels
- Oil (linseed oil) for a number of uses, including paint manufacturing and artists’ oil paints/thinners
- Flax seeds (for production of oil, but also for human food and a variety of baked goods)
- Industrial uses, including even the automobile industry
- Animal fodder, from the remainders after seed extraction.
The beautiful textile made from a plant
Next to silk, linen is arguably the most beautiful natural textile made. Despite its tendency to wrinkle (which is seen by many as a positive sign of its natural quality), linen fabric is smooth, cool, and wonderfully comforting against the skin. It has both a slight springiness and yet good drape. Linen is unmatched as a “breathable” material, having the rare dual properties of being able to absorb a great deal of moisture yet also dry very quickly, the ideal cooling fabric for hot weather. It is mold and mildew resistant and unbothered by moths.
Linen takes dyes less readily than some other fabrics (such as silk or cotton), but has a subtly lustrous surface and can look beautifully elegant even as an undyed textile. Due to the slightly uneven nature of the natural linen fibre, textiles made from true flax linen almost always show slubs (that is, occasional thicker portions in the weave) to one extent or another.
Linen takes dyes less readily than some other fabrics (such as silk or cotton), but has a subtly lustrous surface and can look beautifully elegant even as an undyed textile. Due to the slightly uneven nature of the natural linen fibre, textiles made from true flax linen almost always show slubs (that is, occasional thicker portions in the weave) to one extent or another.
Linen is stronger when wet than dry, will stand up to repeated hard washings and actually become softer as a result, a characteristic which made linen the ideal, long-lasting, healthy undergarment (shift) to wear next to the skin in the 18th century. Somehow we’ve forgotten that wisdom! It was frequently used to make middle and lower class stays in the 18th century as a less expensive alternative to silk (see the example pictured below).
Linen can withstand high temperatures (e.g. by ironing) and hard compression, such as through mangles (machines used over a century ago to press linens flat, creating an smooth, lustrous surface), or a combination of both (as in calendering to produce a glassy, ciré-like surface).
Flax linen is manufactured in a wide variety of weights and textures, from the finest, sheerest handkerchief linen to the heaviest upholstery fabric. Linen’s one drawback, aside from its tendency to wrinkle easily, is that it is not as abrasion and stress-resistant as some textiles, particularly at points of wear, such as tailored edges or joining seams subject to strain. Like metal, but unlike wool which is flexible even when dry, linen can be brittle at such points and eventually break. However, linen’s admirable qualities more than outweigh these negatives.
A multi-step process is required to transform flax from plant into a magical linen textile. The linen-making method, while not as simple as cotton or wool, has always been straightforward enough to be done in a home or local setting.
For centuries in the Low Countries most notably, but also in other flax-growing regions throughout the temperate regions of the earth, fields of flax were harvested by hand, the flax plants being pulled out by the roots rather than being cut like wheat, in order to preserve the longest possible fibres.
For centuries in the Low Countries most notably, but also in other flax-growing regions throughout the temperate regions of the earth, fields of flax were harvested by hand, the flax plants being pulled out by the roots rather than being cut like wheat, in order to preserve the longest possible fibres.
The traditional linen-making steps, which go back hundreds, if not thousands of years, were carried out by hand as well. These were, in general terms:
The traditional linen-making steps, which go back hundreds, if not thousands of years, were carried out by hand as well. These were, in general terms:
- rippling (seed/initial debris removal),
- retting (soaking to rot off the outer layers, exposing the fine fibres),
- drying,
- scutching (beating to remove the outer stem material),
- hackling or heckling (combing to smooth and clean the fibres),
- spinning, dyeing and weaving.
There are various means by which the outer sheath of the flax stalk can be retted (rotted away), including in a still pond, vats or tanks, laid out on grass to expose the stalks to the dew, using chemicals to break down the stalks, or – the traditional preferred way – in a stream or river.
It is generally acknowledged that the quality of flax linen fibre is directly related to the retting method used, dew or vat-retting producing a greyish-beige coloured, coarser fibre, and stream-retting a finer blond coloured fibre (hence the expression “flaxen-haired girl”). The photos below demonstrate the difference between the finest, lightest fibre and that of coarser, lesser quality flax fibre, both after final hackling.
Completing the process of scutching and hackling (or heckling) to get to the resulting flax fibres as shown above does take muscle-power, but linen-making is often shown in old paintings and illustrations as being a communal or family activity.
The finest and most expensive linen was white, made in the traditional manner as the product of "grassing", i.e. the long lengths of woven linen laid out on grass to be bleached naturally by the sun. This process could take days or weeks, depending upon the weather and the amount of sunshine.
Below are: (1) a painting by Teniers from about 1640 showing a community bleaching-ground in the Netherlands, and (2) an early 20th century photo-postcard from Ireland, showing linen laid out on grass for bleaching:
Despite the demands of these processing activities, linen-making has been able to be scaled up to commercial production through mechanization more easily and economically than ramie. This is because, unlike ramie fibre, there are no difficult gummy substances to be removed from flax stalks nor fibres that require high heat or chemical extraction.
Bleaching flax linen to a fine white still remains challenging however, even with modern chemicals and processes, as it is a delicate balance between obtaining a pure white or damaging the natural beauty of the textile. Since finished linen fabric often contains a high percentage of impurities (about 20% in comparison to cotton's 5% or less), including plant material and waxes which help to give linen its subtle gloss and interesting slubbed texture, it is harder to bleach than cotton, and the process takes longer. Accordingly, even today pure, absolutely white linen is usually more expensive than "natural white".
These days, in larger linen-producing nations like Belgium, the traditional processing steps are done by a variety of specialized machinery. Yet the great advantage to modern linen production is that the cleaning and dressing can be done entirely mechanically, without the use of chemicals (at least until the dye stage).
In addition, none of the debris removed is discarded -- every part of it is useful. Each step of the process of producing fine textile linen from flax results in a product that can be used in some way by a number of industries, whether for paper, composite board, animal feed, rope/twine, or rougher linen fabric. Where textiles are concerned, linen has a small ecological footprint and a sustainable economic profile.
Linen reigned supreme in Europe for centuries as the textile of both aristocrats (in its finer, whiter forms, especially in lace) and of the middling and working classes (in ordinary quality and homespun form). In North America, colonists in northern areas developed local linen growing, processing and weaving, and were often required by authorities to produce a certain amount of home-made linen textile.
The dominance of linen was finally crushed by the enormous quantities of cotton that began to flood the British and European markets by the end of the 18th century. The lucrative cotton trade, largely made possible by the enslavement of Africans in the United States of America, produced a textile with many of the natural properties of linen, but that was cheaper, quicker, and easier to manufacture than linen.
The dominance of linen was finally crushed by the enormous quantities of cotton that began to flood the British and European markets by the end of the 18th century. The lucrative cotton trade, largely made possible by the enslavement of Africans in the United States of America, produced a textile with many of the natural properties of linen, but that was cheaper, quicker, and easier to manufacture than linen.
Nonetheless, throughout the 20th century, flax and linen textile production still accounted for a meaningful segment of the economy of many northern European countries, as well as parts of Canada, the U.S., the U.K., Scotland, and Ireland.
Although prior to WWI much of the field and preparatory work was still done by hand and horse-power, the linen industry operated on an enormous scale, manufacturing everything from fine damask linens to ropes and sails for ships. From the late 1890's to the mid- 1910's, linen enjoyed a resurgence in popularity for fashionable clothing, especially for warm weather walking suits, dresses, and blouses.
Although prior to WWI much of the field and preparatory work was still done by hand and horse-power, the linen industry operated on an enormous scale, manufacturing everything from fine damask linens to ropes and sails for ships. From the late 1890's to the mid- 1910's, linen enjoyed a resurgence in popularity for fashionable clothing, especially for warm weather walking suits, dresses, and blouses.
In Europe however, the devastation of the two World Wars (and particularly WWI) wrought havoc on linen production, since many of the areas used for growing flax saw long, devastating battles that razed and tore up the landscape. Flax growers and weavers were forced to abandon their occupations and flee. In particular, the flax fields of Belgium and the Netherlands never recovered their former extent.
Perhaps even more tragically, most of the varietal diversity of flax genetics, perfected over hundreds of years of selective plant breeding in Europe, was lost. The highest quality flax linen produced today can't compare with the incredibly fine, beautiful linen of the 19th and early 20th century prior to WWI, made into delicate items such as silky, gossamer handkerchiefs and sheer blouses. This loss of flax varieties is the main reason identical textiles cannot be manufactured today. The hope is that perhaps enough genetic diversity remains amongst all the common flax grown today that, in time, a few flax plants will be discovered that have these exceptional qualities in their fibre, and which can be propagated by seed once again.
Like the other natural fibre textiles, linen has a history that parallels and follows that of humankind itself.
Linen textiles today
Today linen is made into a mind-boggling array of textiles in various weights and weave patterns. About the only type that is not seen in linen is satin. This is because linen fibres are too brittle to be effectively “floated” for any great distance over a base warp (as silk can be). It may also be that since the surface of linen can be rendered satin-smooth, glossy and hard through mechanical means that weaving linen as a satin fabric is pointless. Damask (see below) is a variation of satin that does not require large areas of surface "floats". It is seen in flax linen as a luxury textile.
Lately there has been an enormous resurgence in flax linen textile production in north-eastern Europe (Poland, Lithuania, Latvia, etc.). These countries have lower labour costs than western Europe and can grow much of the flax they need for mass production themselves, resulting in reasonably low per metre textile costs to consumers. The very finest linens however still tend to come from western Europe, especially Belgium and Ireland, and these continue to command the highest prices.
Here is a brief glossary of some of the types of linen textiles available:
- Handkerchief Linen: Not a weave per se, but a weight. An extremely fine, lightweight, almost sheer fabric, usually in a plain weave. A 3.0 oz. weight is about the lightest flax linen available today. Irish handkerchief linen is one of the most sought after and expensive of this type.
- Plain-weave Linen: The standard “linen” textile, in an even, over-under weave pattern which makes the most of linen’s interesting slubbed texture yet produces a smooth, slightly lustrous surface. Made in a wide range of weights from near-sheer to mid-weight dress or suit linens, to heavy, opaque jacketing and upholstery types.
- Twill-weave Linen: A beautiful, strong diagonal weave (similar to wool twill) that gives linen a glossy, tough-wearing surface. This type of textile is often intended for household linens, towels, drapery and upholstery, and is also very good for use in historical reproduction garments where hard wear is anticipated.
- Damask Linen: As with silk, linen has been woven in damask patterns for centuries. Linen damask textiles are almost always single-colour (usually white), produced using complex damask looms that alternate smooth, short satin-like weave sections with twill or other weaves to create a subtle positive/negative design (traditionally floral motifs) with a lustrous finish. Most often used for table linens, napkins, etc. Irish damask linens can be very expensive textiles, often more than twice the price of plain weave.
- Linen Knit: Linen can be produced as a beautiful, lightweight jersey (knitted) fabric, much like fine cotton knit, with a slightly heavier, limp drape yet more translucent appearance. Particularly well suited for loose, lightweight, flowy summer tops and cardigans.
- Linen Hopsack and Canvas: These are tightly and closely-woven, heavy fabrics, often used for upholstery, storage or carrying bags, or other utilitarian purposes.
- Linen Terry-Cloth: A fairly recent development, often made with a 100% cotton base and 100% linen loops rather than in all-linen, linen terry is a highly absorbent and long-wearing fabric used for luxury bath and kitchen towels.
- Linen Velvet: A high-end fabric, woven much like cotton velvet but heavier and more durable. Used primarily for upholstery.
- Linen Herringbone or Tweed: Herringbone and tweed linens are rather rare on the market, but linen tweeds or herringbone weaves make beautiful couture-quality ladies' jackets or skirt suits. Heavier types make lovely throws or upholstery coverings.
- "Shot" or "Changeable" Linen: Similar to the process used for silk, this weaving technique produces a wonderfully subtle effect in linen. By weaving a linen textile with a weft in one colour and warp (lengthwise) fibres in another colour, a shimmering surface is created that changes depending on how the light strikes it. This effect is less striking than with silk, but still very beautiful. Used primarily for garment-making in mid-weight linens.
- Glazed (Calendered) Linen: This is not so much a weave type, as a process, usually offered in medium-weight, closely-woven linens. The fabric is subjected to pressure and heat to produce a hard, glossy, resistant surface finish. Historically used as hard-wearing garment linings, but appropriate for household use as tablecloths, placemats, etc. This type of linen is rarely available today.
- Linen with Metallics: There has been a bit of a trend recently for flax linen to be woven with a metallic surface finish of one kind or another, for example with silver or gold threads interwoven into the linen, giving the face of the textile a shimmery, metallic effect. I suspect this "fad" will disappear sooner or later, mainly because linen's beauty can stand on its own.
- Linen Blends: Linen (and ramie) can be mixed with a wide variety of other fibres, but to my mind the best are the linen/cotton blends, partly because the cotton content lowers the cost, but mostly because these fibres have some qualities in common, and can be washed, ironed, and used in similar ways. A linen/cotton blend is a good alternative to pure linen for those on a budget. Linen is often blended with viscose (a modern rayon textile), rarely with polyester, and only occasionally with wool, silk, or other natural fibres. I find none of these is as successful or useful, for one reason or another, as linen/cotton mixes. Linen has, in recent times also been blended with nylon (Lycra) to produce "stretch" linen fabrics, which in my view neither drape well nor handle well.
Linen remains today both a luxury fabric and an important eco-friendly textile with wonderful qualities that can’t be matched by synthetics. It also has none of the concerning ethical issues attached to it that some other textiles may have. Fortunately, the unique characteristics and advantages of linen are becoming recognized by many modern consumers, and this amazing, ancient fibre is being appreciated once again for its enduringly beautiful qualities.
Ramie (Boehmeria nivea)
Ramie, also known as China grass, is a member of the botanical family Urticaceae, and is accordingly closely related to the common stinging nettle plant, Urtica dioica, which is well known in northern regions of the world. The family resemblance is hard to miss when the two plants are seen side-by-side:
Whereas stinging nettle is a plant of north temperate regions, ramie is very much a sub-tropical plant that grows best in the more humid regions of the Orient. Like common nettle, but unlike flax, it is botanically a perennial (although stinging nettle plants die down each winter in the north and re-grow from the roots in spring). In areas where ramie is cultivated, the plant continues to grow throughout the year, being harvested more than once and re-growing from the base.
The (western) botanical designation for ramie was given in honour of George Rudolph Boehmer (1723-1803), a professor of botany at Wittemberg, Germany. Its descriptive name, “nivea”, comes from the Latin “nivalis” meaning snow-white (think of Nivea cream). The reason for this name is that the fibres obtained after processing ramie are usually pure white, unlike flax linen, which ranges from a blond to greyish-beige colour.
| In the Fun Fact Column: As an interesting aside, a rather coarse fibre for textile-weaving can be made from common nettle plants too! Since nettles are easily grown all over the temperate areas of the world, there are home textile makers and weavers in northern countries who take advantage of this close cousin of ramie. Stinging nettle was sometimes used in Europe for making cloth where flax was either too expensive to grow or otherwise unavailable. Efforts have been made since the 19th century to create a viable ramie industry in parts of the world outside the orient, such as Australia and the United States, but local climate conditions, difficulties with processing, and a ready market for the finished product (especially when flax linen is a better choice) have been limiting factors. Due to the very involved processing of ramie from plant to woven textile, making ramie fabric more expensive than alternatives like cotton, many such efforts proved uneconomical. This was especially the case in regions where costly artificial irrigation was necessary to maintain crop growth. |
Ramie has many of the same properties as flax linen, such as high breathability, moisture absorbency, resistance to heat and washing, quick drying, and mildew resistance. Like true flax linen, it does soften with repeated washings, and does easily wrinkle. However, ramie also has a number of distinct characteristics, some of which are less desirable than flax.
Ramie is stronger than flax or cotton, with longer, finer individual fibres. It dyes more easily than flax, holding its colour well despite exposure to sunlight, and has a visibly more lustrous sheen than linen made from flax, almost silk-like in fact, especially in lightweight ramie fabrics. Ramie, having very fine fibres without slubs, can be woven into cloth that is even finer and sheerer than the finest handkerchief (flax) linen. It is tougher and more durable than flax linen, good for hard-wearing applications.
Ramie is stronger than flax or cotton, with longer, finer individual fibres. It dyes more easily than flax, holding its colour well despite exposure to sunlight, and has a visibly more lustrous sheen than linen made from flax, almost silk-like in fact, especially in lightweight ramie fabrics. Ramie, having very fine fibres without slubs, can be woven into cloth that is even finer and sheerer than the finest handkerchief (flax) linen. It is tougher and more durable than flax linen, good for hard-wearing applications.
However, ramie has some unfortunate drawbacks for garment use, despite its being a natural textile. For one thing, its fine fibres, (unlike silk or wool, and more so than linen), are brittle and inflexible when dry, making spinning challenging, especially in mechanized settings.
Secondly, ramie's relationship to the nettle plant is revealed in the tiny, bristly surface hairs of the fibres that remain on the fabric, even in the sheerest weaves. These are really only visible under a magnifying glass, but they cover the entire surface of the textile, making it very irritating for some people to wear next to the skin. The hairy surface of the fibres can also make high-speed industrial weaving problematic.
Secondly, ramie's relationship to the nettle plant is revealed in the tiny, bristly surface hairs of the fibres that remain on the fabric, even in the sheerest weaves. These are really only visible under a magnifying glass, but they cover the entire surface of the textile, making it very irritating for some people to wear next to the skin. The hairy surface of the fibres can also make high-speed industrial weaving problematic.
Another negative aspect of ramie is the complex processing involved in going from plant to textile fibre. Unlike flax (which itself requires a series of steps to produce fibre for spinning), ramie stalks contain a gum-like substance which necessitates lengthy, additional beating, scraping, cooking at high heat, and chemical treatment to separate out and render the fibres usable for textiles. In turn, this reduces the economical production of cloth made from ramie and increases the cost of the finished product. The result is that, up until the past few years, modern ramie fabric has often been nearly as expensive as linen, and less available as a garment textile in the medium to heavier weaves.
Recently however a bio-chemical, enzyme-based process has been introduced in China that may reduce the complicated, time-consuming process required to treat the plant material. If the processing problems can be solved, ramie’s strength and appropriateness for a number of garment, utilitarian and industrial purposes would make it a valuable cash crop for oriental producers.
Still, much of the reason that ramie can compete price-wise with true flax linen on the international market, despite these processing complexities, is that ramie textiles are produced in countries with very low wages, sometimes appallingly so (or even child labour), in factories without the safety procedures and protections required in western countries by law.
If China improves the ramie processing technology, allowing it to ramp up its ramie textile manufacturing, it will likely create a flood of ramie linen on the western market that, to the non-expert eye, will seem identical to flax linen but at a much lower price. At that point, flax linen production in northern regions may again be in serious jeopardy.
As far as uses go, ramie is employed today to create many of the same end products as linen (except for the seeds and oil, since ramie is completely different botanically from linen). This includes rope, nets, utilitarian textiles, cloth for garments and furnishings, paper producing, and so on. The high durability and fineness of the fibres may make it valuable for industrial applications as yet undeveloped. In addition, like nettle leaves, the leaves of the ramie plant are edible, used in oriental cuisine.
Historical availability of ramie
As mentioned earlier, ramie has a long history of use as a textile in the Orient. Since flax wasn't suitable for growing in these areas, even if it had been available, and there is little evidence that (unlike India) cotton was grown in any quantity in China or the south Asian regions, ramie was the most widely available plant textile. Like flax in northern regions of the earth, ramie textiles could be made on a small scale locally in the Orient, and hence it was available to the lower classes.
Was ramie linen seen in Europe before the 20th century? It's not clear from my research whether ramie textiles were widely available outside the Orient prior to the early 1900's, although I have seen references to it in European publications of the Edwardian era.
Still, since ramie, unlike flax, was inappropriate for growing in northern regions, and was similar to linen in many ways yet more difficult to process, it's likely that few ramie textiles and other products would have been imported all the way from southeast Asia. The end product simply wouldn't be able to compete with the more luxurious and comfortable flax linen textiles produced in Europe. Prior to the late 19th century, ramie textiles would doubtless have been at least as expensive as cotton from India, if not more so, given the complicated method of ramie fibre extraction combined with the long, difficult, and costly shipping from places like China.
In effect, each part of the world had its own linen textiles: flax could not realistically be grown in humid tropical places, nor ramie in cool northern climates.
But how do I tell them apart?
Before approaching the question of identifying ramie from flax textiles, it's helpful to remember that the term "linen" itself has become generic, that is, applicable to cloth made from various plants. It's also been used to simply refer to the flax plant itself.
The word "linen" does indeed derive from the name of the flax plant (linum), but is now generally applied to any bast textile, that is, one made from the phloem (inner layer) of natural plant fibres. Accordingly, there is flax linen, ramie linen, hemp linen, nettle linen, and even bamboo linen, all of them being lumped under the one designation, "linen", both by manufacturers and the clothing trade.
The important point to remember is that generally speaking, flax and ramie are virtually impossible to distinguish from each other chemically once they're made into cloth, but the woven textiles themselves can often be identified based on their physical properties or characteristics. Recent research has shown that ramie and flax fibres may be able to be identified microscopically through a multi-faceted approach, an important factor for museums with historical textile collections.
The obvious -- and serious -- issue arising from this reality is that a lesser quality linen textile (ramie) can masquerade as its more luxurious cousin (flax) on the worldwide consumer market. As mentioned above, if China succeeds in producing more ramie more quickly and of a higher quality at a lower price, it has the potential of destroying the northern flax linen market.
Distinguishing true linen from ramie does take some experience and careful observation, but once you’ve handled the two fabrics side-by-side a few times, especially if they are of a similar weight, you’ll rarely need to wonder again.
First, it should be said that a burn test is of no use in this context. Both textiles are are "bast" types, and will simply burn to a dry ash (like wood) in the same way.
Basic chemical analysis to distinguish whether a woven textile is flax or ramie is essentially meaningless too, since both fibres will react to chemical reagents (such as strong acids or alkalines) in the same way. Both can be realistically and truthfully classified or labelled as "linen" by manufacturers and by the garment industry, complicating an already difficult problem.
Only a complex lab analysis of impurities or chemicals in the fibres themselves -- a costly and time-consuming procedure at best -- might be able to determine the likely origin of the fibre, based on agricultural and processing chemicals used in different regions of the world. Many agrichemicals and pesticides are still legal in China and other far eastern countries that have long been banned in the West. Although such a lab analysis would be extremely expensive, it would not be able to conclusively identify the fibre, only point to the area of the world it probably came from. That is, if residues of certain agrichemicals used only in the far east were found, the textile would likely be ramie.
I often use scent as a defining test to determine the content of fabric, but again, in this case both ramie and linen have that characteristic, wonderful fresh woodsy smell.
So, what’s left to determine which is which? Well, the touch test, a keen eye, and a bit of textile knowledge.
(1) Textile Knowledge: To begin with, much of what is sold today as the finest “linen voile” or even “super-fine handkerchief linen” is actually ramie. Generally speaking, true flax linen is not made in a weight lighter than about 3.0 oz. This is because modern linen fibres are not as fine as those of ramie. Accordingly, if you see linen fabric that is under about 2.8 oz. being sold, it is very likely to be ramie.
As has been outlined above, knowing the source of the textile can be a help in identifying whether it's flax or ramie. This is where being able to rely upon information provided by seller or manufacturer is important (see further on).
(2) A Keen Eye:
Check for Slubs: If you’re buying from an online source, this may be somewhat difficult, but try to enlarge any photo of the fabric to a point where you can tell if there are slubs. If the fabric is said to be very lightweight (e.g. under about 2.8oz.) and has no slubs, it’s almost certainly ramie. If it’s over 2.8 oz. and you can see some slight slubbing in the weave, even in a handkerchief weight, it may be true linen. Heavier weights of true (flax) linen will almost always clearly display slubs in the weave in close-up photos.
Look at the Sheen: Secondly, if you've purchased enough of the fabric to be able to pile it up on a table, look at it under good light, directed at an angle to the fabric. This test is especially useful if you can place a pile of yardage that you know to be true flax linen next to your mystery linen. Ramie linen almost always has a more definite surface sheen, sometimes almost a shine. Flax linen tends to have a much more subtle sheen, not as reflective as ramie.
Check the Weave: A very close weave and some indication of a more pronounced lengthwise run in the fibres can signal that the fabric is woven from ramie. Although not conclusive in itself, this factor combined with other indicators, can help to positively distinguish ramie from flax linen.
Most importantly, if you’re in doubt, ask the seller to confirm the content. If they can’t or won’t do so, either look elsewhere or order a swatch. A swatch may be the only way to know with more certainty, then see #(3) below.
(3) The Touch Test: Once you have your swatch or have received your fabric order (or if you can touch and see the fabric close-up in person), first check for slubbing in the weave. An extremely lightweight, sheer fabric with a pronounced surface sheen and a very fine, smooth, slub-free weave will almost always be ramie.
Testing for "bounce": Place the "mystery" fabric loosely in a pile on a table -- this works best with at least a half metre/half yard of fabric, to give you enough to manipulate. Gently scrunch a section of it up in your hands. Feel the character of the fabric as you do so: ramie will display a fair resistance to being bunched up, and a definite bounciness or tensile resiliency.
However, this is a test that is really best as a comparative one. Place a length of fabric that you know to be true flax linen, preferably of the same weight of weave, in a pile next to the "mystery" fabric and handle it in the same way. Linen will display less resistance to being "scrunched up", will not bounce away from the hand as sharply, and will have an overall softer, more pliable feel (referred to as the fabric's "hand").
Testing Drape: Test the drape of the "mystery" fabric, preferably compared to a similar weave of true flax linen. To do this, hold the fabric up and with your fingers make a few knife-pleats across one cut end of the yardage, each pleat about 2 or 3cm (about 1") wide, across the width of the fabric (that is, along one cut end, working from selvedge to selvedge). Pin the pleats in place if you like, then hold up the piece and carefully observe how the pleats fall (or drape). Undo these pleats, turn the fabric piece, and make pleats of the same size in the other direction (that is, along the length of the piece, pleating along the selvedge). Again, observe carefully. Repeat this experiment with the length of fabric you know to be flax linen.
What you'll find, if your "mystery" linen is ramie, is that the pleats will fall very nicely fairly flat, and with little resistance when made across the width of the fabric, but will create deep, springy, rounded folds when you try to pleat along the length (i.e. along the selvedge). By comparison, flax linen textiles will almost always pleat evenly and with little resistance in either direction.
The reason for this is simple: ramie textiles are made from finer, longer fibres than flax linen, and therefore fabric woven from 100% ramie will have a strong lengthwise grain, compared to flax linen. You can often see this pronounced lengthwise weave in ramie fabrics simply by looking at them at an arm's-length distance, whereas flax linen tends to be fairly evenly woven in both directions. Ramie is also often more closely and stiffly woven than linen, sometimes to the point where lighter weights of ramie linen may actually have an organza-like "hand" or feel.
Surface Feel: And here’s the final test: take a fairly large section of the fabric and very, very gently run the palm of your hand over the surface, preferably lengthwise on the fabric, then do the same with the back of your hand. If you feel a slightly bristly, hairy surface, almost like a peach-fuzz effect, you probably have ramie. If you can’t feel this with your palm, run the fabric gently against the inside of your forearm or your cheek – these areas of skin may be more sensitive to the prickliness of the surface of ramie.
Once again, if you can compare this test immediately with a length of true flax linen, the difference will be apparent, especially if you have sensitive skin. Some people can't bear the feel of ramie against their skin unless the fabric is washed several times and put through a hot dryer, something that is entirely unnecessary with flax linen.
(4) Linen Weights, Source, and Prices as Distinguishing Factors:
Keep in mind that most ramie that is sold as “linen” in North America will be the sheerest, most transparent and lightest weight type. This is often the type that can compete most economically with flax linen, which can’t be produced in such extremely fine weights.
The price of most of these featherweight ramie textiles may be close to that of true linen, so cost is rarely a helpful factor in identifying ramie.
However, as mentioned above, as more ramie becomes more easily produced, especially in China, and as the quality and variety of ramie textiles increases, unfortunately it may become more and more difficult to know exactly what you're buying. These Chinese products can legally be sold as natural "linen", which doesn't help the consumer at all.
Price may ultimately be your best clue: if you find light to mid-weight fabric being sold as natural linen, but at 30% or more under the usual prices of European linen, chances are very good the fabric is Asian ramie. Some sellers will correctly identify ramie fabric as such, others either don’t know enough to know the difference between ramie and linen or prefer not to say, for obvious reasons.
Chinese/Asian or European? A reliable, trustworthy retailer should be willing to tell you where they source they "linen", even if they don't know the fibre content for certain. If that source is China or another country in the far east, and the price is lower than most European linen on the market, then the fabric is very likely to be ramie. If the seller confirms the fabric comes from a European or North American source, then it is most probably true flax linen.
However, be aware that there are instances where true flax fibre is exported from northern European countries into countries (such as China) with cheap labour, to be made into linen textiles. In these cases, the source of the finished fabric will not help identify whether it's ramie or linen -- you will need to rely on one or more of the other physical properties tests mentioned above.
If you're dealing with an honest, forthright textile retailer then at least you can make an informed decision as a consumer whether to buy the product or not. If the seller either can't provide details, or refuses to give more information, it's best to move on rather than being disappointed with your purchase.
What to do with ramie?
Even if it isn’t true flax linen, and if you may not be able to tolerate wearing ramie against your skin, that doesn’t mean that ramie has no uses in garment-making, even for historical items.
For example, a fine, sheer ramie might make a wonderful 18th century cap, apron, engageantes, neckerchief, or even a cool, comfortable petticoat or under-petticoat for summer. It might be ideal for Victorian collars, cuffs, or bouffant sleeves, or a pretty fichu. It might also be the best fabric to use for Renaissance or earlier veils, cauls, wimples and ruffs. For the Edwardian/1910’s era, the finest lightweight ramie could be used in place of ultra-expensive Swiss batistes for summer lingerie gowns (as long as they are being worn over the usual soft cotton batiste underclothing, and not directly against the skin).
For example, a fine, sheer ramie might make a wonderful 18th century cap, apron, engageantes, neckerchief, or even a cool, comfortable petticoat or under-petticoat for summer. It might be ideal for Victorian collars, cuffs, or bouffant sleeves, or a pretty fichu. It might also be the best fabric to use for Renaissance or earlier veils, cauls, wimples and ruffs. For the Edwardian/1910’s era, the finest lightweight ramie could be used in place of ultra-expensive Swiss batistes for summer lingerie gowns (as long as they are being worn over the usual soft cotton batiste underclothing, and not directly against the skin).
Treating ramie to soften it
If you're sensitive to the itchy, bristly feel of newly-purchased ramie against your skin (as I am), it is possible to "beat down" the fabric's surface to a point where it's tolerable to wear. This type of extreme treatment is something I would never do with flax linen (it would produce a limp, flannelette-like result), but it does help to soften ramie linen's stiff and hairy texture.
By the way, as an interesting test of the "before" and "after" state of the fabric, gently stroke the ramie fabric over your cheek or the inside of your upper arm now, then do the same after this treatment -- I think you'll easily feel the difference! Here is what I do, which will essentially help destroy some of the natural properties of the ramie:
1) Wash the piece in warm water first, preferably in a washing machine, not by hand, so that it gets some agitation. Don't use a "gentle" cycle, just a normal one. Let the machine spin-dry the fabric.
2) Wash it again in the machine, this time in slightly warmer water with a good, strong laundry detergent (like Tide with Oxyclean). Put it through the normal cycle again, spin-drying at the end.
3) Put the whole piece into the dryer on medium heat for about 40 minutes. You'll notice this will produce an enormous amount of lint -- this is the surface of the ramie fabric which has been abraded and sloughed off during this process (including a lot of the bristly bits of fibre).
4) Iron the fabric. Use an iron set to the highest (linen) heat setting. Spritz each section of the fabric with water before ironing, then firmly press as you iron. Repeat over the entire length of fabric. Air-dry on a rack before storing.
And try the cheek-stroking test again. I guarantee it will feel like a different fabric! Perhaps not quite as soft and comforting as flax linen, but acceptably soft enough to wear against the skin.
The following series of photographs may help you to be able to recognize some of the visual differences between linen and ramie the next time you’re shopping for fabric.
1. In the photo below, I’ve put a length of 1.7 oz. ramie (at the left) and 3.0oz. handkerchief linen (at the right) next to each other. Scissors were placed under each of the fabrics to demonstrate their relative sheerness for the given weight. It’s fairly clear from this picture that the ramie is visually more sheer than the linen.
2. Below is a photo of the ramie on its own. Notice the evenness, closeness of weave, and smooth, fine texture of the fabric:
3. Compare the above photo of ramie to this photo of the handkerchief linen shown earlier. Notice the slubs, even in this very fine 3oz. handkerchief linen:
- Below is a picture of the ramie, taken at the same distance, for comparison:
5. When the ramie (at left) and linen (at right) are placed side-by-side in a close-up, the difference in fibre thickness, slubbing (or lack of slubbing where the ramie is concerned), and closeness of weave are fairly clear, especially for anyone used to working a lot with flax linen. These photos were taken at the same distance. (Scissors were placed under each piece to demonstrate the relative sheerness of the fabrics).
6. Below is a photo of some 2.0oz. sheer ramie yardage in a steel blue colour, showing the almost silk-like sheen of the cloth and the even texture and weave. True linen has a much more subtle surface lustre and is not available in such very light weights. You may also be able to tell from the photo how much this piece of ramie linen reacts like organza when scrunched up (portion at right in the picture).
7. Next is the same ramie textile a little closer up, showing its fine, close, even, semi-transparent weave. Notice the very fine, hair-like fibres at the selvedge, much finer than those of flax linen. Note also the more pronounced lengthwise grain of this fabric as compared to the handkerchief linen shown earlier.
How is the weight of linen textiles measured?
The weight of both linen and ramie textiles is expressed in either grams per square metre (“gsm” in the metric system used by most of the world), or ounces (oz.) per yard for U.S. measurements. This gives a very good indication of the weight, thickness (or hand) and the sheerness or opacity of the fabric.
However, keep in mind that the more open the weave, the more the fabric will have a gauze-like, less opaque character in any weight. Accordingly, the number of threads per inch/centimetre are also important in understanding the character of the cloth. For example, a handkerchief linen with 30 threads per inch will be sheerer than one with 40 threads per inch, even though the textiles may be described as being of a similar gsm or oz. weight.
However, keep in mind that the more open the weave, the more the fabric will have a gauze-like, less opaque character in any weight. Accordingly, the number of threads per inch/centimetre are also important in understanding the character of the cloth. For example, a handkerchief linen with 30 threads per inch will be sheerer than one with 40 threads per inch, even though the textiles may be described as being of a similar gsm or oz. weight.
The following summary (given in both measurements) provides a rough guide to the types and best uses of the various weights of ramie and linen:
About 1.5 to 2.8 oz. (Less than about 90 gsm)
Linen textiles of this weight will almost always be finest, sheer ramie cloth, sometimes called “linen voile” or “ramie voile”. Has a sheen and springiness similar to silk organza. Unlikely to be flax linen.
For sheer blouses or accessories such as cuffs, collars, handkerchiefs, aprons, table linens, etc. Takes to embroidery well. May be difficult for some to tolerate next to the skin.
Over 2.8 to about 3.5 oz. (approx.. 90 – 120 gsm)
This is fine handkerchief linen weight (although a 2.8 oz. true flax linen is very rare); Semi-sheer, soft, drapes beautifully, lightweight, extremely smooth and comfortable against the skin.
For fine lingerie, blouses and accessories; unmatched for use in items worn next to the skin, especially good for 18thC. reproduction shifts. Very desirable for 18thC. style caps, handkerchiefs, aprons;
19th & early 20thC. reproduction blouses and dresses; some types of lingerie.
About 4 to 8 oz. (approx. 130 to 190 gsm)
This is the mid-weight of most true linens, with a very wide range of uses and weaves. Generally semi-opaque to fully opaque.
The lighter, 4 to 5 oz. weights are especially good for 19th & 20thC. reproduction blouses and summer dresses, and for 18thC. linings, gowns and petticoats. The heavier types in this category (6 or 7 oz) are best for jackets, stays (18thC.), or more substantial dresses, skirts and outerwear (19th & 20th C.).
Some weights in this category, including the twill weaves, are well suited to certain home decorating uses, such as bed linens, curtains, lighter weight upholstery, towels, etc.
About 9 to 16 oz. (over 200 gsm)
Considered heavy weight linen, these types are rarer on the retail fabric market. Includes such textiles as linen canvas and heavier twills. Very thick, stiff and usually with little drape.
Best for the most substantial outerwear (below 12 oz.), such as Edwardian automobile "dusters", or 18thC. support layers that require both sturdiness and breathability.
Generally mostly used for upholstery or decorating purposes, book-binding, etc.; Linen canvas is the traditional base material for fine oil paintings.
Handling and Cleaning Ramie and Linen
Ramie and true linen can be dealt with in the same way for most purposes. Both will shrink significantly (3% or more) when washed, so my first advice is to always, without fail, pre-shrink ramie or linen fabric before you sew with it.
Unless you enjoy the crisp, rather stiff vertical hand and bristly surface of ramie as it comes from the bolt, pre-treating it as described earlier to soften it will tame its less desirable characteristics and at the same time ensure it is thoroughly pre-shrunk. Do not give true flax linen the same brutal treatment, unless you really prefer to turn it into a limp, fluffy fabric similar to cotton flannelette.
Otherwise, both flax and ramie linen can be handled similarly:
To Pre-Shrink: Soak the linen or ramie yardage in cold to medium-hot water for at least 30 minutes, and preferably up to an hour, leaving it undisturbed (i.e. don't put it through a washer cycle). The water temperature you use for pre-shrinking should be similar to the temperature you plan to use for future washing. Carefully lift the fabric out of the water, and allow the bundle to drip for a minute or two to release excess water. Avoid hard wringing or twisting, as this will encourage wrinkling.
Or, if you are pre-shrinking in an automatic washer, put the fabric through the spin cycle (but remove the fabric immediately after the spinning is finished, to prevent hard wrinkles from setting).
Dry the ramie or linen on a drying rack, smoothing the fabric as much as possible. Leave to drip until almost, but not quite dry, preferably outside on a clear, dry day if possible. Linen and ramie can be put through the dryer on a medium-low setting, but be aware that this treatment will change the character of the cloth, making the surface fluffier and less crisp.
After Pre-Shrinking: One key point with ramie and linen is to try to catch the fabric before it's completely dry if you want to be able to iron it smooth without difficulty. Ideally, the fabric should still be slightly damp, but definitely not wet. Use a dry iron on the "cotton" or "linen" setting to press out any wrinkles and smooth the yardage. Then be sure to hang the yardage for a few hours, preferably outdoors, to ensure it's completely dry before storing it.
Cleaning: Both ramie and linen garments can be dry-cleaned, but it's hardly worth the cost unless the garment is a complex or tailored item that will make ironing it after washing a real challenge, if not impossible. However, for items of fairly simple construction, such as shirts, skirts and lingerie, reproduction shifts, petticoats, etc. washing is the best choice.
Linen and ramie can take hard, frequent washing, and in fact will become softer with time if so treated. As noted above, they can be put in the dryer if you're willing to change the way they drape and feel. But if you want to keep your linen garments crisp-looking, gentle washing and drip-drying is best.
I wash my 18th century reproduction linen shifts and men's linen shirts (both made of true flax linen) in the automatic washer on the gentle cycle, with a mild soap (like Woolite or Zero), and hang them outside to almost dry. I then iron them while still slightly damp to get a perfectly beautiful result. There is nothing like the wonderful scent of freshly-washed linen brought in from outside on a breezy summer's day. In fact, this is precisely the scent some commercial air freshener products attempt to capture "in a bottle"!
Storing: If properly stored in a dry, clean place with reasonably good air circulation, linen garments will last beautifully for decades (even centuries). Moths are not an issue at all (they are interested in protein fibres, not plant material). However, too much dampness for too long can encourage mold. For this reason, always be sure linen garments and fabrics are thoroughly dry before storing.
If you're planning to store linen yardage folded up for more than a few months, whether ramie or flax linen, it's a good idea to take it out from time to time to air the fabric and release wrinkles. If you have time, give it a brief pressing with a steam iron, then air-dry for a few hours. Fold it differently when replacing into storage, to avoid permanent creasing along old fold lines.
If you're planning to store linen yardage folded up for more than a few months, whether ramie or flax linen, it's a good idea to take it out from time to time to air the fabric and release wrinkles. If you have time, give it a brief pressing with a steam iron, then air-dry for a few hours. Fold it differently when replacing into storage, to avoid permanent creasing along old fold lines.
A Note About Safety: Both linen and ramie, being plant-derived, are easily flammable, so be careful about wearing linen garments near open flame (this is especially true where historical reproduction gowns with trains or wide hemlines are concerned).
A Gallery of Historical Replicas in Linen:
Following are some examples of historical items I've created over the years using various weights of true (flax) linen. Linen remains one of my favourite textiles to sew with and to wear!
Using linen for historical reproductions:
True (flax) linen is especially historically accurate for 18th century reproduction garments and under-garments. There is certainly no textile better than flax linen to accurately replicate 18thC. shifts.
But linen is also just as perfectly suited to the 19th and early 20th century, keeping in mind the appropriate fabric weight and drape for the particular use. For example, mid-weight (suiting weight) linen was highly fashionable and widely used for walking suits and summer day dresses during the 1908 to 1919 era.
But linen is of course also appropriate for Renaissance, Elizabethan, medieval, and ancient representations, and its uses for fine accessory garments is virtually endless. Since linen's use in garment-making goes back millennia, for both upper and lower classes, the possibilities are unlimited.
I hope this guide will provide some insights into these two textiles and help you choose just the right fabric – whether ramie or true flax linen – for your next project.
Upcoming topic: Silks and the Faux Silks.
]]>Upcoming topic: Silks and the Faux Silks.


