What goes into a 'History House' antique pattern?
In short, my whole life. I've been creating and selling my historical pattern designs since 2007. Every pattern I develop draws on the skills, experience, and knowledge I've accumulated through many years of study and training in a variety of disciplines. These include history and language studies (I hold a degree in these fields), fluency in French and German, years of fine arts training, involvement in live theatre and costume production, study of couture garment-making and draping, decades of writing and research in various areas, and a lifelong interest in sewing.
There are a lot of people capable of drafting a usable pattern from antique sources, and some who are skilled at grading those patterns and writing sewing instructions to make a product that is worthy to sell. But I believe there are few who are able to do those things as well as fully comprehend and interpret antique patterns originating in French language publications, understand historical French dressmaking (or couture) methods, and then drape, grade, and produce a finished garment, followed by a properly drawn, size-graded, and annotated sewing pattern with step-by-step sewing instructions. That, in a nutshell, is what I do!
For anyone who might be interested in knowing about my process from the starting point of a complicated-looking, multi-lined antique pattern sheet up to a published pattern, I've included a brief overview of the steps below. These represent the work done to create one of my standard History House patterns. The Master Class patterns will generally omit the draping, multi-size grading, step-by-step instruction writing, and sample-making, but all my experience and knowledge will still go into producing a more accessible pattern, with written explanations to guide the user, than most of the "raw" antique patterns available today.
Most importantly, despite being authentic historically, I strive to make my patterns accessible and in a format that will be familiar to anyone who has used a modern commercial pattern.
Steps to Creating an Exceptional Historical Pattern
Step #1
Begins with choosing a design that speaks to me for one reason or another. Then comes the complicated-looking 100-year old (or older) pattern sheet, consisting of intersecting lines of various types, usually in French, and with little by way of directions but a few lines of text (see photo -- anyone familiar with antique patterns will recognize this!).
The first task is to simply identify and trace off the required pattern pieces, then reconstitute the larger pieces (usually skirts) from the tiny reduced size scale sketches, by drawing them out in full size on tracing paper. This often involves a lot of scrutinizing with a magnifying glass, since many old pattern sheets are quite worn, tattered or creased, making the smallest printing on them very hard to read.
Next, I read through the original French instructions (such as they are), make notes for points to keep in mind, and draft any missing or required pieces such as cuffs, facings, pockets, etc. The result is a collection of taped-together rough looking pattern pieces, full of scribbled notes and pencil lines, ready to be turned into 3-dimensional reality.
A typical Edwardian era French pattern sheet of the type I work from, with multiple pattern pieces superimposed, and large pieces set out in miniature diagrams.
Step #2
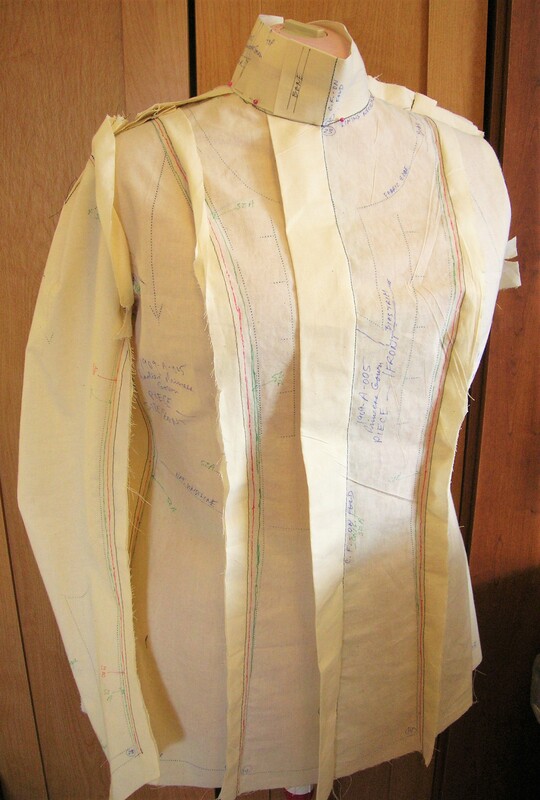
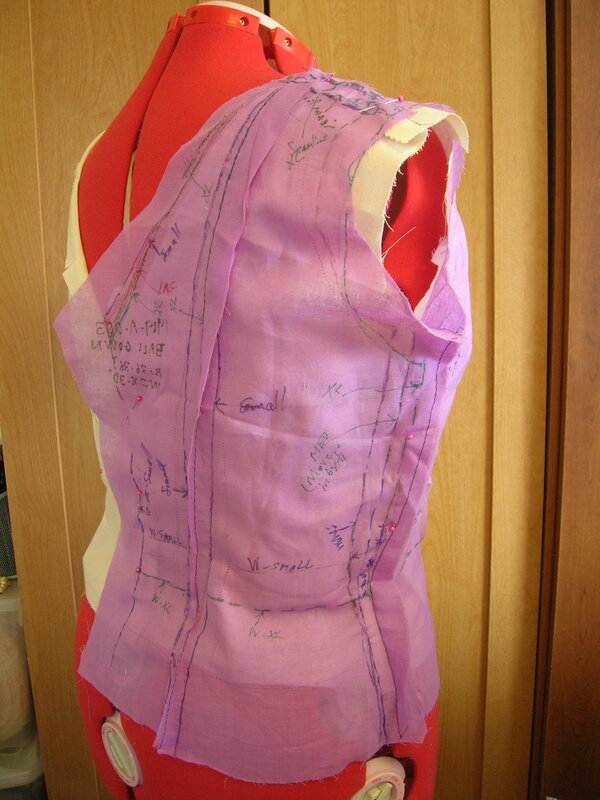
I construct a draft garment in muslin (the "toile"), and grade the design to more modern proportions or in a multi-size (for my standard 'History House' patterns). The muslin pieces get scribbled and written all over, sometimes cut up, enlarged, altered and otherwise almost ruined in the process! Often 2 or more toiles are needed. Just a few examples are shown below. This whole process can take a week or two. Once I'm satisfied that I've worked out the issues associated with bringing an antique pattern "back to life", I'm ready for the next step.
I construct a draft garment in muslin (the "toile"), and grade the design to more modern proportions or in a multi-size (for my standard 'History House' patterns). The muslin pieces get scribbled and written all over, sometimes cut up, enlarged, altered and otherwise almost ruined in the process! Often 2 or more toiles are needed. Just a few examples are shown below. This whole process can take a week or two. Once I'm satisfied that I've worked out the issues associated with bringing an antique pattern "back to life", I'm ready for the next step.
 A typical marked-up toile in the base size (this one for a 1912 ladies' shirtwaist).  The initial toile for a 1909 gown. The toile will be re-made, re-fitted, and re-drafted for each size to be offered in the pattern.  Toile for a multi-layered Edwardian formal gown.  Toile for a 1909 ball gown, with 3 layers to the bodice alone. Each will need to be fitted and re-drafted for each proposed pattern size.   Play Pause |
Step #3:
I transfer all the information I've gathered from the 3-dimensional toiles back onto my draft paper pattern pieces for each size I plan to offer in the pattern. More notes, more scribbling, cutting, piecing, taping, correcting, and general messiness! Occasionally at this point an additional toile (mock-up) is needed to double-check the changes to the draft pattern.
I transfer all the information I've gathered from the 3-dimensional toiles back onto my draft paper pattern pieces for each size I plan to offer in the pattern. More notes, more scribbling, cutting, piecing, taping, correcting, and general messiness! Occasionally at this point an additional toile (mock-up) is needed to double-check the changes to the draft pattern.
Step #4:
I set up a pattern file on my laptop computer, and compose the first, rough draft of my sewing instructions. At this point, I assign each pattern piece a number and a name, create a draft pattern envelope, and transfer those details onto my computer file. This part of the procedure can take 3 or 4 days to complete.
I set up a pattern file on my laptop computer, and compose the first, rough draft of my sewing instructions. At this point, I assign each pattern piece a number and a name, create a draft pattern envelope, and transfer those details onto my computer file. This part of the procedure can take 3 or 4 days to complete.
Step #5:
I cut out the various pattern pieces to enable me to actually sew a sample garment from the pattern. This stage of the process can take several days, as I work out the best layout, based on the fabric width, and make notes and rough diagrams of the layout to include in my final pattern.
I cut out the various pattern pieces to enable me to actually sew a sample garment from the pattern. This stage of the process can take several days, as I work out the best layout, based on the fabric width, and make notes and rough diagrams of the layout to include in my final pattern.
Step #6:
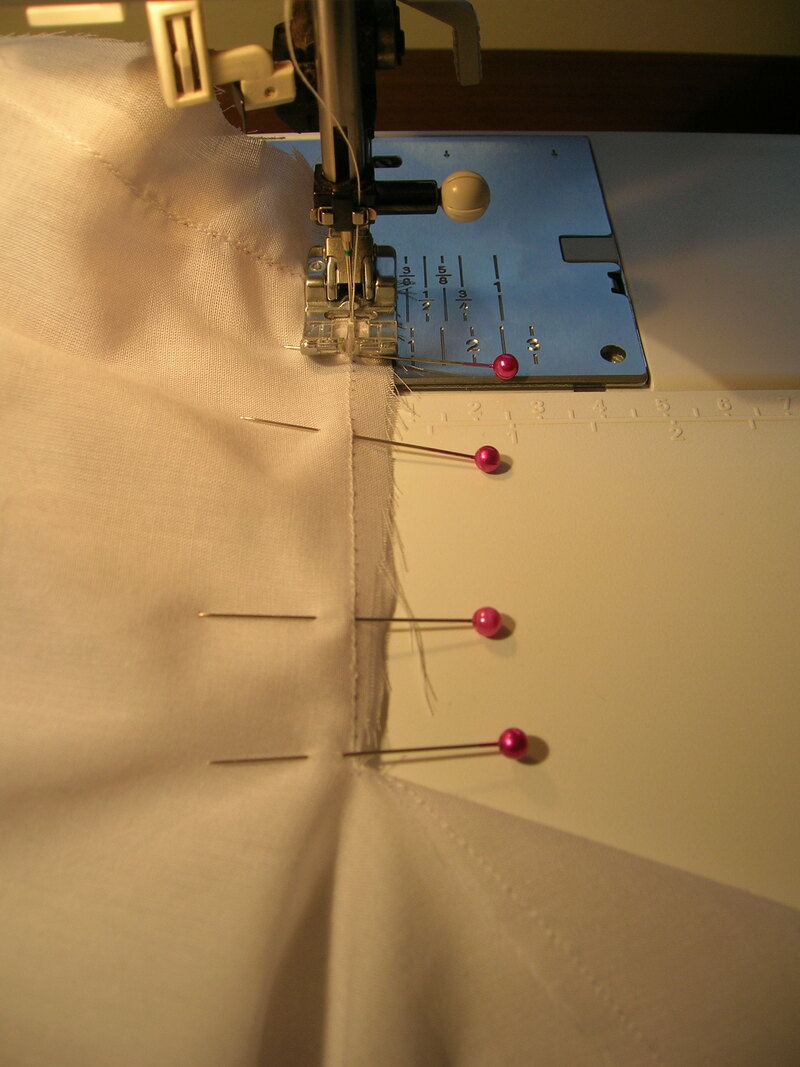
Starting to sew! Here is where multiple skills and knowledge of historical garment construction are required. I have my laptop running next to my sewing table, and while I visualize the construction steps and process (they're never like a modern garment), I write detailed sewing instructions a few steps ahead of where I actually am, and complete those steps with my sewing machine (or hand stitching), making corrections to the text as I go. I then move on to the next portion, and so on, until I have a finished sample garment. This part of the process in itself takes anywhere from several days to 2 or 3 weeks. While I sew, I also make notes of any changes or alterations I may need to make on the paper pattern, and take photos that might be useful for illustrating points of construction.
Starting to sew! Here is where multiple skills and knowledge of historical garment construction are required. I have my laptop running next to my sewing table, and while I visualize the construction steps and process (they're never like a modern garment), I write detailed sewing instructions a few steps ahead of where I actually am, and complete those steps with my sewing machine (or hand stitching), making corrections to the text as I go. I then move on to the next portion, and so on, until I have a finished sample garment. This part of the process in itself takes anywhere from several days to 2 or 3 weeks. While I sew, I also make notes of any changes or alterations I may need to make on the paper pattern, and take photos that might be useful for illustrating points of construction.
 Pieces cut for an 1862 red wool mantel, including red silk jacquard organza underlining  Sewing the inner armscye seam of a 1911 lawn blouse.  Stitching on the ruched sleeve band of a 1912 taffeta jacket.  Positioning decorative silk bias bands on a 1912 wool day gown.  Pinning silk satin bias to neckline of a 1912 afternoon gown. Play Pause |
Step #7:
Back to the drawing board! Now drafting skills, intense concentration and attention to detail are essential, to produce my "master pattern" in permanent ink on vellum. This step often takes several days to a week or more, and I thoroughly review the whole pattern before taking it to my professional printer for scanning. A sample of the result so far is pictured below:
Back to the drawing board! Now drafting skills, intense concentration and attention to detail are essential, to produce my "master pattern" in permanent ink on vellum. This step often takes several days to a week or more, and I thoroughly review the whole pattern before taking it to my professional printer for scanning. A sample of the result so far is pictured below:
Step #8: The pattern master goes off to the print shop to be scanned. Once I have the scanned files back, I go over them carefully to check for any omissions or errors and correct them.
Step #9:
I review and revise the sewing instructions (on average, about 10 to 15 pages' worth), including finalizing all size details and annotating cutting layout diagrams, in preparation for publishing the pattern. This process can take several days to a week or more for the larger, more complex patterns.
I review and revise the sewing instructions (on average, about 10 to 15 pages' worth), including finalizing all size details and annotating cutting layout diagrams, in preparation for publishing the pattern. This process can take several days to a week or more for the larger, more complex patterns.
Step #10:
I design a pattern cover with a copy of the antique sketch, take photos of the sample garment to include on the envelope cover and the online pattern listing, print out the sewing instructions, then compile all the necessary digital files on the computer. This can involve several more days of work.
I design a pattern cover with a copy of the antique sketch, take photos of the sample garment to include on the envelope cover and the online pattern listing, print out the sewing instructions, then compile all the necessary digital files on the computer. This can involve several more days of work.
Step #11: Publish the pattern for sale online, and (usually) offer the sample garment for sale.
And that's it! Simple, right?
Just kidding! But it does explain, I hope, the care, skill, and dedication I put into my patterns, and the time involved in bringing each one to completion. It's not unusual for a pattern drafted in 3 or 4 sizes to take two or three months to get to the point of publication. Now if I only had a staff of hundreds, like the big pattern companies...
Just kidding! But it does explain, I hope, the care, skill, and dedication I put into my patterns, and the time involved in bringing each one to completion. It's not unusual for a pattern drafted in 3 or 4 sizes to take two or three months to get to the point of publication. Now if I only had a staff of hundreds, like the big pattern companies...
Two versions of 'History House' pattern #1909-A-003, a grand Belle Epoque evening gown. On a rare occasion, or for especially beautiful designs, I will make more than one sample garment, in different colours or sizes.
This pattern is available in my Etsy shop -- click on the button below:
This pattern is available in my Etsy shop -- click on the button below:
Site powered by Weebly. Managed by Dot5Hosting


