|
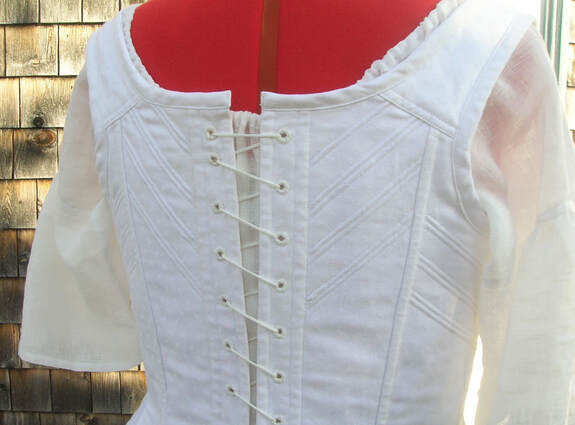
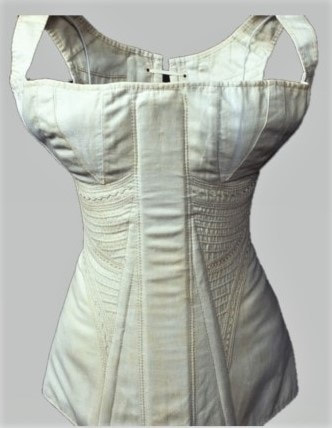
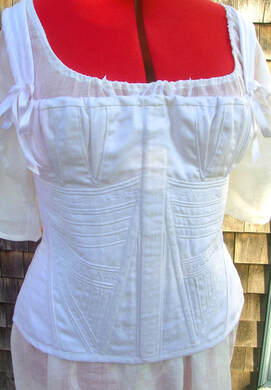
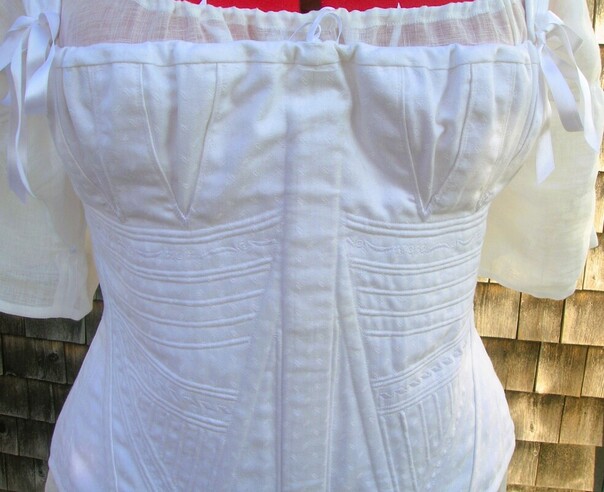
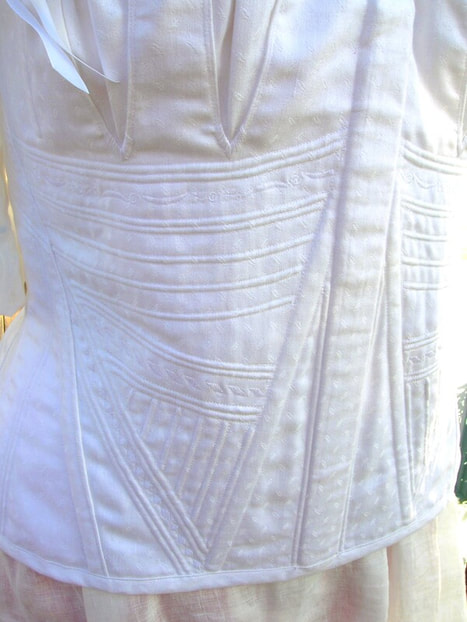
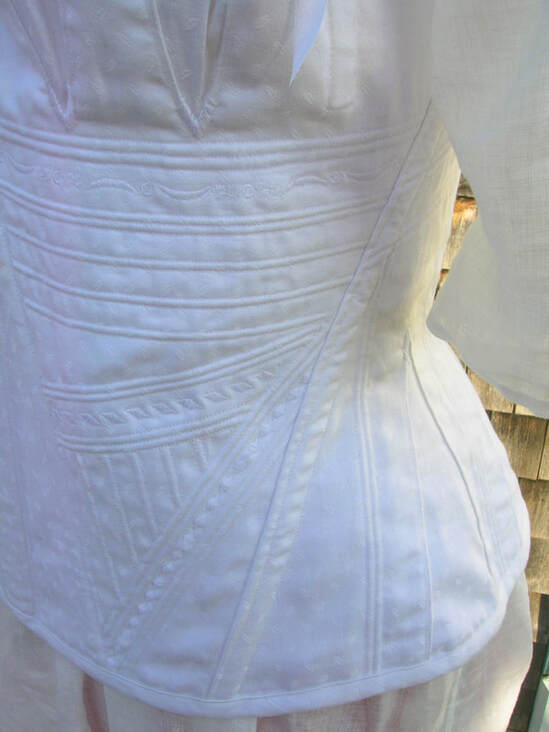
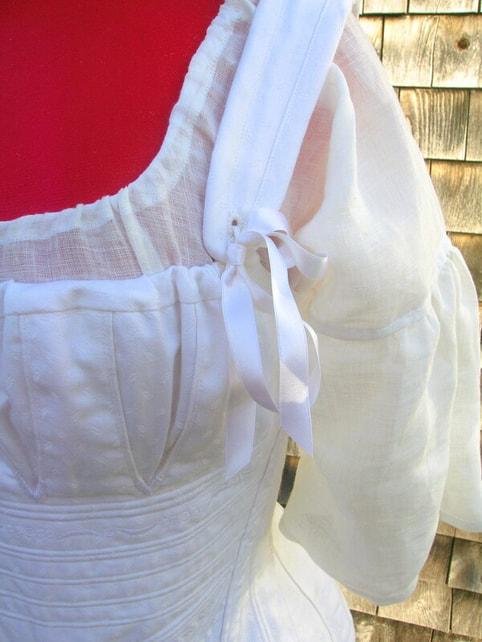
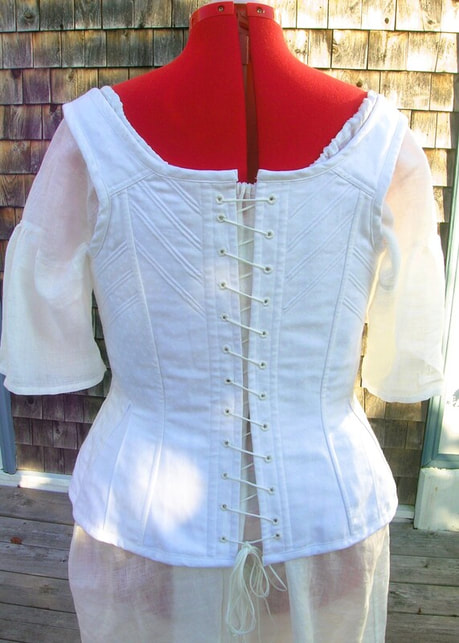
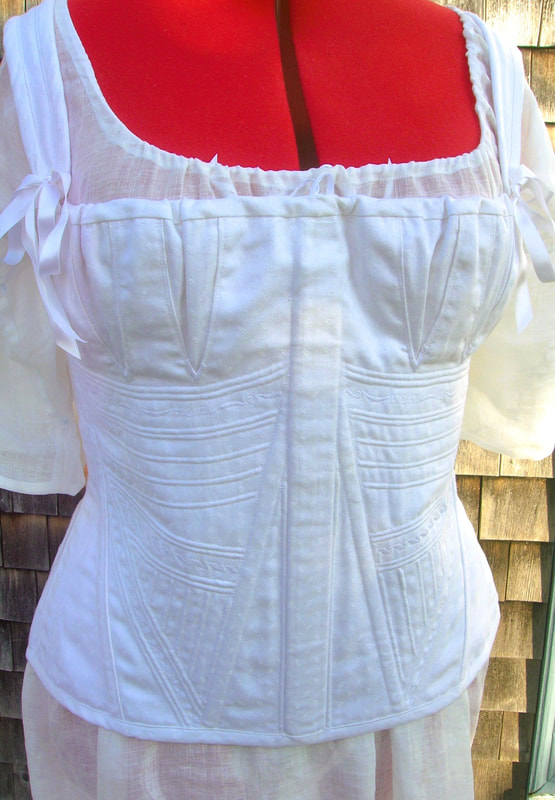
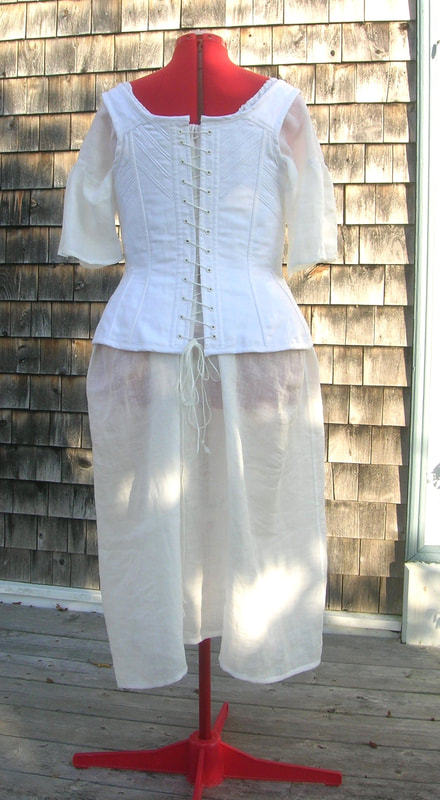
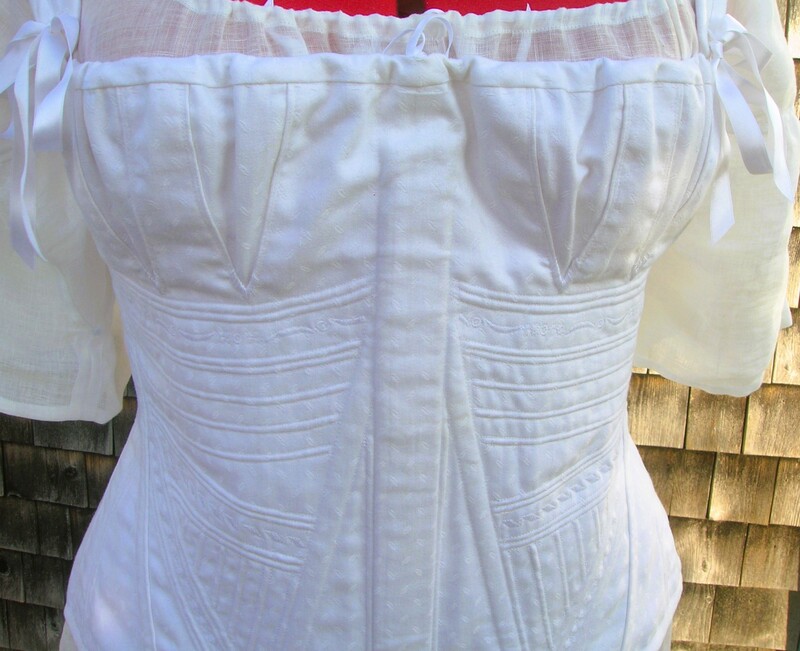
As a maker of historical patterns, I'm the first to acknowledge the value of another maker's work if it's technically well-drafted (what I call "good pattern engineering"), reflects historical accuracy, and includes clear and complete instructions. So I'm not averse to turning to a fellow pattern-maker in a pinch, in order to avoid having to reinvent the wheel and/or go from zero to 90 to create a garment from an historical period with which I'm largely unfamiliar (not to mention with a short deadline looming). Now, I'm not going to go so far as to advertise another maker's pattern here on my own website, but please read on -- I'm perfectly willing to tell you whose pattern I made use of! This past year I finally caught the Regency bug (i.e. a sudden, inexplicable compulsion to make a ca.1800-1815 ensemble). This of course I knew would require a brand new corset, in a style I had never attempted before. I was feeling more than a little overwhelmed by the thought of having to start an entire wardrobe for myself and my husband from scratch with all the other tasks I need to do in spring (we have a large garden), and with just a few weeks to accomplish all of it. Given the short, 6-week timeline to my planned event, I realized I could probably easily spend four weeks of it just delving into Regency corset research and drafting alone. I decided that relying on someone else's corset pattern and knowledge of the era was a far better idea than starting completely from scratch! I was aware of the reputation of Laughing Moon patterns and their focus on late 18th and early 19th century designs. What I didn't know was that the company's owner and designer had been following me and admiring my work too! Accordingly I chose a ca.1800-1810 style historically accurate corded corset pattern (Laughing Moon #115) which I thought would serve my purpose well. I did make a number of alterations, adjustments and revisions based on an extant corset of ca.1810 that I particularly liked (see photo above), and I spent some considerable time brushing up on, practising, and experimenting with, my cording techniques! Of course I don't have the perfect figure and tiny waist that the owner of the original antique corset must have had, but on the whole I was very pleased with my resulting Regency corset. I've made many 18thC. stays and early 20thC. corsets in my time, but this experience was quite different, requiring a very different approach. For my corset, I chose a very pretty 100% cotton lightweight coutil in an off-white colour, with a tiny sprigged design in the weave (see photo above), and a lightweight white polished cotton for the lining. I decided to interline the entire corset with a lightweight 100% linen in natural white, in order to give some extra body for the cording and to provide additional breathability. Oh yes -- and I had to track down a proper wooden busk! Fortunately there was a Canadian seller on Etsy with just the thing. Although the busk was narrower than what I preferred, its 3.5cm width was sufficient. Knowing what I do about patterns that are accurately based on historical designs (which this one is), before I cut anything, I made a full toile of cotton muslin to check and adjust the fit. To better work with my own figure and height, I lengthened the corset, added some extra boning channels into the design, and altered the cording pattern considerably. I should note here that the Laughing Moon pattern also includes a "theatrical" version that would appeal to those who don't want to go on a complicated journey of making a fully historical Regency corset, or who just don't have the time to devote to a fully historical replica. Probably the most challenging part of the process of cutting the pattern was determining which of the various bust and hip gore sizes to use. In the end, for my overall medium-large size frame, I found that the smallest bust gores actually worked best to provide a proportional look and fit through the bust area (meaning 4 narrow, inserted gores), and the smallest 4 gores for the hip. There was a great deal of careful sewing involved in inserting, stitching, and finishing all the gores in the outer layer, the lining, and the interlining of the corset. Next came the cording, embroidery, and boning. What I quickly realized was that, unlike Edwardian or Victorian corsets, it was essential to correctly determine the order of working on these various elements. In other words, each section and design element had to be carefully planned as separate tasks, to be done sometimes before, sometimes after, completing section seams, and in the right direction to avoid puckering or interfering with an already finished portion of the corded design. The pattern instructions were fairly helpful in this respect, although not always completely clear or detailed enough. It took me some time to make notes and an "attack plan" before beginning, and I would strongly recommend this for anyone creating a similar corset of this era. Another challenge in creating a corded corset is estimating the shrinkage (and shrinkage direction) that cording produces and allowing for this in cutting the sections. I cut the areas that I knew I would want to cord fairly heavily with an extra 1.5cm at each joining seam allowance, and I corded all the way to the edge of each piece. I then machine-basted the section seam(s), tested the fit against my (uncorded) toile, and trimmed off the excess cording ends. This method provided a near-perfect fit. Unfortunately, because time was short I didn't take photos of the construction process itself, but I've included a number of pictures of the finished corset (including some close-ups), most of which can be found at the end of this article. I used my sewing machine (due to time constraints) for almost all of the joining seams, the busk channel, the gore insertion stitching, and the edge binding. I also did all the cording by machine, as well as the rows of dainty white-on-white embroidery. For all this machine work I used a strong, 100% cotton quilting thread made by Gutermann (this thread is stronger, more tightly spun, and somewhat finer than Gutermann's standard cotton machine thread). Finishing, including all the eyelets and gore points, was done by hand using an 80/2 weight linen thread. To complete the corset, I cut my own self-fabric bias binding for the top and bottom edges of the corset, as well as for binding the shoulder straps. Incidentally, I discovered that despite the widely-spaced straps, the historically correct shaping, which produces a curved edge, holds quite well without slipping off the shoulders. The straps are held to the body of the corset by means of 1.5mm silk satin ribbon strung through eyelets (see photo below). As for the back lacing, at this time period most corsets were still made with spiral lacing, and this is the method I used for mine. I personally like to use a (non-historical) nylon cord for the back lacing on all my 18thC. corsets, as I find it mimics the smoothness and strength of what would have been high quality twisted silk cording employed at the time for better stays, and I used the same type of cord for this Regency corset. It has the advantages of being easy to handle, extremely sturdy, and of sliding quickly and easily through hand-made eyelets. Like all my 18thC. stays, this corset was laced using my "hybrid" spiral lacing method, a technique which allows for no-fuss lacing up, and simpler self-lacing where necessary. (If you haven't seen my procedure, using the hidden pull-cord on one side, click on the button below to view a demonstration). Even an old pro can learn something new!So, what did I, as a skilled pattern-maker, and historical couturière, learn from the experience of making this Regency corset? Well, much more than I expected!
I'm not sure I'll be building another Regency corset anytime soon, but the many hours spent creating this particular garment were repaid in more ways than I anticipated. And of course, now I have the perfect support piece for my planned Regency ensemble! To complete this story, I have to add that (as sometimes happens) the event which elicited all this excitement and preparation got postponed in the end. This has actually worked out to my advantage (as also sometimes happens), as I now have several more months to create my full ensemble at my leisure. Check back later to see the results!
In the meantime, below are some additional photos of my completed Regency corset (shown over my newly-made lightweight semi-sheer linen Regency shift).
0 Comments
Your comment will be posted after it is approved.
Leave a Reply. |
AuthorPatricia Preston ('The Fashion Archaeologist'), Linguist, historian, translator, pattern-maker, former museum professional, and lover of all things costume history. Categories
All
Timeline
March 2024
|








 RSS Feed